How to properly set up a jointer. Setting up the jointer correctly for the job. Corvette jointer - description of technical characteristics. DIY jointing machine
Household and industrial jointers are widely used for wood processing. Just like turning, circular and milling machines, jointers are mandatory equipment for carpentry shops. They are easy to use and reliable. Working with homemade jointers requires accuracy and some skills.
Scope of application and purpose
Industrial and home-made planing equipment is used for one-sided processing of flat surfaces of wood products. The main area of application of the machines is furniture and woodworking production. Perpendicular surfaces are planed on them, chamfers are selected at the desired angle from the sidewalls. Precision processing is important when assembling furniture; jointing equipment allows you to obtain a part of a given size. Planing mechanisms are often used at home in household workshops.
A jointing machine does not allow you to plan thickness to size, or make parts with parallel surfaces!
Classification of jointing machines
Depending on the number of planing devices, planing machines can be double-sided or single-sided. All planing devices are divided into categories according to the width of the planing surface, the length of the work table and the rotation speed of the knife shaft.
According to the processed width of the workpiece, mechanisms are distinguished:
- by 40 cm;
- by 50 - 52 cm;
- at 60 - 63 cm.
Compact homemade units for the home have a smaller processing width.
According to the length of the working surface, two groups of devices are distinguished:
- with a length of less than 250 cm;
- with a length from 250 to 300 cm.
Larger workpieces can be processed on long tables. The quality of jointing also improves.
According to the frequency of torsion of the working shaft, machines are divided into two categories:
- 4700 - 4800 rpm;
- 5000 rpm.
Industrial motors can operate at speeds up to 12,000 rpm.
The device of a jointing machine

The design consists of the main elements:
- working surface;
- bed;
- guide;
- knife shaft;
- circular fence.
The working surface consists of two plates: back and front. The level of the back plate coincides with the level of the top point of the cutter blades. The front level is set lower to the extent that the material is removed during processing. Typically the level difference is no more than 1.5 millimeters. This is enough to qualitatively process the surface of the part in two steps.
The plates are made of cast iron, and to make the table more stable, stiffening ribs are provided. The edges of the slabs are covered with steel plates that protect them from destruction. They are also chip breakers.
The knife shaft is located between two plates; cutters are attached to the shaft. For high-quality processing, it is necessary to select the same cutters. As a rule, single-edged knives are used that can be sharpened. Double-edged cutters, when severely dull, are thrown away and replaced with new ones; they cannot be sharpened. As a rule, machines for household workshops are equipped with cutters made of tool high-speed steel. To work with dense types of wood or pressed boards, carbide-tipped cutters are used.
The guide is fixed with bolts in the provided holes. The ruler can move in the transverse direction depending on the size of the part.
A circular fence is installed on the front of the slab; it fits tightly to the guide due to the spring. The fence covers the knife shaft. The movement from the motor to the blade shaft is transmitted through a belt drive.
The optimal size of wooden parts for processing on a jointer is from 100 to 150 cm. Too long parts hang down and create inconvenience when working at home, while short parts are dangerous.
Setting and selecting mode

Before starting work, you need to calculate the thickness of the material being planed and the speed of movement of the workpiece (for equipment with an automatic feeder). The size of the layer depends on the initial state of the tree and is determined experimentally. To do this, several (no more than five) workpieces are processed. If untreated areas remain on the surface, the slab is lowered slightly. If the workpiece is warped by more than 2.5 mm, processing is carried out in two stages.
When the height of the slabs is set, measure the gap between the edge of the cutters and the jaws of the slabs, which should be from 2 to 3 millimeters. To determine the gap, a calibrated plate is used, which should be inserted into the gap easily, but without gaps. If the gap exceeds 3 mm, the part becomes covered with tears; if the gap is less than 2 mm, the cutter is destroyed.
In addition to setting the slabs in height, it is also necessary to determine the location of the guide. When processing wooden blocks, the gap between the ruler and the left edge of the knife shaft should be slightly larger than the width of the block. Gradually, the knives become dull and the guide moves to the right, involving other parts of the cutters in the work. The ruler moves across the tabletop on a rack and pinion device driven by a flywheel. To make a corner chamfer on an edge, the guide is installed using a template or square and secured with a screw.
Automatic feeders regulate the feeding of parts without stoppers, with low pressure. When processing edges, they are placed parallel to the ruler.
The correct settings of planing equipment are determined experimentally. Allowed errors are:
- on the plane no more than 0.15 millimeters per meter;
- perpendicularly - no more than 0.1 millimeter per 10 cm.
Working principle of a jointer

One person is enough to operate single-sided jointing equipment at home. He examines the condition of the workpiece and places it with its convex plane up on the front plate. With both hands he presses it against the ruler and points it at the cutters. Next, the already trimmed side is pressed with the left hand to the surface of the back plate. The master inspects the processed workpiece: if it is not planed enough, he sends it to the knives. It is advisable to avoid processing very warped workpieces, since too thick a layer of chips is removed. The remaining workpiece may turn out unacceptably thin.
When processing two perpendicular planes, the larger area is used first. Then it is applied to the guide and the second one is planed. The double-sided machine allows you to process both sides simultaneously.
- If “burns” or “mossiness” appear on the surface during processing, it’s time to sharpen the cutters;
- When working with parts shorter than 40 cm and narrower than 3 cm, they are held only with special pushers, and parts of complex shapes are held with templates;
- If the planed plane is curved or has the shape of an impeller, you should check the level of the tabletop plates and the blade shaft.
DIY jointing machine

homemade machine - side view
The frame of a small tabletop machine for home can be made from a rectangular metal pipe. A more powerful homemade design will be obtained from a 40 mm corner. The width of the bed depends on the size of the knives and the planned planing width.
At one end, two guides are welded to the frame, the upper edges of which coincide with the surface of the frame. In the middle of the frame, a knife shaft mounted on a pair of ball bearings is attached to bolts screwed into pre-prepared holes.
The working surfaces for the desktop machine for the home are made of thick plywood laid on bars. And to regulate their level, homemade overhead bolted connections are provided. Four connections for each plate: a pair at the front and a pair at the rear. A vertical block with a hole is attached to each part of the tabletop from below. A long threaded pin is threaded through the block and the upper horizontal of the bed, with the help of which the position of the table top relative to the knife shaft is changed.
There is another option for homemade fastening of the work surface: there are grooves made in the frame (4 pcs.), in the movable tabletop there is the same number of holes into which threaded pin heads are inserted. By tightening the nuts and moving the pins in the grooves, they change the distance between the blade shaft and the edge of the table top.
The back plate is installed motionless and adjusted in height to the knife shaft. A board or chipboard of a suitable size can serve as a guide ruler.
When choosing a motor, you should proceed from the nature of use of the future machine. For household needs, a power of 750 W is sufficient, but a motor with a power of at least 1.5 kilowatts can cope with more serious tasks.
A few more options for homemade jointers:
Review of factory models
| Model | W0108 | W0100 | ||
| Engine | 0.75 kW 220V | 0.75 kW 220 V | 2.2 kW, 220V | 3.7 kW 380V |
| Cutting width | 153 mm | 153 mm | 203 mm | 400 mm |
| Maximum cutting depth | 3 mm | 3.2 mm | 3.2 mm | 3 mm |
| Number of knives of the cutting shaft | 3 | 3 | 4 | 4 |
| Cutting shaft diameter | 61 mm | 61 mm | 78 mm | 98 mm |
| Table length | 1210 mm | 1535 mm | 1800 mm | 2250 mm |
| Feed table length | 700 mm | 760 mm | 880 mm | 1090 mm |
| Reception table length | 590 mm | 755 mm | 880 mm | 1090 mm |
| Table width | 255 mm | 255 mm | 330 mm | 420 mm |
| Table height from floor | 820 mm | 850 mm | 795 mm | 820 mm |
| Stop dimensions | 740 x 98 mm | 889 x 124 mm | 889 x 124 mm | 1195 x 150 mm |
| Packaged sizes | 1245x515x275 mm | 1600x360x250 mm | 1850x450x300 mm | 2300x820x1025 mm |
| Gross weight | 104 kg | 135 kg | 208 kg | 570 kg |
| Price | 52000 rub. | RUB 68,000 | 112000 rub. | RUB 229,000 |
 W0108
W0108 

 W0100
W0100
The first task that a craftsman faces if he wants to do a quality job is to create an even square workpiece. This article will discuss such nuances as installing jointer knives, their adjustment, and the principles of operation of the tool. In order to form a general picture, you need to consider techniques that allow you to keep your jointer in working condition, after which you can learn some features that should be taken into account when working. Many novice professionals have difficulty setting up knives; first of all, this article was created for them.
The work involved in removing or installing knives largely depends on the fastening mechanism and may vary. In most cases, even a novice will have no difficulty removing the jointer blade and putting it back.
It is not the installation of the knives that is of great importance, but the adjustment of the jointer knives and the adjustment of the tables.
It often happens that workpieces have irregularities, for example, convex or concave. Before you rush to adjust the knives, you need to make sure that the problem is not related to the table. This is signaled primarily by concavities. This means that some part of the tables is tilted below the desired height. To determine the unevenness of the table, use a straight ruler. Convex edges indicate that the inside of the tables is excessively inclined towards the cutting head.
How to determine the correct installation of knives
Correct installation of knives is the key to successful operation of the machine. Experts say that the height of the blades should be approximately the same as the height of your workbench. In order to determine whether the machine is configured correctly, you need to try processing the workpiece. If after work there are unevenness or noticeable chips on its surface, then most likely the knives are adjusted incorrectly. Professionals use a ruler or a very even block of wood to determine the accuracy of machine settings.
Knife adjustment work
In order to remove the knives or secure them, you will need a wrench. In the first case, you just need to unscrew the nuts and remove the tool; in the second case, the same work is done in reverse order.
Removed and necessarily require cleaning from dirt using organic solvents, you can also wipe the blades with motor oil. This procedure is carried out so that they remain sharp longer and do not corrode. For better quality work, you will definitely need a perfectly flat board, which will be used to adjust the fastening of the knives.
Adjusting the jointer knives is possible only if they are loosely fastened, this is done so that you do not have any difficulties during adjustment.
To simplify the work, use a wrench to loosen the clamp; you do not need to tighten the clamp bar nuts too much.
Adjustment is made by moving the blade down or up. Pay attention to the shaft with knives; you will need to turn it over and move the knife with the blade up. Then you need to lay a pre-prepared board on the machine, the length of which should be slightly larger than the rear area of the machine.
Place the board so that its edge is just above the knife blade, and gradually rotate the shaft in different directions, thereby adjusting the height of the knife. Gradually the blade will rest against the board, at this moment you must fully secure it. After this, you need to start adjusting the second knife, or the rest, if there are several of them in the machine. When the work is done, rotate the cutting head until all blades just lightly touch the ruler or block. After you have done this work at least several times, the question of how to install knives on a jointer is unlikely to worry you in the future.
One of the first tasks in creating a successful project is to make an even, flat and square piece. Let's look at how a jointer works, how to set it up, and the correct techniques for working with a jointer. First, let's look at all the steps I use to keep a tool in good working order, then look at a number of work techniques that will help you get the best results.
Jointer.
At first glance, the structure of a jointer seems quite simple - a long, flat surface with sharp blades. The serving and receiving tables, if you look closer, show that they are actually two separate tables:
- feed table, the place where the workpiece is placed and moved to the cutting head;
- receiving table where the workpiece is placed after passing over the cutting head. (See the photo below to help you identify the main parts of the jointer.)
Setting up the tables together is a critical point and is the first step to set up  jointer. The picture on the left shows how to use a straight edge to check that the two tables are parallel, remove the cutter head guard. Now to check, place a ruler along the tables. Check parallelism at several points along the width of the table to make sure they are level (photo on the right).
The most common problems you will encounter are unevenness in the form of convexity or concavity on the workpieces. The concave shape of the workpiece is the result of the outer edges of the infeed or outfeed tables being lowered below level. (This will show up as gaps on the edges of the ruler at the start and end of the jointer tables.) A convex shape of the workpiece means that the inside edges of the tables slope toward the cutter head.
Knives.
The next thing to check is the knives. The height of the knives should be equal to the height of the receiving table. If the workpiece after planing has roughness or large chips, there is a possibility that the knives are not adjusted. The pictures on the left show how to use a ruler to check that all knives are at the same height. Using a wrench, loosen the knife clamp bar, make the necessary corrections and tighten the clamp bar nuts. Check the height of each blade. The picture on the left shows the correct end result. When we rotate the cutting head, each of the knives should make very light contact with the ruler at the very top of the arc, across the entire width of the table.
Planing depth. Having adjusted the height of the knives, we proceed to setting the knives for the planing depth, this means to what depth the jointer will plan the wood with each pass. In fact, the planing depth is set by moving the feed table up or down. There are two most common mistakes. The first mistake is a large planing depth; a smaller planing depth helps to reduce jerks and chips on the product to a minimum. Another common problem that requires adjustment of the take-up table is when the jointer makes a deeper cut on the edge of the workpiece. This is usually corrected by adjustment; you need to look for where there is no parallelism between the tables and the cutting head.
Emphasis. The next step in the settings is to check the stop on the jointer. For most products, the fence should be set at a 90° angle with respect to the infeed and outfeed tables. This is a fairly simple adjustment. All you need to do is use a square to adjust the stop in relation to the tables. Make sure tables are clean during setup.
CONNECTION OF WORKPIECES.
The first step in jointing lumber, joining two pieces together, is the operation most familiar to us. The alignment of edges and planes requires their absolute parallelism and rectangularity. Next, let's look at a few tips that will help you get a good result.
The first thing we will consider is how to determine the direction of the fibers on the workpieces. To avoid unevenness and chips, you need to determine the wedge-shaped direction of the fibers on the product and feed the workpiece to the knives with the narrow part of the wedge, and not the wide one. If the orientation of the workpiece is incorrect, you will feel strong impacts of the knives on the workpiece at the beginning of planing. The photo on the left illustrates the direction of the grain.
Cutting depth. As I noted earlier, the planing depth on my jointer is set to no more than 1.7mm. This setting promotes smooth jointing, and it also helps extend the life of sharp knives between sharpenings. The exception is when working with very uneven lumber. In this case, I don't mind planing the piece more aggressively until I get a more or less flat side. This way, even if there is a chip, it will be fixed later.
. The trick here is to hold the workpiece facing the fence and keep the edges square. The photos below show the basics of the method.
Planing machines
TO category:
Woodworking machinery
Planing machines
Design
On single-sided jointing machines, one of the planes of the workpiece (usually the face) is aligned or sequentially, in two transitions, two planes of the workpiece. The working body is a horizontal knife shaft, on which two, less often four, legs are installed. The machines are designed for processing workpieces and panels up to 600 mm wide.
The diagram of a single-sided jointing machine is shown in Fig. 130 The machine bed is cast, box-type. The machine has front and back tables, a guide ruler. The guide ruler is cast, with well-processed supporting and vertical planes. It is mounted on the machine using a bracket.
The knife shaft is mounted horizontally on the frame in ball bearings. The shaft is covered with a fan guard, hinged on the machine. Thanks to the spiral spring, the guard is pressed against the guide fence, completely covering the cutter shaft.
Each table is mounted on two eccentric rollers, movably mounted in separate slides for each table. The slides are attached to the frame with bolts. Eccentric rollers allow you to move the tables in height, and the slides allow you to move the tables closer or further away from the knife shaft.

Rice. 1. Schematic diagram of a single-sided jointing machine: 1 - rear table, 2, 15 - eccentric rollers, 3 - thrust. 4 - bracket, 6 - nut, 6 - blade shaft, 7 - fan guard, 8 - bracket for fastening the guide bar, 9, 11 - screws, 10 - rod, 12 - guide bar, 13 - front table, 14 - mechanism handle lifting and lowering the front table, 16 - slide, 17 - installation location of the push-button station, 18 - hand brake levers, 19 - blade shaft lock, 20 - bed, 21 - electric motor, 22 - hand brake housing
The horizontal position of the tables when lifting and lowering is maintained due to the pairwise connection of eccentric rollers in rods-screws 3. The front table is lowered and raised by moving the handle in the plane of the sector with divisions; The height position of the rear table is adjusted by changing the position of the screw rod with nuts.
The starting equipment of the electric drive is built into the frame. A special device can be provided for sharpening and jointing knives directly on the knife shaft.
Double-sided jointing machines have a second working body - a vertical spindle, which allows them to simultaneously process two surfaces of workpieces (face and edge) with the formation of a right angle between them.
In addition, they differ from single-sided jointing machines by the presence of a composite guide ruler. The machines are equipped with automatic feeders, depending on the design of which, height changes are adjusted using a handwheel.

Rice. 2. Double-sided jointing machine S2F4-1: 1 - bed, 2 - rear table, 3 - handwheel for the mechanism for raising and lowering the car lift, 4 - automatic feeder, 5 - guide ruler, 6 - front table, 7 - handle for the table height adjustment mechanism, 8 - control panel

Rice. 3. Diagram of a vertical spindle and a composite guide ruler of a double-sided jointing machine: 1 - fixed part of the ruler, 2 - fixing screw, 3 - bracket, 4 - stand, 5 - V-belt drive, 6 - electric motor, 7 - screw for belt tension, 8 - plate for fixing the electric motor, 9 - handle for installing the bracket, 10 - eccentric for installing the movable part of the ruler, 11 - movable part of the ruler, 12 - cutter head, 13 - spindle
When changing cutting tools, the automatic feeder is moved to the side. To brake the knife shaft, an electromechanical brake is provided, interlocked with the “Stop” button of the machine.
The spindle (Fig. 3) is secured with a bracket on a fixed stand. The electric motor is connected to the spindle through a V-belt drive. The spindle rotates at a frequency of up to 7000 rpm, the cutting circle diameter is 104 mm. There is a cutter head on the spindle. The guide ruler is composite: its main part is stationary, the moving part is moved in a horizontal plane by turning the eccentric. When the eccentric is fully rotated, the moving part of the ruler moves relative to the fixed part by 2 mm.
Operating mode selection
First of all, it is necessary to determine the thickness of the wood layer to be removed, and if the machine is equipped with an automatic feeder, then the feed speed.
The thickness of the removed layer depends on the warpage of the workpieces, the magnitude of which is determined by trial processing of 3-5 workpieces.
If the processed workpieces have unplaned areas, the front table is lowered to the required amount. If the warp value is more than 2-3 mm, jointing is carried out in two passes.

Rice. 14. Surface processed by milling: a - general view, b - surface with the trajectory of the cutting edge of the cutter
Knowing the amount of feed per knife, the cutting radius, the number of knives and the speed of rotation of the knife shaft, it is possible to calculate the numerical value of the amount of irregularities and thereby the class of processing roughness and, conversely, to determine the permissible feed rate based on a given class of surface roughness.
Setting up machines
Setting up single-sided jointing machines involves setting the rear and front tables in height, as well as the guide ruler.
The working surface of the back table must coincide with the horizontal tangent to the cylindrical cutting surface or be 0.02-0.03 mm below it. In this position, kinematic irregularities do not rest against the table sponge. To set the table in the required position, take a properly processed block of hardwood, place it firmly on the table and manually turn the cutter shaft. If the knives lightly touch the block, then the table is installed correctly, the block lies on the knife - the table must be raised. Raise the table by moving the nut with a wrench along the screw-rod connecting the eccentric rollers of the rear table. The back table is adjusted after each change of knives and their sharpening and jointing directly on the shaft.
The position of the front table relative to the back one depends on the thickness of the layer of wood being removed, which should not exceed 2 mm. It is determined by the distance from the working plane of the front table to the horizontal tangent to the cylindrical cutting circle. The table is moved in height using a handle, positioning it against the corresponding division marked on the sector. The design of the table movement mechanism allows you to quickly raise and lower the table by moving the handle, which is used for longitudinal milling of warped workpieces.
Having adjusted the tables in height, check the distance between the table jaws and the cutting edges of the knives. It should be within 2-3 mm. It is measured with a calibrated plate of appropriate thickness. The plate should fit easily, but without play, into the gap between the sponge and the knife blade. If the distance is more than 3 mm, tears appear on the workpiece; less than 2 mm, the cutting edge of the knife is chipped. Adjust the gap size by turning the shaft until the knife is against the jaw. By unscrewing the screws, move the slide with eccentric rollers until a gap of 2-3 mm is obtained along the entire length of the knife shaft. After this, the slide is securely fastened.
When jointing block workpieces, the distance between the guide ruler and the left end of the knife shaft should be slightly larger than the width of the workpiece being processed. As the knives become dull, the ruler is gradually moved to the right to ensure that the undull areas of the knives are involved in the work. The guide ruler is moved across the table by a rack and pinion mechanism driven by a handwheel. To longitudinally mill the edge of a part at an angle to the face (usually 90°), a guide ruler is installed using a metal square or (at an angle other than a straight line) an appropriate template. To do this, a control square (template) is installed on the rear table of the machine. The gap between the flange of the template square and the surface of the guide ruler should not exceed 0.05 mm over a length of 1001 mm. The guide ruler, installed at a certain angle, is fixed with a screw.
When setting up double-sided jointers, the tables and the stationary part of the guide fence (above the back table) are set up in the same way as in single-sided jointers. The plane of the moving part of the guide ruler (above the front table) should be separated from the plane of the fixed part of the guide ruler by the thickness of the layer of wood removed from the edge of the workpiece. It is installed in the desired position by turning the eccentric handle, which moves along the hob, which has the shape of a semicircle.
If the handle is in the middle of a semicircle, will the ruler take a position at which the thickness of the cut layer of wood will be equal to 1 mm? if the handle is located at 1/4 of the semicircle - 0.5 mm, etc. The tangent to the cylindrical cutting surface of the knives of the head mounted on a vertical spindle must coincide with the plane of the stationary part of the guide ruler or be 0.01-0 away from it .02 mm. To install the head, a block with aligned planes is pressed against the stationary part of the ruler and the bracket carrying the head is rotated until the cutter head takes a position in which the cutting edges of the knives lightly touch the block. In this position, the head is fixed by tightening the bracket locking screw.
Both automatic feeders and conveyor feeders are configured to feed workpieces of a certain thickness. Workpieces must be fed without “slipping” and with slight pressure on them from spring-loaded rollers, chains or claws.
The supply of workpieces also depends on the location of the automatic feeders. When processing sheets, it is better to install the automatic feeder behind the knife shaft (at a distance of 30-40 mm from it); when processing thick workpieces, the feeders can be located above the front table. The automatic feeder is installed at a slight angle to the guide ruler, which ensures that the workpiece being processed is pressed against it.
Automatic feeders are also used on single-sided jointing machines. To joint the edges of the workpieces, they are installed parallel to the guide line; in this position, the automatic feeder elements press the workpiece against the guide line and the machine table.
The setting is checked by test jointing. Deviation from plane should not exceed 0.15 mm over a length of 1000 mm and from perpendicularity - 0.1 mm over a length of 100 mm.
Working on machines
One worker works on a single-sided jointing machine, and two workers on a double-sided jointer. The machine operator takes the workpiece from the stack, inspects it and places it with the concave surface down on the front table. Pressing the workpiece against the guide ruler with both hands, he feeds it to the knives. Subsequently, when moving the workpiece with his left hand, he presses the processed part of the workpiece to the plane of the back table. After the next pass, the machine operator again inspects the workpiece and either puts it in a stack, or, in the case of a simple horn, sends it back to the machine. Workpieces with a heavily warped surface should not be planed, since the chips have to be removed in several passes and the thickness of the workpieces as a result of such processing is reduced to the size at which they are scrapped.

Rice. 5. Device for feeding short workpieces to the cutting tool: 1 - workpiece, 2 - pusher
If a part needs to be aligned with two mutually perpendicular surfaces, then first the wider one (for example, a face) is aligned, and then the workpiece is pressed with this surface to the guide ruler and the second surface (edge) is milled. On a double-sided jointer, this operation is performed in one pass.
You cannot mill to size in thickness or produce workpieces with parallel planes on a jointing machine. This is done on other machines, for example surface planers. The optimal length of parts processed on jointing machines is 1-1.5 m; shorter workpieces should be milled using a special device (Fig. 5); Planing longer ones is inconvenient and difficult due to the large mass.
If the treated surface has curvature or wingedness, it is necessary to verify the position of the tables relative to the knife shaft. When “beating” the workpiece with knives, mossiness and arson appear on the treated surface, the knives should be sharpened; If two adjacent planes are not at right angles, you need to adjust the guide ruler.
When fed manually, workpieces shorter than 400 mm, 50 mm and thinner than 30 mm can be guided to the cutting tool only by pushers, and curved workpieces - by templates. It is prohibited to perform shaped longitudinal milling and quarter cutting on jointing machines.
Machine design. Planing machines are distinguished by the largest width of the workpiece processed: 250 mm (SFZ-Z, SFAZ-1, S2FZ-E), 400 mm (SF4-1, SFA4-1, S2F4-1) and 630 mm (SF6-1, SFK6- 1).
Depending on the number of cutting mechanisms, there are single- and double-sided machines. On double-sided machines (S2FZ-E, S2F4-1), two surfaces of the workpiece are milled simultaneously: the face and the edge.
Based on the type of feeding of the processed material, a distinction is made between jointing machines with manual and mechanized feed. Mechanized feeding is carried out by attached automatic feeders (SFAZ-1, SFA4-1) or a conveyor feed mechanism built into the machine (SFK6-1).
To collect and remove chips and dust, the machines are equipped with chip receivers connected to the factory exhaust network.
The single-spindle jointing machine SF6 is shown in Fig. 1. The cutter shaft, front and rear tables and guide ruler are mounted on the box-shaped frame. The knife shaft is mounted on ball bearings and is driven by an electric motor through a V-belt drive. The electric motor is located on the sub-motor plate inside the frame. To quickly stop the knife shaft there is a brake operating from an electromagnet.

Rice. 1. Single-spindle jointing machine SF6: 1 - bed, 2.8 - tables, 3 - guard, 4 - guide ruler, 5 - knife shaft, 6 - clamps, guide ruler fastenings, 7 - bracket, 9 - scale, 10 - table height adjustment handle
To change the thickness of the layer being removed, the front table can be moved in height relative to the knife shaft. The back table is designed for precise positioning of the machined surface of the part. It is made unregulated, i.e. rigidly attached to the frame, or adjustable in height. Having an adjustment mechanism makes it easier to set up the machine. The guide ruler is designed for precise lateral alignment of the workpiece. It is made in the form of a narrow plate and mounted on a bracket. It can be tilted towards the working surface of the table and moved across the width of the machine. The working area of the knife shaft is closed by a fan guard.
The double-sided jointing machine with horizontal and vertical spindles S2FZ-2 is designed for simultaneous milling of the face and edge of the workpiece. Unlike a single-sided jointing machine, it is additionally equipped with a vertical edge jointing head, front and rear guide rulers. The front ruler can be adjusted relative to the head to the thickness of the layer being removed. The edge jointing head is driven into rotation by an individual electric motor mounted on a bracket at the back of the bed. The processed material is fed by rotating rollers of the automatic feeder.
The jointing machine with a built-in conveyor SFK6-1 has a conveyor feed mechanism. It is made in the form of an endless chain put on sprockets, one of which is drive. Spring-loaded, pointed metal claws are attached to the chain links for a secure grip on the workpiece. The feed mechanism is mounted on two stands and can be moved in height by a separate electric motor through screw and worm gears.
Setting up machines. Setup includes installing knives in the knife shaft, adjusting the position of the tables, guide ruler and feed mechanism. Properly prepared knives should be installed in the knife shaft. They must be sharpened, balanced and balanced. Before installing knives into the knife shaft, you must:
turn off the input switch; turn the automatic feeder to the non-working position or raise the support of the conveyor feed mechanism; move the guide ruler to the extreme right position; lower the front table to its extreme position; secure the blade shaft with a locking device; loosen the screws securing the knives and remove dull knives; clean the grooves in the body and wedges from chips, dust and resin; install the prepared knives.
The knife is installed in the knife shaft so that its cutting edge protrudes beyond the edge of the pressure wedge (chip breaker) by 1.5...2 mm when the thickness of the cut layer (chips) is more than 0.2 mm and 0.5...1 mm when the thickness of the chips is less 0.2 mm. The non-parallelism of the cutting edge of the installed knife on the working surface of the rear table should be no more than 0.1 mm over a length of 1000 mm.
To achieve the required installation accuracy, control and installation devices are used (Fig. 2). The accuracy of installation is controlled with a ruler or a wooden block with a section of 30 X 50 mm and a length of 400 mm. The block is placed on the rear table of the machine at the end of the knife shaft (Fig. 2, a). The shaft is rotated manually and, having loosened the fastening screws, the position of the knife is changed so that the cutting edge touches the block. The fastening screw closest to the block is lightly tightened. When relocating the block, check the position of the other end of the knife. Adjust the position of the knife so that its edge along its entire length is positioned equally relative to the block. The following knives are adjusted in the same way. The adjusted knives are finally secured with screws. A gap between the knives and the housing jaws is not allowed. The quality of installation of knives is controlled by the force of turning the knife shaft manually and by the sound that occurs when the knife comes into contact with the working surface of the template.
In some cases, to achieve installation accuracy, a template made in the form of a C-shaped bracket is used (Fig. 79.6). The bracket is equipped with base supports with which it is installed on the knife shaft housing. The template is pre-configured. Using the screw, adjust the base stop to ensure optimal protrusion of the knife relative to the body. When setting up, bring the cutting edge of each knife until it touches the base stop. By moving the bracket along the knife shaft, ensure that the knives are parallel to the shaft body.
The device with an indicator (Fig. 2, c) has a body with precisely ground plates, in which a dial-type indicator is fixed. The device is installed on the back table so that the stop touches the cutting edge of the knife. The position of the knife in the body is adjusted using the indicator scale. The device allows you to achieve the installation of knives on the same cutting circle with an error of up to 0.02 mm while ensuring parallelism and the necessary release of the knives relative to the working surface of the rear table.
After final tightening of the spacer bolts, the knives may move. Therefore, you should once again check that they are installed correctly, rotate the shaft idle and make sure that the knives are securely fastened.
The back table is installed so that its working surface is tangent to the circle described by the cutting edges of the knives, or 0.02...0.03 mm below it (Fig. 3, a). If a verified template (control ruler) is used when setting up the knife shaft, then the knives will be installed tangentially. If a control and adjustment device is used during adjustment, basing it on the cylindrical surface of the knife shaft housing, it is necessary to adjust the position of the rear table in height. The table is adjusted by turning the eccentric rollers through rod-screws 2 with a nut 3, and the accuracy of the installation is controlled by a verified template or an indicator device.

Rice. 2. Alignment of knives in the knife shaft of a jointing machine: a - with a control ruler or a wooden block, b - a template, c - a device with an indicator; 1 - block, 2 - table, 3 - blade shaft, 4 - stop, 5 - bracket, 6 - lock nut, 7 - screw, 8 - housing, 9 - indicator
When processing bar parts, the guide ruler is positioned so that the distance to the left end of the knife shaft is slightly greater than the width of the workpiece being processed. As the knives become dull, the ruler is moved to the right and the parts are processed with that part of the knife shaft on which the knives have not yet become dull. When processing parts with non-perpendicular adjacent surfaces, the guide ruler is positioned so that the angle between its working surface and the knife shaft is obtuse.
The fence guides on a double-sided jointer perform the same functions as the front and back tables. The rulers are adjusted relative to the edge jointing head using a handle, and the amount of the layer to be removed is set using a scale mounted on the frame.
The automatic feeder or conveyor feed mechanism is adjusted in height (Fig. 3, b) using a handwheel, depending on the thickness of the workpieces being processed. The distance from the working surface of the front table to the feed rollers (conveyor fingers) should be 2...3 mm less than the thickness of the workpiece. The automatic feeder is positioned above the knife shaft so that the first feed roller is above the front table at a distance of 50...60 mm from the knife shaft, and the other rollers are above the rear table.
The automatic feeder is oriented relative to the guide ruler so that the rollers are not parallel to the axis of the knife shaft (angle 1...30), for which the automatic feeder is rotated relative to the vertical axis. This arrangement of the feed rollers allows the workpiece to be pressed against the guide ruler and improves the conditions for its basing.
The pressure of the feed elements on the workpiece must be sufficient to feed without slipping. Excessive pressure causes increased wear of the automatic feeder mechanisms and deformation of the part in the cutter shaft area.

Rice. 3. Setting up a jointing machine: a - setting up tables, b - installing an automatic feeder; 1 - rear table, 2 - screw rods, 3 - nut, 4 - blade shaft, 5 - front table, 6 - handle for adjusting the thickness of the layer being removed, 7 - scale, 8 - eccentric roller, 9 - rods
The front table is installed so that its working surface is below the upper generatrix of the circle described by the cutting edges of the knives. The amount of protrusion of the knives relative to the front table determines the thickness of the layer to be removed. Since the thickness of the largest layer depends on the degree of warping of the workpiece, the table height is adjusted before processing each workpiece. By rotating the eccentric rollers through the rods, handle 6 raises or lowers the table. The amount of lift is controlled on a scale.
Working on machines. When processing small workpieces, a manually fed planer is operated by one worker. The machine operator takes a workpiece from the stack, visually evaluates the convex and concave edges of the workpiece and places it with its concave surface on the front table. Severely warped or defective workpieces should be rejected
Pressing the workpiece to the table and the guide ruler from the side with your left hand, feed it onto the knife shaft with your right hand. When moving, the front end of the workpiece moves the fan guard and thus provides access to the rotating knives.
After processing the front end of the workpiece, you should firmly press the processed part to the plane of the back table with your left hand and continue feeding.
When feeding, carefully monitor the position of your hands relative to the knife shaft and keep them at a safe distance. When processing small parts, there is an increased risk of injury, so workpieces shorter than 400, narrower than 50 and thinner than 30 mm are fed into the machine only with a special pusher (Fig. 81). After each pass, the machine operator evaluates the quality of the processing and, if the surface is not planed, re-planes it.
If two surfaces of a part need to be aligned, then first the face is milled, and then the edge, pressing the part with the previously processed surface against the guide ruler. On double-sided machines, these operations are performed in one pass.
When processing massive and large-sized parts, the machine is operated by two workers. The machine operator positions and feeds the workpiece, and the second worker, standing behind the machine, helps at the final stage of processing, receives the finished part and places it in a stack. If necessary, additional roller tables are installed in front and behind the machine.
The manual feed speed on the machine is selected individually for each workpiece, depending on the defects and the required milling depth. When counter-cutting and milling against the grain, the speed should be reduced. The milling depth depends on the processing allowance and the size of the defects.

Rice. 4. Scheme of processing small parts using a pusher
Removing stock in one pass usually does not allow obtaining the required quality of processing. The best effect is achieved in two or more passes at a small milling depth, since in this case the deformation of the part under the influence of clamping forces and internal stresses in the workpiece material is reduced.
In machines with mechanized feed, the feed speed is selected according to a schedule based on the condition of maximum load of the cutting motor and ensuring the specified surface roughness.
The resulting parts must be checked for accuracy of processing. By applying the treated surfaces one part to another, the size of the processing error is visually judged by the size of the gap between them. In addition, the flatness of the machined surface can be checked with a straight edge and feeler gauge. The deviation from the plane should not exceed 0.15 mm over a length of 1000 mm. Adjacent treated surfaces must be mutually perpendicular. The permissible deviation is 0.1 mm at a height of 100 mm. Perpendicularity is checked with a test square and feeler gauge. The roughness of the treated surface should be 60... 100 microns. If the parts do not meet the specified requirements, the machine should be adjusted.
The SF6-2 jointing machine consists of a bed and a work table, which consists of two horizontal smooth cast-iron plates (back and front), equipped with thin steel jaws on the side of the knife shaft. The purpose of the sponges is to protect the ends of the slabs from abrasion, reduce the gap between the knives and the slabs and support the fibers when cutting chips. A knife shaft is placed between the plates. The knife shaft is located so that the cutting edges of the knives mounted on it are flush with the back plate. Each plate can be raised and lowered separately using a screw.

Rice. 1. Device for balancing knife shafts
A guide ruler is fixed on the table, which can be moved along the width of the table. The jointer operates directly from an electric motor through a V-belt drive.
When jointing, the material being processed is placed on the front plate of the table, if possible, at a right angle to the knife shaft and, pressing it tightly against the plate with the left hand near the knives, with the right hand further from them, slide it onto the knives, which plane the lower surface of the part.

Rice. 2. Jointer SF6-2:
a - general view: 1 - electric motor, 2 - back plate of the work table, 3 - guide ruler, 4 - handle for the height indicator of the front plate, 5 - knife shaft, 6 - fan guard, 7 - front plate of the work table, 8 - starting device , 9 - bed; b - planing diagram: 1 - rear plate, 2 - front plate, 3 - thickness of chips removed
When the front end of the part passes the knives, the part is taken with the left hand to the surface of the rear plate, and with the right hand to the surface of the front plate. The pressure should be as uniform as possible, and the feed should be smooth and uniform.
First, the wide side of the part (face) is touched, and then the narrow side (edge). When planing the second adjacent side, the part should be pressed against the table and against the guide ruler.
To avoid excessive scuffing of the fibers, planing should be done layer by layer. When planing parts made of pine wood, it is recommended to wipe the work table with a rag soaked in kerosene, since the resin released from the wood sticks to the table and makes it difficult to move the parts.
With very careful installation of the knives on the knife shaft, it is still not possible to position their cutting edges exactly along the same circle, and a difference of 0.5-0.1 mm is obtained in the cutting radii. Because of this, waves appear on the treated surface. To reduce this difference, a device is used for jointing and straightening knives at the installation site. The device is produced together with a folding and separately attached machine. After jointing and straightening the knives, the difference between the cutting radii decreases to 0.03-0.02 mm and the planed surface becomes smoother.
The sharpening part of the device is brought into contact with the blade of one knife on the knife shaft and secured in this position. Then turn on the device and move it along the guide along the entire length of the knife, aligning the blade and straightening it. Having finished editing one knife, turn the knife shaft, bring the second knife under the sharpening part of the device and repeat the jointing and straightening. The blades of all knives mounted on the knife shaft are processed in this way.
To feed the material, you need to use special pusher blocks that ensure safe operation and prevent your fingers from coming into contact with the knives.
The planing width on the SF6-2 machine is 600 mm, the thickness of the removed layer is 6 mm, the cutting diameter is 125 mm, the number of knives on the shaft, the number of revolutions of the knife shaft per minute is 5000, the power of the electric motor of the knife shaft is 4.5 kW. Machine weight 860 kg.
The SF4-4 planing machine is designed for planing and leveling the surface along a plane and for milling boards and bars into corners. The machine has a round two-knife shaft with wedge fastening of knives. The spindle for vertical milling consists of front and rear guides and a spindle block with a two-knife head. The front ruler is movable, it is moved in accordance with the specified milling depth; the back ruler is fixed motionless. The spindle is driven by an individual electric motor via V-belts. The machine is equipped with an automatic feeder UPA-3, which automatically feeds the workpieces.
Planing width on the machine is 400 mm, the thickness of the removed layer is 6 mm, the diameter of the knife shaft is 125 mm, the cutting diameter is 128 mm, the number of knives on the shaft, the power of the electric motor of the knife shaft is 2.8 kW, the number of revolutions of the knife shaft per minute is 5000, the weight of the machine is 620 kg .
The SF4-4 jointing machine makes it possible to perform jointing and milling, that is, to combine several operations on one machine that require two different machines. Production space is saved and equipment productivity increases. Labor productivity is doubled by speeding up feed and reducing the number of workers.

Rice. 3. Jointer SF4-4
To prevent accidents, a protective shield or safety curtain is installed above the knife shaft, which is moved to the side during operation of the workpiece itself, and after the part has passed, under the action of a spring, the entire knife shaft is closed again.
To mechanize the feeding of workpieces, you can use attached roller automatic feeders, in which the rollers are driven into rotation by an electric motor through a gearbox. The body of the automatic feeder, with the help of levers and a stand, can be installed so that the rollers will press the workpiece to the table or to the guide ruler.
Existing fences for woodworking machines are mostly bulky and lack versatility. The Kurgan Woodworking Machinery Plant produces the UPA-3 automatic feeder, which can be used as a universal fence on circular saws, planers and milling machines.
Using a UPA automatic feeder, a stand with a device is installed either on the machine table, or on a platform fixed next to the machine, as well as on a separate foundation to the right or left of the machine.

Rice. 4. Safety guards for the jointer:
a-Erokhin shield; b - fan fence; 1 - spring shield, 2 - curtain; c - automatic feeder with top clamp: 1 - stand, 2 - automatic feeder, 3 - front table
The body of the automatic feeder, using hinges and a stand, can be installed so that the rollers will press the workpiece when processing it to the table or to the guide ruler.
On a jointing machine, the UPA-3 automatic feeder is installed so that the first pair of rollers is located above the front of the table, the second and third pairs are located above the back. Along the width of the machine, feed rollers are installed in the middle of the material being planed.

Rice. 5. Universal fencing - automatic feeder UPA-3 (view from the side of the processed material)
The distance between the rollers and the machine table is set less than the thickness of the supplied material. The material is fed manually up to the second pair of rollers, and then by an automatic feeder.
The S2F-4 double-sided jointing machine with mechanical feed and edge jointing head is shown in Fig. 6. The machine is used for simultaneous planing and jointing of the bottom face and the right edge of one workpiece (corner planing). The machine consists of a cast-iron frame on which two plates are located on eccentric supports - front and rear, between them there is a knife shaft with a diameter of 125 and a length of 410 mm, which has a fan guard. The knife shaft rotates on ball bearings and is driven by a 4.5 kW electric motor through a V-belt drive. There is a guide ruler on the plates. The front plate serves as a guide for the workpieces before planing, and the rear plate is designed to move the workpieces during planing. The size of the removed layer of wood is adjusted by raising or lowering the front table using a handle on which there is a height indicator. The rear plate is adjusted using a screw or nut. Planing width of the machine is 400 mm. The thickness of the workpiece being processed is 15-100 mm, the thickness of the removed layer is 6 mm, the number of knives on the shaft is 2-4, the number of revolutions per minute of the knife shaft is 6000, the weight of the machine is 800 kg. On the machine, in addition to the horizontal knife shaft, a vertical knife head is mounted, through which the edge of the workpiece is planed. The vertical cutter head is mounted on an edge jointer spindle mounted on a special support. The automatic feeder and edging head have individual electric motors. Therefore, the drive of the spindle of the vertical cutter head is carried out from one electric motor with a power of 1.7 kW through a V-belt transmission. Workpieces and lumber are fed to the horizontal cutter shaft using an automatic feeder, which is driven by another electric motor through a gearbox. The automatic feeder is located on the side of the machine on a vertical rod and, depending on the thickness of the workpieces being processed, can move in the vertical and transverse directions. Push-button control.

Rice. 6. Double-sided jointing machine S2F-4 with automatic feeder and edge jointing head:
1 - control buttons, 2 - fan guard of the knife shaft, 3 - rear table, 4 - automatic feeder, 5 - edge jointer spindle, 6 - rear table height adjustment screw, 7 - guide ruler, 8 - eccentric mechanism handle for front table height adjustment , 9 - front table
Planing machines with mechanical feed of parts are more productive than the machines with manual feed discussed above.
The device for mechanized feeding of parts has rubber-coated rollers or a conveyor chain. The rollers are driven into rotation by an electric motor through a gearbox. The conveyor chain has spring pins. Endless chains of fingers, moving towards the knife, grab the workpiece and move it over the knife shaft of the machine. Depending on the thickness of the parts being processed, the conveyor chain can be installed at different heights. The chain is driven by a built-in individual electric motor with a power of 0.6 kW.
The SF6A-2 jointing machine with a conveyor feed is more powerful; it is used for processing one or several workpieces up to 600 mm wide. The four-knife shaft of the machine is driven through a belt drive by an electric motor. To quickly brake the knife shaft, an electromagnetic brake is used, acting on the end surface of the disk mounted on the end of the shaft. Along the circumference of the disc there are holes for a stopper that fixes the position of the shaft when sharpening knives. The material is supplied by a double-chain conveyor equipped with transverse bars with spring claws. Thanks to the large number of claws, the pressure of each of them on the workpiece is insignificant and therefore the workpiece does not deform when moving along the table. Chains with bars are tensioned on two pairs of sprockets - one drive and the other tension. There are removable devices for sharpening and jointing knives directly on the machine.

Rice. 7. Jointer and device for mechanical feeding of parts:
a - general view of the machine; b - diagram of the conveyor mechanism on a jointing machine: 1 - knife shaft, 2 - workpiece, 3 - back plate, 4 - pressure fingers, 5 - conveyor chain, 6 front plate

Rice. 8. Kinematic diagram of a jointing machine with a conveyor feed:
1 - mechanism for adjusting the height of the rear table, 2 - rear table, 3 - mechanism for driving the conveyor, 4 - conveyor, 5 - front table, 6 - mechanism for adjusting the height of the front table, 7 - mechanism for adjusting the height of the conveyor to the thickness of the workpiece, 8 - knife shaft
The diagram of the working place at the jointing machine is shown in Fig. 9. The parts processed on the machine should be placed near the machine so that the worker does not have to make unnecessary transitions and movements.
Sharp steel pads should be installed on the work table at the slot of the knife shaft, fixed flush with the table surface. The distance between the edges of the pads and the surface that the knife blades describe is no more than 3 mm.
The knife shaft must have a quick-release device for securing the knives.

Rice. 9. Diagram of the working place at the jointing machine:
1 - machine operator's place, 2 - blanks, 3 - planed parts
Workpieces shorter than 400 mm, narrower than 50 mm or thinner than 30 mm when fed manually must be planed only using special blocks - pushers. Planing of thin and short parts in batches can only be done using tsulagi. Shaped and curved planing is prohibited.
Once both halves of the table have been positioned at the required height, the lifting mechanism must be securely secured in this position. The plane of the back table should be tangent to the cylindrical surface described by the blades of the knives.
The non-working part of the knife shaft must be covered with a guard that automatically moves with the guide ruler. Fastening the guide ruler with clamps is prohibited.
On jointing machines with mechanical feed, simultaneous planing of two or more parts of different thicknesses is allowed only if each of them is securely pressed.
A wood planer is one of the most indispensable and at the same time affordable types of equipment used in woodworking and furniture production. Firstly, he comes into action immediately after the first stage (sawing wood on a sawmill). Secondly, the price for the simplest model starts from 10 thousand rubles. Thirdly, its scope of application is very wide: from processing powerful timber to small parts of future solid wood tables, chairs and stairs.
The main task of the machine is the final preparation of a wooden blank for its subsequent high-precision processing. Namely, in the straight-line cutting of the future part along planes or edges. The jointer is also used when chamfering products at an angle.

Specifications
Before purchasing a machine, you should pay attention to the following points.
Depending on the width of the table and the workpieces processed, jointing machines are divided into: light (milling width 250 mm), medium (up to 400 mm) and heavy (630 mm).
The machines are also divided according to the length of the jointing tables: up to 2500 mm and up to 3000 mm. Accordingly, the longer the table, the larger the plane on which the workpiece will be planed. This means higher quality and accuracy of the future product.
The number of knives on the knife shaft varies from 3 to 4. If it is less, then it is no longer professional equipment.
The rotation speed of the knife shaft also affects the cleanliness of the processing. The technical market offers models from 4700 to 5000 rpm. with an electric motor power of 5-5.5 kW. This is the most common frequency. Again, if this indicator is below the minimum, then such a machine is unlikely to belong to the professional category.
Now about other equally important characteristics. The largest width of the processed surface is 630 and 260 mm, the smallest length is 400 and 300 mm, the minimum thickness is 10 and 12 mm, the diameter of the knife shaft (cutting circle) is 128 mm, and the diameter of the vertical knife head is 105 mm.
 Operating principle
The shaft, equipped with cutting knives, is mounted on the bed of the jointing machine. In this case, the fixed back part of the table is attached at the level of the circumference of the knife blades. The front part is set in height to the thickness of the wood layer being removed.
Next, the workpiece being processed is fed towards the rotating shaft. This can be done manually or using automatic feeders. The latter, by the way, ensure not only the safety of the operator, but also the optimal speed of feeding the part onto the shaft. The machines are additionally equipped with such mechanisms at the request of the customer. But there are also models with built-in conveyor feeding.
The process of cutting itself is not very complicated. The blades pass along the bottom of the part and make it absolutely flat. The design of the machine allows you to process only one surface (face or edge) in one pass. True, there are installations that can process both parts, but this will be discussed a little later.
Machine setup
Before starting work, the jointer requires adjustment. First of all, this concerns sharpening knives and their correct installation in the knife shaft.
The jointer uses knives with a chamfer and a sharpening angle of 40°. Sharpening is carried out only on special knife sharpening equipment. The radius of curvature of the cutting edge should be no more than 6-8 microns. Straightness per 100 mm of knife length should not exceed 0.025 mm.
Before installing the knives, the front and rear tables are lowered into the shaft. After installation, the blades can protrude beyond the edge of the chip breaker by 1-2 mm, and from the shaft by no more than 2 mm. Using control equipment, the parallelism of the knives is adjusted. The difference should not exceed 0.1 mm per 1000 mm length. For a more precise installation (0.01 mm), an indicator device will be required.
After the first most important stage, the tables, guide ruler and feed mechanisms are configured. Then the jointer is started in idle mode and, if necessary, adjustments are made.
Types and scope
Planing machines come in two types: single-sided (single-spindle) and double-sided (double-spindle). We talked earlier about how a jointer typically only processes one surface per pass. So, a double-sided machine can simultaneously plan two adjacent parts (face and edges).
Single-sided machines are used for jointing boards and timber and have a manual feed of the workpiece. Double-sided models, thanks to their capabilities, perform operations on selecting quarters, grooves and fugues. The units have a roller automatic feeder with a speed of up to 30 meters per minute.
On a single-spindle machine, when processing workpieces up to 1.5 meters long, one operator can work at a speed of up to 10 m/min. The double-spindle machine, when working with parts of the same length, is serviced by two workers.
Joining machines from the company Corvette
Planing machine Corvette-100
Power 750W
Voltage 220V
Number of knives 2 pcs.
Specifications for the Corvette 100 planer

Belt transmission
Working shaft rotation speed, rpm 8000-16000
Working shaft diameter, mm 52
Max width of workpiece processed, mm 155
Desktop size, mm 710x155
Net/gross weight, kg 13/15
Package size (LxWxH), mm 770x340x350
The Corvette 100 planing machine is designed for preliminary and final processing of workpiece surfaces, creating one or two base planes.
Features of the Corvette 100 planer:
It is equipped with a powerful commutator motor with speed control.
-There are 2 knives installed on the working shaft.
-Belt drive protects the Corvette 100 engine from overloads.
-The Corvette 100 machine has small dimensions and weight.
Planing machine Corvette-101
Power 1100W
Voltage 220V
Number of knives 2 pcs.
Max processing width/depth 155/3mm
Specifications for the Corvette 101 planer 
Engine power consumption, W 1100
Supply voltage, V/Hz 220/50
Electric motor type: commutator
Belt transmission
Working shaft rotation speed, rpm 10000
Number of knives on the working shaft, pcs. 2
Working shaft diameter, mm 52
Max. width of the workpiece, mm 155
Max. planing depth per pass, mm 3
Desktop size, mm 730x160
Angle of inclination of the guide bar, degrees 0 - 45
Possibility of quarter sampling -
Availability of built-in dust removal yes
Diameter of the dust collector pipe, mm 60
Net/gross weight, kg 35/40.5
Package size (LxWxH), mm 820x370x380
The Corvette 101 planing machine is designed for preliminary and final processing of workpiece surfaces, creating one or two base planes.
Features of the Corvette 101 planer:
Equipped with a powerful commutator motor.
-There are 2 knives installed on the working shaft of the Corvette 101 planing machine.
-Built-in turbine for chip removal.
-It is possible to adjust the angle of the guide bar.
-High speed of the working shaft allows achieving high purity of processing.
-The spring-loaded protective cover makes working on the machine safe.
-The Corvette 101 machine has small dimensions.
Planing machine Corvette-104
Power 750W
Voltage 220V
Number of knives 3 pcs.
Max processing width/depth 152/2mm
Specifications for the Corvette 104 planer 
Engine power consumption, W 750
Supply voltage, V/Hz 220/50
Belt transmission
Working shaft diameter, mm 61
Max. width of the workpiece, mm 152
Max. planing depth per pass, mm 3
Desktop size, mm 1415x184
Availability of built-in dust removal -
Diameter of the dust collector pipe, mm 100
Net/gross weight, kg
83/97 - 1st box;
30/33 - 2nd box
Package size (LxWxH), mm
1600x360x250 - 1st box;
635x395x490 2nd box
The Corvette 104 planing machine is designed for preliminary and final processing of workpiece surfaces, creating one or two base planes.
Features of the Corvette 104 planer:
The Corvette 104 machine is equipped with a powerful asynchronous motor.
-Belt drive protects the engine from overloads.
-Hard cast iron work table.
-Possibility of quarter sampling.
-It is possible to adjust the angle of the guide bar.
-The spring-loaded protective cover makes working on the machine safe.
-Corvette 104 is equipped with a pipe for connecting a vacuum cleaner.
-The design of the Corvette 104 machine has high rigidity and a fairly large mass, which eliminates vibration of the machine during operation and ensures stability of processing.
Planing machine Corvette-106
Power 1500W
Voltage 220V
Number of knives 3 pcs.
Max processing width/depth 200/3mm
Specifications for the Corvette 106 planer 
Engine power consumption, W 1500
Supply voltage, V/Hz 220/50
Electric motor type: asynchronous
Belt transmission
Working shaft rotation speed, rpm 4400
Number of knives on the working shaft, pcs. 3
Working shaft diameter, mm 65
Maximum width of the processed workpiece, mm 200
Maximum planing depth in one pass, mm 3
Desktop size, mm 1340x230
Angle of inclination of the guide bar, degrees ± 45
Possibility of quarter sampling yes
Availability of built-in dust removal -
Net/gross weight, kg 132/150
Package size (LxWxH), mm 1360x600x270
The Corvette 106 planing machine is designed for preliminary and final processing of workpiece surfaces, creating one or two base planes.
Features of the Corvette 106 planer:
Equipped with a powerful asynchronous motor.
-The belt drive protects the engine of the Corvette 106 machine from overloads.
-There are 3 knives installed on the working shaft.
-Hard cast iron work table.
-Independent height adjustment of the receiving and feeding work tables allows for non-through jointing.
-Corvette 106 has quarter sampling capability.
-It is possible to adjust the angle of the guide bar.
-The spring-loaded protective cover makes working on the machine safe.
-The upstairs electrical control unit makes work convenient and safe.
-The design of the Corvette 106 machine has high rigidity and a fairly large mass, which eliminates vibration of the machine during operation and ensures stability of processing.
How to choose a sharpening machine for jointer knives and how to use it effectively?
Dedicated to the owners of planing, jointing machines and electric planers.....
Every owner of planing machines, jointers and electric planers was faced with the need to sharpen knives for their equipment. Having planer knives for sharpening will not be difficult for you to do. It would also be a good idea to go to a sharpening workshop where your knives can be quickly repaired.
Is it possible to sharpen planer and jointer knives at home??? Maybe. And you can sharpen them on a sharpener. Yes, on the grindstone. But for this you will need a modern low-speed sharpener (or rather, even a sharpening machine) with water cooling. The best option is to use Tormek T7. Naturally, such knives are not sharpened by hand. To sharpen them we use a special tool SVH 320 for Tormek. 
For high-quality sharpening of planer knives, a smooth and non-greasy sharpening stone is required. Let's level the SG 250 sharpening stone using the leveling device ]]> and the TT-50 sharpening stone included with the Tormek T7. After dressing, smooth the sharpening stone using a whetstone for cleaning and leveling the sharpening stone SP-650
Having prepared the sharpening stone, we will begin sharpening the planing knives. We remove the universal stop and install the special stop that comes with the SVH 320 kit. We screw into it a screw that regulates the angle of inclination of the knife being sharpened relative to the sharpening stone. With this screw we can later set the required sharpening angle.
We take the blade holder included in the SVH 320 kit and install our planing knife into it. The manufacturer Tormek recommends sharpening blades and knives with a width of at least 13 mm. The length of the knife is not so important, because... It is possible to rearrange the long knife in the holder. However, one can argue with this, because... I have doubts about the convenience and quality of sharpening long knives with rearrangement.
 It is very important to install the knife correctly in the holder, because... otherwise it will be sharpened skewed. When installing the knife into the holder, rest the back of the knife against the stop and clamp it with the screws of the holder.
To accurately set and control the set sharpening angle, use a marker to paint over the sharpened chamfer of the knife. Now, based on the nature of the marks of the sharpening stone on the painted blade, we can estimate the angle of inclination and adjust it in the necessary proportions.
We install the holder with the knife on the stop mounted on the Tormek. Using the adjusting screws of the stop, lower the holder with the knife until it touches the sharpening stone. Use the angle adjustment screw to set the angle of the knife relative to the stone.
By manually rotating the sharpening stone, we determine by the nature of the marks on the painted blade whether it is necessary to adjust the angle of inclination of the knife holder. If necessary, we make adjustments.
So, having set the required angle, we proceed directly to sharpening. For fixed removal of metal from the knife being sharpened, there are two sliders on the stop with a scale division of 0.1 mm. It is assumed that the sharpener can adjust the amount of removal in precise proportions.
After each feed, be sure to securely fix the stop with two clamping screws so that there is no fluctuation of the stop during sharpening.
Sharpening the knife is carried out by moving the holder with the knife to the right and left relative to the sharpening stone. It is not permissible for the knife being sharpened to extend beyond the edge of the sharpening stone. It is recommended to stop the holder 12 mm before the edge of the circle. To eliminate errors, stops are provided that can be moved and the required stroke of the holder can be set.
It should be noted that during sharpening of a planer knife, water accumulates and distributes on the knife blade from the sharpening stone, which leads to water draining onto the body of the sharpening machine and onto the floor. And a lot of this water flows down. Therefore, it is necessary to regularly add water to the Tormek water tank. To reduce water spillage on the body, it is recommended to place a 6 mm high pad under the right leg of the machine (under the leather honing wheel). However, this measure does not completely prevent water from entering the Tormek T7 case. However, Tormek T7 has good protection and is not afraid of such water baths.
Another problem with the planer knife was that the SG 250 stone was constantly salted, which reduced the efficiency of sharpening and increased the sharpening time. I had to clean it regularly with a whetstone to clean and level the SP-650 sharpening stone. Of course, it is of great importance what material the knife is made of. In our case, the knife was sharpened from HSS steel and this stone had to be constantly sharpened. When sharpening knives made of tool steel (softer steel), more intensive removal of chalk occurs and sharpening occurs faster. For sharpening HSS knives, it is recommended to use another stone SB 250.
So, after 20 minutes of sharpening, we have an even, smooth, beautiful bevel of the knife with a stable, even burr on the cutting edge.
The knife requires fine-tuning. We polish the planing knife on a Tormek T7 leather wheel using finishing and polishing paste PA-70.
First we bring the working plane of the knife, then its chamfer. We ensure that there is no burr left on the cutting edge of the knife. Once the burr is removed, the knife is sharpened and ready to use.
After sharpening, we checked the geometry of the knife. The knife had a strict parallelism between the cutting edge and the back. Even despite the fairly large sharpening angle, the knife we sharpened cut a sheet of paper perfectly.
Let's summarize:
1. To sharpen planing knives you do not need to have complex and expensive machines. All you need is a Tormek T7 and a special tool SVH 320
2. After sharpening on Tormek T7, you get a high-quality sharpened planing knife with unchanged geometry.
Identified deficiencies:
1. During sharpening, water pours abundantly from the knife being sharpened onto the work table and the body of the machine, which causes some discomfort. Even resorting to certain tricks cannot completely get rid of this inconvenience.
2. The SG 250 sharpening stone gets dirty regularly and requires cleaning and leveling with an SP-650 sharpening stone. There is an assumption that if you use the SB 250 stone, this problem will be eliminated.
http://www.equipnet.ru/articles/tech/tech_1354.html ]]>
]]> http://cooltool.com.ua/catalog/goods/376_Stanok_strogalnyy_Korvet100_art... ]]>
]]> http://cooltool.com.ua/catalog/goods/379_Stanok_strogalnyy_Korvet104_art... ]]>
]]> http://www.grinding.ru/?lev0=907&lev1=115 ]]>
We also recommend
 Carpentry with Alexander Klimov - post
 Do-it-yourself vacuum cleaner repair
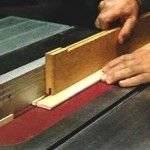
 A guide for a circular saw is a necessary device that expands the capabilities of the tool Do-it-yourself clamps for the guide bar
 World of DIY - children's toy rocking scooter
 Setting up the jointer correctly for the job
 Belt sanders: how to choose Additional qualities of belt sanders