Review of carpentry clamp. A do-it-yourself clamp makes the craftsman’s work easier and saves him money Wood clamp drawings
A clamp is a tool that allows you to fix a part during processing. Craftsmen often use various types of clamps in their work. Whether you are a carpenter or a mechanic who processes metal, there is always a need to use it.
This device is available in different versions, from universal to specialized. Relatively recently, a new modification has appeared: a quick-release clamp. Develops compression force up to 450 kg.

The task for all types is common - to fix the workpieces for processing or connecting to each other.
Like any other tool, clamps can be purchased at the store or made yourself. The second option is often chosen by professionals. It’s easier to come up with your own design than to look for an option for individual tasks.
Homemade clamps - varieties and manufacturing technologies

Angle clamp
Such devices are used to fix two objects (not necessarily the same size) at right angles, to connect them together in any way. These can be wooden blanks when gluing, or assembling using corners and confirmat.

However, most often, an angle clamp is used as a jig for welding metal parts at right angles.
For production you will need:
- steel corner 40 mm, thickness 3-4 mm;
- steel plates 40-50 mm wide;
- threaded studs, preferably hardened;
- rods for gates;
- nuts for the worm gear;
- welding machine;
- drill, taps.
We weld the corners to the steel plates at a strictly 90° angle.

We attach a worm structure to each side by welding. This is the same corner with a welded-on thrust nut or thickening, in which a thread is cut in accordance with the collar pin. The width of the working gap is selected according to the potential workpiece.
IMPORTANT! If the range of sizes of the parts being processed is too wide, it is better to make several clamps. Too much movement of the knob does not contribute to a strong fixation.
A collar pin is screwed into the working nut, after which a stop is assembled at its end. As a rule, this is a structure of two metal washers of different sizes. The stop should rotate freely on the pin.

On the back side of the knob we drill a hole into which we insert a metal rod as a lever.

A properly assembled metal clamp allows you to securely fasten steel parts during welding, or wooden parts during carpentry. The design is so simple to make - that it has become a real staple among home-made craftsmen.
In today's project We will create a tape clamp that will allow you to compress parts of various shapes when gluing, which is usually difficult to do using standard bars or a pipe clamp. Want to make a picture frame? No problem, use the tape clamp!
You can independently and at minimal cost make a tape clamp for use on wooden frames, fittings, round objects, hexagons, octagons, n-gons and press objects of any size!
For the project you will need a 1.9 cm thick hardwood board measuring 10 by 25 cm, a 0.5 cm thick fibreboard measuring 12.7 cm by 51 cm, a 0.64 cm and 0.95 cm hardwood pin (eg oak, do not use poplar or pine), 16 x 0.95 cm high and 10 cm long hex bolt (or rod) and full thread, 16 0.95 cm high T-nut, hex nut # 8, three meters or stronger polyamide cord 1.9 cm wide, four sliding fasteners 1.9 cm wide, and wood glue. The tools you will need are a cutting machine with a table, a band saw and a drilling machine.

Step 1: Creating the Corner Jaws


A band clamp consists of several jaws, a band that wraps around the jaws, and a tension mechanism that tightens the band around the jaws to clamp them onto the workpiece.
For a rectangular frame, you will need three jaws to hold the three corners, and a stationary jaw and tensioner for the fourth corner.
To make corner jaws, cut a 10 cm diameter circle from a 1.9 cm thick piece of hardwood. Drill a 0.3 cm diameter hole in the center. Cut 12 cm by 12 cm squares from 0.5 cm thick fibreboard (effectively , the thickness of the slab is slightly thinner), and also drill holes with a diameter of 0.3 cm through their centers. Using nails, center the fiberboards and glue the block of boards together. The edges of the fiberboard should be aligned as shown in the photo.
After the glue has dried, print and cut out the drill template 1, and stick it onto the square block using rubber cement. Drill 0.6 and 0.3 cm diameter holes. Use a band saw to cut the resulting block into quarters, and cut off the jaw corners (2.54 by 2.54 cm square) on each piece. The incision will go through the 0.95 cm diameter holes as designed. Finally, deburr each piece.
Cut eight 2.85 cm long pieces from a 0.95 cm thick hardwood dowel. Use an oak dowel, pine or poplar is too soft. Glue the resulting pins to the half-holes with a diameter of 0.95 cm. The pins act as “pivot” jaws to accommodate the clamping joints, which are not located at an angle of 90 degrees.
Using 0.6cm thick hardwood dowel, cut eight 2.85cm long pieces and glue to the top/bottom holes in the fibreboard. These pins will hold the pressure tape. There should be enough space between these pins and the round edge of the hardwood piece to thread the tape through.
Sand and clean the edges and faces of the four corner jaws you just made. Set them aside.
Step 2: Creating the Fixed Jaw and Tension Mechanism


Start with a 7.62 x 10 cm piece of 1.9 cm thick hardwood. Cut 1.2 cm on each side along the 10 cm long side. Cut each cut header in half - use a bandsaw or handsaw! You will need three pieces of hardwood 1.9 cm thick: one piece measuring 7.62 by 7.2 cm (depending on the gap between the saw teeth of the saw), and two pieces measuring 1.2 by 3.7 cm.
Cut two pieces measuring 7.62 by 10 cm from 0.5 cm thick fiberboard.
Now glue together a block of blanks (fiberboard - hardwood board - fiberboard) as shown in the diagram and photo. I used small coins stacked on top of each other and taped together during the gluing process to create a groove for the clamp strip. After 15-20 minutes, remove the coin separator before the glue completely hardens.
After the glue has dried, attach template 2 to the top and side of the block; Drill holes in the top and inside the side as shown on the template.
Using a band saw, notch the stationary jaw and cut 0.95cm diameter holes as indicated in step 1; Next, cut the block halfway along the line indicated on the template. Mark the two pieces as they fit together, because you need to line up the side holes! You have now created a fixed jaw and a movable tension slider.
Glue four 2.85 cm long pins (2 0.63 cm thick and two 0.95 cm thick) onto the stationary jaw as indicated in step 1. Sand the edges and pins.
Cut two 12.7 cm long pieces from the 0.95 cm thick pin. The pins should move smoothly back and forth through the moving part. If necessary, sand the pins (use a drill press as shown in the photo). Glue the pin blanks to the fixed jaw blank. Use the sliding slider to align the pins during the gluing process.
Step 3: Install the Tension Bolt


Install a 16 x 0.95 cm T-nut into the center hole of the movable slider, which faces the fixed jaw. You will need to drill a shallow 1.1cm hole around the center hole to accommodate the T-nut. Insert a 16mm threaded rod through the T-nut (or a 10cm long, fully threaded hex bolt). When the bolt or rod is screwed in, it will act against the fixed jaw and push the movable slider out. Press a #8 hex nut into the center hole of the stationary jaw so that the rod/bolt rotates against it, protecting the wood at the bottom of the hole as shown in the photo. You can fit a hex bolt handle to tighten the clamp, or use a 19mm wrench for this purpose.
Step 4: Final finishing of all components
Coat the corner jaws, the fixed jaw and the movable slider with varnish or polyurethane so that the wood glue does not stick to them and can be easily cleaned off. Do not paint the pins or holes in the slider; they can stick together!
Step 5: Install the Tape


Take 3 meters (or more) of strong 1.9 cm wide polyamide cord (tape) and four 1.9 cm wide sliding fasteners. Pass the cord through the fastener, the left side of the fixed jaw, the second fastener, then through the left groove of the movable slider, the left side fixed jaw, first fastener and three corner jaws. Follow similar steps for the right side. See photo above.
There is a better way to adjust the length of the tape, i.e. cam levers, compression screws, spring-loaded fasteners, etc. The easiest and cheapest way is still sliding fasteners. Improve the design yourself!
Step 6: Using the Tape Presser


Always adjust the length of the tape before applying glue to the workpiece and allow it time to dry. Wrap the clamping band around the workpiece and align the jaws at the corners. Pull the tape tight on the left side and adjust the sliding fasteners. You can use masking tape on the sponges to prevent the glue from sticking to them. Make sure no glue gets on the pivot/tension pins or mechanism. Turn the bolt using a 19mm socket wrench to tighten the jaws against the workpiece. Make sure your piece remains flat and square and let the glue dry.
For rectangles, use three jaws plus one fixed jaw. For six-sided workpieces, use 5 jaws plus one fixed jaw. For n-third parties - a good idea for new brain project!
Thank you for your attention!
Each carpenter uses clamps during work, reliably fixing workpieces with their help. You can make such a device yourself, and there are several options.
Clamps are simple, universal and specialized. Not so long ago, a new type of product appeared - quick-clamping. Such an element can compress up to 450 kg. It will be useful to study the instructions for making wood clamps with your own hands.
Corner option
Regardless of the type of clamp, it must firmly clamp the parts for joining or processing. A corner joiner helps to fasten wood pieces at a certain angle (most often 90°, but there are others). You cannot do without this when assembling furniture and frames.
In order to make such a clamp from wood with your own hands, you will need the following materials:
- two wooden blocks 25 mm thick made of hardwood;
- plywood 12 mm thick or more;
- screws, studs;
- jigsaw or hacksaw;
- drill.
A square board with a side of 25 or 30 cm is cut out of plywood. Two bars are fixed on it at an angle of 90 °.
Important! The angle must be measured with high precision, since the correct fixation of parts depends on it.
First, the bars are glued, then countersunk, holes are drilled and screws or other fasteners are tightened. Perpendiculars are drawn from the center of the bars - screw studs will pass here.
At a distance of 20 mm from the corners, thrust bars are attached, maintaining a gap between them. It should be slightly larger than the width of the parts that are to be clamped with a homemade clamp. It is better to screw in the studs immediately, before fixing the stops. You will also need to cut out the movable blocks that will be connected to the pin (when it is unscrewed, the workpiece will be pressed against the corner bar).
For screws, it is best to take studs with rectangular or trapezoidal threads. The thread pitch is 2 turns per cm. It is very good if the stud has a rear sight on one side of a slightly smaller diameter than the thread. It can be used to seat the handle. On the other hand, a rear sight with a slightly larger diameter to accommodate the bearing is desirable.
So, in the simplest clamp, one end will be stationary, and the second will move through a worm gear.
To release the workpiece, you need to move the bracket to the required distance and turn the knob a few turns. This will fix the element. After this, you can release the mechanism and the workpiece will be released.
The simplest version of this model is equipped with a rail structure. The guides, which are arranged in parallel, have cut grooves at equal distances. Fixed stops are secured using rods made of metal. They can move exactly along the width of the workpieces. At the end of the beams, fixed stops should be installed, which have a worm mechanism. The usual method is to clamp it with a hairpin and a furniture nut.
Self-clamping option
For gluing parts, it is better to choose the simplest clamp model, which has an F-shape. The stores sell various models that consist not only of wood, but also of metal. The cost of such instruments is high. Therefore, many craftsmen prefer to make them with their own hands.
For small jobs, a cam-type clamp is ideal. For example, if you need to glue small parts or fix workpieces. This model works in the same way as the f-shaped element. The tool includes 2 jaws and guide bars. Sponges: movable and fixed. For reliable clamping, it is necessary to fix the workpiece well and rotate the cam 90 degrees.
You can make such a tool yourself with a minimum set of tools and materials. Before you begin, you should draw a drawing of the product. You can use any material for manufacturing, and also change the standard sizes as you wish.
The tire is made of wood or metal. Small bolts and rivets can be used instead of metal pins. It is recommended to make movable and fixed jaws at the same time, since they mirror each other. Their width and length can be changed to increase the grip of the product.
For gluing boards (boards)
Clamps are needed for fixing sections, which, after the glue has dried, are used for furniture panels. Such products differ from simple ones in their length. In other words, they have a large jaw span. If you buy such material in a store, you will have to pay a decent amount. Therefore, craftsmen prefer to make clamping mechanisms themselves.
Materials and assembly steps
In order to make tree clamps, you will need the following elements:
- beech or birch block;
- feather drill;
- pipe 2.5 cm;
- mortise nuts of suitable diameter;
- a nut that has a rounded knob (used for decoration);
- a cutter with a diameter of 2.5 cm and a long pin.
The basis of the material is a pipe, from which a piece of the required length is cut. Depending on the size of the jaws, it is necessary to cut the block. The pieces should be from 15 to 20 cm. For free movement of the timber along the pipe, a hole with a diameter of 2.5 cm should be made at a distance of 2.5 cm from the edge. Parallel to the hole, a cut should be made from the same end. To fix the sponge on the pipe, connect the hole to the end.
For the driving nut, you need to drill an additional hole on the side of the cut. You need to drive a nut into it and tighten it with a bolt on the back side. To fix the sponge, clamp the pipe in the hole. To move the pipe, you need to unscrew the bolt, then move the element and repeat all the steps again.
The lower clamping part has 2 jaws; it is slightly larger than the upper one and has an additional nut. The structure of both parts is identical. An additional driving nut is located at the opposite end of the pipe into which a stud with a wing nut is installed.
In the second collapsible moving part there are no clamping parts such as cuts and nuts. The dimensions of such an element are also rather large. In this part it is necessary to make a recess for the stud device.
Operating principle
The principle of operation of the clamp is very simple. It is necessary to separate the jaws so that they are separated from each other at a distance of 3 cm greater than the width of the shield that will be installed. Next you need to fix them on the pipe. To do this, tighten the nuts that are located at the edges. The blanks must be placed on the tubes and sealed with glue. Then they need to be pulled together by rotating the “lamb”.
If you know how to use a grinder and a welding machine, you can make the same clamp for gluing wood from metal.
To maintain the plane of the plot with tubes, it is recommended to arrange the clamps in a checkerboard pattern. The main advantage of such a tool is its ease of manufacture and operation.
Special clamp designs
Having mastered the skills of making simple-shaped clamps, you can improve them and make devices for connecting complex parts.
There are homemade clamps made from a wooden hanger, which is sawn into pieces. They combine wood and steel and make more comfortable handles that allow you to quickly tighten the screw. This is especially important if you need to frequently change position or use several clamps at the same time. In the case of complex pieces, you can first cut them out of paper and then transfer them to plywood.
Although welded metal products are more reliable, wooden structures are also used not only for carpentry, but also for turning and carpentry. You don't need to have any special skills to create a clamp. You can make such a wooden product in unlimited quantities with your own hands. You just need to devote some time to the manufacturing process.
Using this device you can glue wood panels of different sizes. The clamp itself is easy to use and has a fairly simple design. If you have the necessary materials, making such a clamp for a home workshop will not be difficult.
To make homemade clamps (they are also called clamps), you will need a pin with M10 nuts, a 20 mm steel strip and two rectangular profile pipes with sides 40x20 mm, 80 cm long. These materials can be bought inexpensively at a hardware store.
Clamps for gluing panels: stages of work
We make markings on the profile pipes and drill through holes every 15 cm, using a regular or stepped drill. We cut the steel strip with a grinder into pieces 150 mm long. In these plates we drill two holes of the required diameter.

We connect the profile pipes to each other using plates. You will also need stops - a movable square one and a fixed T-shaped one, welded from a profile with side dimensions of 20x20 mm. We screw a pin of suitable length into the movable clamp.

Features of using a clamp
It is good because when gluing wooden panels it clamps the workpiece on four sides in two planes. Thus, the gluing is of very high quality. By rearranging the T-shaped fixed stop, you can adjust the length. Watch the video on our website for the process of assembling a clamp for gluing wooden panels.
A carpenter's clamp is a special clamp designed to briefly hold working elements or parts to simplify their attachment to the base.
Why do you need a clamp?
Clamps are specialized carpentry clamps designed for fixing individual elements.
This tool is especially relevant for carpentry and plumbing.
In practice, the tool is used in a variety of manipulations. You cannot do without it when gluing individual elements made of wood. Since for a high-quality connection, individual elements need to be compressed for 24 hours, which is simply impossible to do manually. For such situations, purchasing or making your own carpentry clamps will be the best way out.
Types of clamps
Today, such a tool can be made from various materials in several variations. Typically, making a clamp requires wood or metal. When installing the specified device in the right place, you can not hold individual parts, but can fully work with other tools.

The simplest version of a carpentry clamp involves the presence of a pair of moving components and a frame for them. The tool operates using additional clamps and levers. With the help of which the force is selected, the parts are compressed and they are fixed.
There are also quick-clamping designs of the lever type. These are specialized clamps.
Their peculiarity is that clamping occurs instantly, but this will require a certain force.
There are different types of carpentry clamps. Depending on the mechanism installed in them and its features, they are:
- Corner designs.
- Screw installations.
- Quick clamping devices.
- Mounting structures.
- Hand clamps.


When choosing a particular tool, it is important to take into account your own needs within the framework of the upcoming work. They differ in the working stroke and the maximum distance between parts. The greater these characteristics, the more universal such a tool will be in practice.
How to make a carpenter's clamp with your own hands
This tool can be purchased at any specialized store. But if you wish, you can assemble a homemade clamp with the required dimensions.
Professionals often tend to assemble these devices themselves. In this case, it is possible to design a tool that will cope with individual needs when a master performs certain tasks.
Corner structures
This type of tool is used to hold individual elements of similar or different dimensions. A carpentry clamp will allow you to connect them to each other in the position required.
In practice, in most cases, angle-type fixtures are used when welding metal structures. They ensure their connection and retention at a strictly right angle.
To assemble the device yourself, you need to prepare:

- Steel angle 40 mm.
- Hardened studs with pre-threaded threads.
- Nut.
- Taps.
- 40 mm steel plates.
- Drill.
- Rods.
- Welding device.
It is necessary to weld the prepared corners to the steel plates, strictly observing the right angle. At the next stage, worm units are fixed on each side. Here it is important to correctly determine the size of the working gap so that it corresponds to future workpieces.

Experts advise that if you plan to work with structures of different sizes, it is worth assembling several carpentry clamps. The reason is that the greater the stroke of the knob, the worse the fixation.
A stop is placed at the end of the stud immediately after it is screwed into the working nut.
Moreover, the stop itself must be able to rotate along the pin.
A hole is made at the back of the knob. A metal rod will be placed here, which will take on the function of a lever.
This is the simplest design that even an inexperienced craftsman can assemble on his own. But it will be very useful in practice.
Pipe

The most difficult welding option in practice is the end connection of individual pipes. To implement it and significantly simplify it, pipe clamps are used. They guarantee the correct connection of the individual sections.
It is not difficult to make this device yourself. You will need a couple of steel plates, as well as a suitable corner. To ensure the required fixation, the device itself is provided with threaded studs.
Despite its apparent simplicity, this device demonstrates high efficiency in practice.
Other options for carpentry clamps
There are other types of carpentry clamps. They are used depending on the specific production need within the framework of certain manipulations.
If you gently quickly fix small elements, a device shaped like a caliper will do. To make it yourself, all you need is a sheet of plywood and a few blocks, along with additional elements - a stud and a nut.
A stop is attached to the main rail on one side. A recess is made in it where the mechanism itself will be placed. When the bracket is in the required position, you need to fix the part by turning the knob on the pin.

The simplest, but no less effective in practice version of the clamp is assembled from a nut equipped with a lock, steel studs, a pair of wooden blocks, thrust washers and nuts.
In order for the clamp to serve as a full-fledged vice, it is worth initially making several sets with similar characteristics.
When performing individual manipulations, the constituent elements of the structure must be kept on the table surface to facilitate their further processing.
To do this, a self-clamping type clamp is suitable. Its bracket is made of wood or metal.
This is a simple device that is a lever. When you turn it, there is a quick clamp that works automatically. To set the desired height, simply move the pin placed on the workbench.
Typically, quick-release structures are assembled according to individual requirements for the desired manipulation.
Video: Do-it-yourself carpentry clamps in 30 minutes
We also recommend
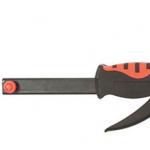 A do-it-yourself clamp makes the craftsman’s work easier and saves him money Wood clamp drawings
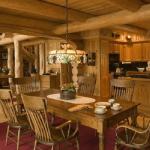 Kitchen in a wooden house: design features and photos of successful projects Kitchen set in a rounded house
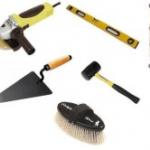 DIY stone paths
 Mosaic of stone and pebbles: master class
 Do-it-yourself stone mosaic
 Tips for working with polymer clay Polymer clay sticks to your hands