Mouse house made of pumpkin. DIY pumpkin crafts for kindergarten and school. Crafts from pumpkins and zucchini on the theme of Autumn
Hi all! Soon autumn competitions will be announced in kindergartens and schools, to which you will be required to bring crafts made from vegetables and natural materials. I think those who have children probably know this first-hand. Since every year, educators and teachers ask parents and their children to participate in such exhibitions.
In connection with the upcoming event, and since my child goes to preschool (so we will also need all this), I decided to make it easier to find crafts that you don’t need to buy, but make yourself. I thought it would be great if a bunch of ideas were collected in one place, do you agree with me?!
In today's post I will show you what children's crafts you can make with your own hands from pumpkin. This is a very popular vegetable. And you can’t even imagine what you can create from it. A bunch of original souvenirs. Moreover, everything is done so easily and simply that even the smallest child can handle it.
I’ll tell you a secret, I have prepared for you the largest selection of autumn pumpkin crafts for boys and girls. Here and now you will find real masterpieces that will definitely allow you to take prizes. So don’t leave the page and save it as a bookmark so you don’t lose it! I am sure you will find something that you will be happy to build with your kids.
We'll start with products that the little ones can do. Of course, you can’t do it without the help of your parents. But how great and valuable it is when mothers and fathers work with their children. Remember, joint creativity not only develops your baby, but also strengthens your entire family.
Probably the easiest way to make autumn souvenirs from such a sunny vegetable is to draw faces on it and decorate it with additional attributes. Look how cool the boy and girl turned out. Just take two good fruits, one smaller, the other larger, and draw eyes, a nose, a mouth and hands. Complete everything with a straw hat and your work is ready.

You can take not a whole pumpkin, but half of it. Draw a shell on top like a turtle, and make legs and a head from potatoes. Your Tortilla Turtle is ready!

Don't forget that orange carriages are especially popular. For this product you will need a small fruit. You need to cut out the windows in it and pull out all the pulp. Make the wheels out of carrots.

Or you can make a house like this, decorating everything with autumn leaves. And the residents will have small peeled onions. Cool idea!

How do you like this house for a spider made from potatoes? It’s just cool. Make a web from ordinary woolen threads. Collect herbs, rowan branches and decorate everything as you wish.

Now I propose to make you such a beautiful snail. Moreover, you will need not only pumpkin, but also yellow zucchini. Plus sparkles, sequins, ribbons and other decorations.

If you have your own garden and the harvest was successful, then select two large fruits and create such a graceful owl. The only work involved is cutting out the wings, muzzle and gluing them.

Or just do some cutting. Draw what needs to be removed directly on the pumpkin and proceed. This is what a cat can turn out to be!

I also really liked the composition with leaves. You can make a very cute chicken. Just little children can cope with such a task.

Or make a whole family of pumpkin men with your child.

Now I suggest you watch a master class on making a candlestick in the shape of a cat. Such work will deserve a lot of applause, and after the competition do not rush to throw it away. After all, Halloween is coming, so the candlestick will look very cool in the country house or in the fence of your home.
Candlestick in the form of a cat

You will need: large pumpkin, black gouache, brush, spoon, knife, cardboard for ears and tail, pen, fishing line for antennae.
Work process:
1. Take a pumpkin and cut off the bottom so that your craft will stand stable in the future.

2. Using a spoon, scrape out all the insides of the fruit.

3. Now use a pen to draw the cat’s face.

4. Carefully, using a knife, cut out the muzzle along the contour.

5. Paint the pumpkin black.

6. Cut out ears and a tail on black cardboard. Attach the pieces to the pumpkin using glue or toothpicks. Cut out a mustache from the fishing line and glue it to the face.

7. Well, place and light a small candle inside.

Well, isn't it beauty? Simply a masterpiece!
Options for DIY autumn crafts using pumpkins

Look what a funny weirdo, I don’t even know what to call him correctly. And it is also made from pumpkin and plasticine.

I also really liked the idea with a vase for fresh flowers. To make such a product, you need to take a small and even pumpkin. Cut a circle from the top and remove the insides with a spoon. Place a glass inside and pour water into it. Then place a bouquet of fresh flowers in the resulting vase. A real autumn craft is ready. 
You can create something like Winnie the Pooh with a barrel of honey. Well, that’s if you have absolutely nowhere to put the fruits). 
Here's an idea with a hedgehog. Well, everything is also very simple to do. Plasticine, toothpicks, olives or grapes and pears, that's all the details.

You can also paint the fruits in different colors and make the faces of any animals out of felt. It turns out very beautiful and impressive. A whole fairy tale can be made this way.

Kids can make their favorite characters from cartoons and fairy tales. For example, from scrap materials and a small pumpkin you can get something like this.

Fruit baskets also look cool. It’s easier to do, well, you can see everything yourself from the photo.

Crafts from pumpkins and zucchini on the theme of Autumn
Now let's take a closer look at what you can create not only from the orange fruit, but also with other vegetables.
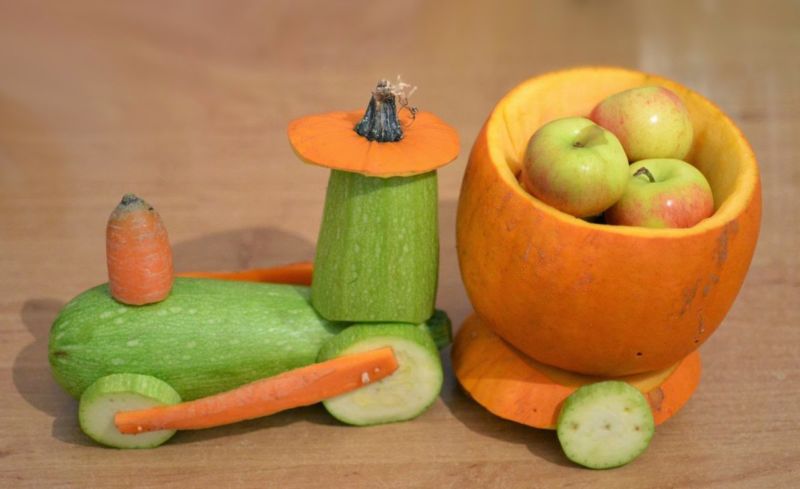
For example, make a vegetable machine like this with a trailer. I think the boys will definitely appreciate it.
But what a big mushroom. And cauliflower is right on topic. Schoolchildren can easily cope with such a craft.

Here are some more beautiful mushrooms!

How do you like this zucchini boat? Just a sight for sore eyes. Well, a pumpkin as an attribute of decoration.

Here's another fun company you can build. If you must have a pumpkin, then use it to make wheels for your car.

Popular fairytale carriage. Zucchini wheels fit really well.

And here's another pumpkin house for the zucchini spider!

Well, to be honest, I haven’t found many crafts made from pumpkin and zucchini together, but separately there is plenty to choose from.
What can you make from pumpkin seeds for an autumn competition?
Now I want to show and introduce you to such material as pumpkin seeds. You can also make different souvenirs from them. So keep ideas for your exhibition.
I’ll show you in detail and tell you how to make such a beautiful chicken.
Chicken made from pumpkin seeds and sunflower seeds

You will need: plasticine, pumpkin seeds, sunflower seeds, a small basket, dried grass or strips of colored paper.
Work process:
1. From black or brown plasticine, sculpt the bird’s body and form a tail. Roll a ball of this color. This will be the head. Stick it to the body.

2. Now make wings using pumpkin seeds. Just stick them into the plasticine in several rows.

3. Then do the same ponytail, but start from the top.

4. Take sunflower seeds and insert them with the sharp side, filling the entire surface of the head and breast of the chicken.

5. Make a comb and beak from yellow and red plasticine. Form eyes from white and black plasticine.

6. Take a small basket, add dried grass and place the chicken in the nest. All is ready!

And here are some more works that can be created. Look and choose.
Application "Autumn tree".

Hedgehog. True, in the illustration it is made from sunflower seeds, but it can also be made from pumpkin seeds, you just need small seeds. And also paint them black first.

And here’s another cute snow-white chicken. The manufacturing technique is similar to the option described above.

Application "Spikelets". Work for preschoolers and primary school children.

Sunflowers also look very impressive. The middle can be made from cereal.

I found another composition. Heroes can be made from some vegetables, for example from a pear, but the panel is made from seeds.

By the way, working with pumpkin seeds is very good for developing motor skills, so take it into account.
New ideas for making pumpkin crafts for kindergarten and school
Wandering around the Internet in search of interesting and original works from this vegetable, I came across this cool handicraft by Svetlana Ridzel from the website Crafts Fair. It struck me so much that I saved it and share it with you. Maybe someone will want to perform such an ekibana.
Pumpkin Ekibana

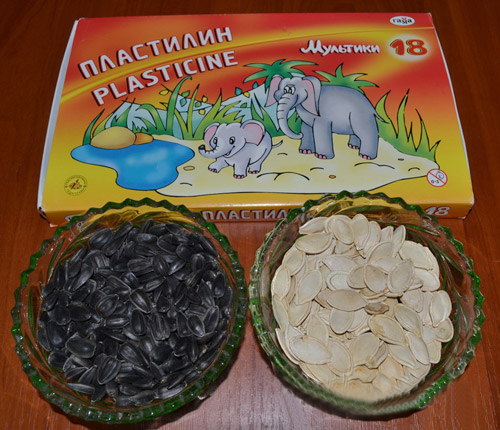
You will need: pumpkin, acrylic paints, brush, piece of sponge, corrugated paper (fabric, felt, foamiran), wax, scissors, wire.
Work process:
1. Wash the pumpkin and trim the tail.
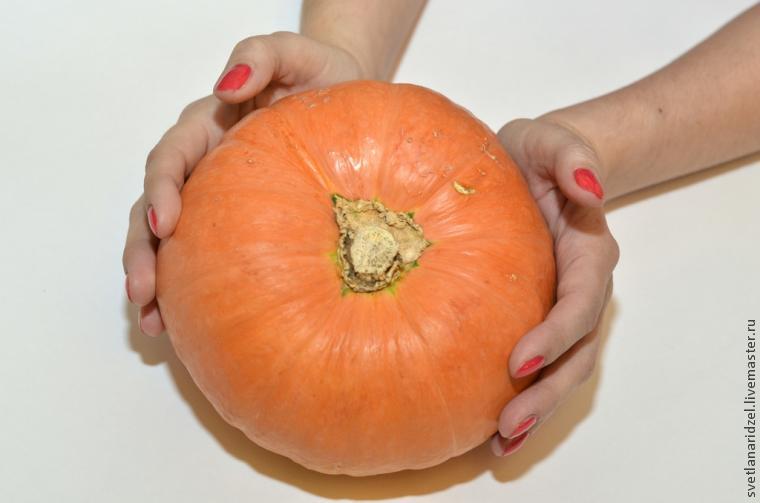
2. Paint the entire fruit with white paint using a sponge. Wait until it dries.

3. Now, starting from top to bottom, color the product according to the colors of the rainbow: red, orange, yellow, green, blue, indigo, violet.


4. Paint the pumpkin with a regular brush, making only vertical strokes.

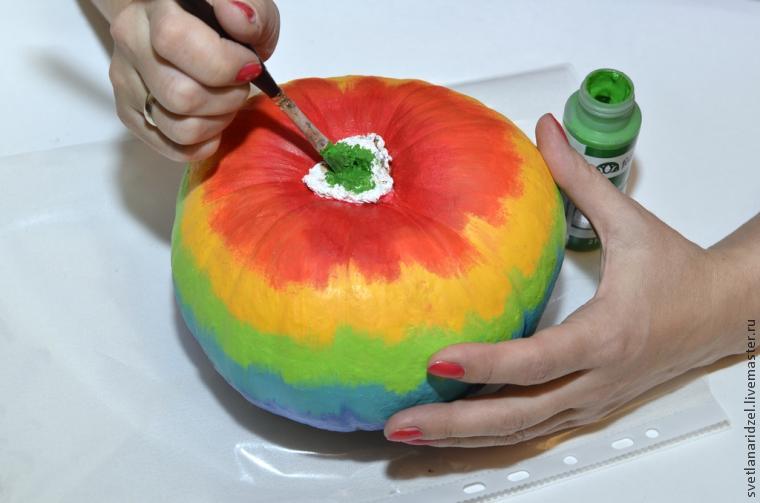
5. Paint the bottom black and the rest of the tail green.
5. Now dry the pumpkin well. At least a day! And when it is completely dry, cover it with wax.

6. From corrugated paper or fabric, and maybe felt or foamiran, make twigs, petals and flowers.

7. Using wire, attach them to the ponytail. Your “beauty” is ready.
I think you will agree with me that this is a real masterpiece! The author is just great!
And a couple more new ideas for creativity. Especially for those who love to tinker.
- Kittens in a basket;

- Haunted House;

- Autumn candlestick;

- Vessel (pumpkin carving).

Well, of course, this is a difficult level that people who practice this art can do.
Crafts from decorative pumpkins for the autumn holiday
And you choose what is simpler, and what the kids can handle. So look further and never cease to be amazed by what you see.
What wise little owls made from white fruits and seeds. Simple, beautiful and popular.

Another version of a flower vase, but with decoration. Check it out!

Big and funny spider. But you will need metal knitting needles or wires.

Another spider as a candlestick.

Pumpkin carving. Again, the level is difficult, but I really liked the work, in case someone gets carried away and wants to make such a product.

Here is a simple job, like a vase, only berries and fruits are added.

How do you like this old crab? I just smile looking at him.

Here are some more interesting and charming baskets. Cut out the top and remove the pulp. Place decorative grass inside, make a handle from the branches and decorate everything with ribbons.

Mischievous bun. The kids will be delighted.

Variations of fairytale carriages. Cool idea to patch a vegetable.


Houses for fairy-tale heroes. Get creative, take improvised and natural materials and create!


Well, the fabric letter looks very original.

Master class on making pumpkin souvenirs: we do it quickly and beautifully
I’ve probably already shown you almost all the craft ideas. Well, is there really a lot to choose from? It remains to tell you in detail how you can make a flower vase. As you have seen, it is popular and easy to make.
Vase

You will need: pumpkin, dried or live flowers, felt-tip pen, knife, spoon, foam.
Work process:
1. Take a smooth and beautiful pumpkin. It needs to be stable on the table.

2. On the upper side of the fruit, use a felt-tip pen to draw an outline along which you will cut out the neck of the vase.

3. Then use a knife to cut out the “cap” along the contour.

4. Remove the grains and pulp using a spoon.


6. Prepare dried plant branches and stick them into the stand. Your ekibana is ready.

In conclusion, a small selection of pumpkin souvenirs for children. They will be happy to do such work themselves, since they will need to do a lot of painting and drawing. Look how light the products are and how beautiful they look.


Wow, now I don’t even know what to choose to work with my daughter, because there are so many interesting things. Well, if that’s not enough for you, then I suggest watching the following video story. Then you will definitely say, stop, I found it).
Friends, how do you like these wonderful pumpkin works? I am sure that now you will definitely take part in the autumn crafts competition with your child. Because there are a lot of ideas for creating them, and they are done very easily, quickly and not difficult. Just don't be lazy and everything will work out. Bye, bye everyone!
Autumn is the time to go for a walk with your children and stock up on natural materials. After all, nature is a real treasure trove for children and needlewomen. Let's make a pumpkin house with our own hands.
Of course, in order for such a craft to stand for a long time, it needs to be repaired and dried, but such work is quite painstaking and will take a considerable period of time. And the kids and I urgently need a craft for kindergarten. Therefore, let's take an ordinary round pumpkin from the garden.
We will need:
Some materials may not be used or replaced.
- real pumpkin;
- chestnuts;
- a square of USB board (sold in all hardware stores), or a piece of plywood, or any other dense backing;
- green corrugated paper;
- acrylic paints;
- foamiran;
- red and white satin ribbon;
- cotton buds;
- salty dough;
- floral wire and aluminum;
- scissors, heat gun.

Cut a square from a USB plate. We wash it and dry it well. We do the same with pumpkin.

We mark the place for doors and windows on the pumpkin; you can do this with a water-soluble felt-tip pen.

We make a sketch on a sheet of paper (according to the required dimensions).

We transfer the sketch to foamiran. For the doors, we cut out additional hinges and a handle.

We paint the shutters at the window with acrylic paint. Let it dry.

Meanwhile, knead the salt dough, the recipe is standard: salt, flour, water. We make a stork out of it: take a piece and give it the shape of a bird. We bend the floral wire according to the shape of the bend of the head and neck, and insert it into the body. Like this.

Take two more pieces, flatten them and form them into a drop. These are our wings. In the same way, we make a ponytail.

Let's take two steps. First we try them on the pumpkin and form the bends.

We also cut out a small rectangle for the bench.
Place all parts in the oven and dry for about 3 hours at a temperature of no more than 100 degrees.
Meanwhile, glue the pumpkin to a board, which we cover with corrugated paper. Paint the area where the window will be with black paint. Glue the foamiran parts.
Remove the dried salt dough parts from the oven and cool. Glue the threshold.

We insert two pieces of aluminum wire into the stork - legs, glue the wings and paint with acrylic paint.

Glue chestnuts to the top of the pumpkin. Insert the finished stork.
Friends, I greet you!
Autumn is golden, leaves are falling from the sky... But besides this, there are a lot of vegetables in the garden that require disposal. Adults make preparations for the winter from them, but I suggest you make crafts. Moreover, from one rather large orange fruit, which is called a pumpkin.
At school or kindergarten, teachers always ask something like this, and come up with it, because there are fairs and exhibitions ahead. To which students and preschoolers always bring their unusually beautiful and interesting pumpkin crafts.
What young people haven’t come up with on this topic are royal carriages, Jack’s head for Halloween, which we all see in November, and many other characters and even figurines. As they say, who knows what.
Of course, you can build something simple, or, if you are older and like to make things, then something more difficult. In any case, ingenuity and imagination will definitely come in handy. For kindergarten and primary school children, I suggest making various kinds of paintings from pumpkin seeds. I saw one of these works on one site https://minyt-ka.ru/podelki-iz-tykvy.html, but there, among other things, there are also a lot of new and original ideas. In general, I recommend going in and taking a look, maybe you can pick something from there.
But what no exhibition takes place without is, of course, a carriage or crew. You can also put a prince or princess there. Or maybe you are in love with Cinderella, then make a gift for her.
We will need:
- pumpkin
- kebab sticks, wooden
- paints
- plasticine
- white tape
- wire
Stages:
1. So, create wheels from wire. Make them round, and use a circle of plasticine in the middle to secure the knitting needles.

2. Then make a plasticine edging to make the wheels more powerful.

3. And then wrap the four wheels with white tape. Now take paints and a brush, apply the desired color.
You could use electrical tape, and then you wouldn’t have to paint it, because it comes in different colors, for example, blue or black would be perfect for this purpose.

4. Wrap wooden sticks or any that you have with tape or tape.

5. Now the most labor-intensive process, and of course the creative one. Remove the pulp from the orange fruit. To do this, remove the top with the stalk. And make an entrance and windows on each side.

6. After that, all you have to do is pierce the bottom with a stick and put the wheels on, the car of your dreams is ready for work and defense).

You can go the other way, using a different method and making a craft using the carving technique.
For very young creators, you can easily and quickly recreate any cartoon character. For example, the Carousel channel often shows the cartoon “Thomas and His Friends.” Take this idea as a basis.
We will need:
- pumpkin, decorative - 1 pc.
- acrylic paints - blue
- brush, glue
- eyes
- black colored paper
- scissors
- toilet paper roll
Stages:
1. First cook the pumpkin, wash it and dry it. Then use a brush to paint it blue. This needs to be done in two stages; once the first layer has dried, apply acrylic paints again and let them dry completely.

2. Use scissors to cut out the face for the main character in the form of two circles. One should come out black, the other white, of different diameters. And take the eyes and glue the face to the white circle, you can draw a nose and eyebrows, or you can use colored paper and use it to do this work.


4. In general, you will get a chimney in which you place pieces of cotton wool. This is how it will look.

I also really liked the idea with the snail, bravo to the author! True, they also used zucchini here.

Everyone will certainly remember this option if you make your own lantern from a pumpkin. Take a look at these steps to help you create this little thing.

It really looks cool and stylish, you could even call it a candlestick. Inside, by the way, is an ordinary paraffin candle.
Or these interesting toys that you can simply apply acrylic paint in the shape of a face.


Toys and figurines made from decorative pumpkins for the holiday
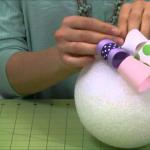
I propose to get straight to the point and make the most beautiful gift or souvenir that will remind everyone of a candlestick. It will decorate any interior at school, and even at home it will last for a year.

With this master class you will definitely want to repeat it. The instructions are detailed. Follow all the steps and step by step you will come to success.
We will need:
- small pumpkin
- rhinestones
- glue moment or glue gun
- round candle
- alcohol
Stages:
1. Start by degreasing the surface, wash the pumpkin with water, dry it and then use a cotton pad to wipe the surface with alcohol. Remove the stalk with a knife and make a small indentation on both sides. You will remove the pulp and seeds from one, and a light will shine from the other.

2. The diameter of the hole will be the same as your candle, or a little larger. Paint the fruit with any acrylic paint that suits your taste. You can also draw various kinds of patterns and drawings. Since the holiday is dedicated to autumn, you can draw leaves and twigs.

2. Pour glue into the hole and stick a candle, let it dry completely. Then decorate with rhinestones or you can take sequins. Light it up and admire your creation.

Also, from any decorative small pumpkins you can easily make interesting compositions of all sorts of funny faces. Use scissors to cut out the imaginary eyes, nose and mouth and this is what you can get.

Well, you can also make horror stories or scarecrows in the form of spiders or some other insects. These are usually brought for Halloween.


And of course, autumn is characterized by foliage and flowers. So why not take advantage of this and create some bouquets. And by the way, last time I showed you in more detail a way to preserve fresh flowers for a long time in a pumpkin, for those who haven’t read it, go ahead.

And this is what can happen.

How fun and bright it is, pleasing to the eye. Such baskets or vases, I don’t even know what to call them more correctly, and you can get such wonderful compositions from them.

Here's another solar job.

In addition to all this, you can also make a wreath along the contour of the pumpkin, look how great it looks.

A wreath on the doors will look stylish. This idea belongs to the Americans.

It is also not necessary to decorate with greenery and flowers; you can use berries or pine cones, for example.

Well, the most creative work can probably be called painting with acrylic paints.


I also came across works in the carving style, but in my opinion this is difficult to do, only masters can do it. Pear-shaped or bottle gourds work well for this purpose.

But, nevertheless, if you set yourself a goal, then maybe you will get such a thing. The main thing is desire and perseverance. And to make it easier for you to master this technique, I picked up a video from the YouTube channel. So, go for it! What gorgeous roses the author came up with.
Autumn crafts from pumpkins for kindergarten
For our most radiant children, I found such a work on the Internet, in the form of a house and ghosts. Let older children make Jack's head, but little ones don't need these scary stories. Let them be kind.

We will need:

Stages:
1. Fold a regular leaf four times, as shown in this photo. Ask your child to draw a little man or something that looks like a ghost or a ghost. It should look like this.

2. Carefully cut out the parts with scissors. And then draw the eyes.

3. Dry the collected colorful leaves of different trees and paint them with acrylic paint, which you take in an aerosol can. Let them dry.
Advice! If there are no leaves and there is nowhere to get them, then you can cut them out of colored cardboard or paper.


5. Glue all prepared products onto the pumpkin house. But how to do that? And it’s easy and simple, take a piece of plasticine and roll it into a small ball, and glue the windows, door and ghosts onto it. Good luck!
I can also offer another option: put a pumpkin in a hat and make a nose out of a carrot. Nothing special, but kids will like it and will be very excited.
We will need:
- small pumpkins
- carrots or parsnips
- toothpicks
- black paper
- old glasses
- hat
- cutting board
- black felt-tip pen
Stages:
1. So, take a parsnip or carrot, wash the vegetable, and dry it with a towel. If you are making several heroes at once, then take two or three vegetables at once. Now cut off the tip of the carrot with a knife, but so that it is not short, but about 5-6 cm. Then stick it into the middle with a toothpick.

2. And combine the parsnips with the pumpkin so that you get a nose. Draw eyes and a mouth with a marker.

3. Now all that remains is to dress up the handsome men. Put on a hat, glasses and you can, in principle, tie bows or tie a scarf. Are you grandparents or someone else?

There are even simpler options. For example, you can create this Kopatych from the cartoon Smeshariki together with your child.

The jumping bunny and the cheerful fox will amuse and delight your baby.


Or such a funny and mischievous hedgehog, apply plasticine to the back and stick toothpicks or wooden sticks there.

Here is such a funny mushroom, made not only from pumpkin, but also from zucchini.

Here, in general, the hero is completely made of modeling dough, only a pumpkin is taken as a basis, or use the same plasticine. Put on a cap or hat and the character is ready.

If you find suitable components for the body, then, for example, you can make a kitten or puppy like this.

Beautiful ideas and new crafts on the theme of Autumn using pumpkins
The decoration direction has become quite popular now and as they say in fashion or trend. Remember how you painted using ordinary paper napkins, here it’s about the same. In general, here are a few ideas in video format, take note.
Draw ornaments, lace and create your own new images, don’t be like everyone else. Make the work unique.
I want to show one work in more detail along with a description. I took it from one site.
We will need:
- white spray paint
- PVA glue
- napkins
- pumpkins

Stages:
1. Well, wash the pumpkins and wipe them dry with a towel. Then paint over them with an aerosol so that they become white; if you leave them orange, then the napkin, which is subsequently glued to the product, may allow this bright color to pass through.

2. These are the little white pieces you will get, let them dry completely. Can be painted twice.

3. Cut strips from paper napkins. Ideally, they should be long enough to wrap around the vegetables.

4. Start gluing, apply glue to the surface of the pumpkin and attach a strip, and so on, until the product turns into a bright souvenir.

5. Decorate afterwards with any satin ribbons or other decor.

6. Design the second pumpkin differently, take other napkins with a different design.

In the same way, you can decorate small pumpkins that look like pears.
Wash the vegetables in running water, dry and degrease with alcohol or acetone.

Then paint the entire surface of the pumpkin with white paint. In the meantime, while the vegetable is drying, you can cut out all sorts of pictures from different napkins, these can be any animals, insects, birds and flowers, etc.

Well, then glue it with regular PVA using a brush.

After all your efforts, an excellent result awaits you. The background can also be made monochromatic by gluing the napkin you need. Decorate with an artificial branch with leaves.

Master class Pumpkin seed tree for children
Well, now let's talk about the most basic things. In schools and kindergartens, in principle, at any time of the year, there is always a place for activities that are directly related to natural materials. So, you know everything about a pumpkin, except for the pulp there are also seeds. So why not make something original out of them?
It can be in the form of a painting, or it can be directly in the form of a real tree, which is now fashionable to call topiary.
Let's start with the first option. You will need a whole bunch of well-dried pumpkin seeds, which you can color and dry in advance with paints of different colors. You can even fry the seeds in a frying pan if you want.
For this purpose, take gel food colors (or paint with regular paints). And then drop a couple of drops of paint into a plastic bag and add seeds, shake the bag. So, shake until they are completely colored.

Then place it on a plate and let the pieces dry. In the meantime, you can draw the outline of a tree on a piece of paper.

Then color it with felt-tip pens or paints, or you can also cut out such an image from colored paper and glue it.

All that remains now is to glue the foliage from the seeds with regular PVA. This is such a beauty.
 Or here's an option that might interest you.

Or perhaps such a drawing, as you can see here, the trunk is also made of natural material.

Here's an idea to note, in the shape of a cockerel). In case someone needs it.

Well, as I promised, we are moving on to the next version of work. This is topiary. By the way, this can be done for a teacher or educator on Teacher’s Day.

Take a piece of paper and roll it into a ball. Take any sheet size, you can take two or three, depending on what size the finished product will be. Using regular white or as it is also called masking tape, cover the bun. Insert a wooden stick, it can be a twig or, alternatively, a barbecue stick or a felt-tip pen case.

After that, apply a good layer of PVA glue directly over the tape. And immediately place the seeds so that they lie tightly to each other.

Wrap a wooden stick with a satin ribbon and tie a bow. You can also decorate the ball itself with beads. For an aesthetic and shiny look, coat the product with varnish.
But cover the jar in which the tree will stand with regular twine, just wrap it in a circle. In advance, applying PVA. Pour plaster or building mixture into the container, insert the creation and let the mixture harden completely. Place cotton wool or dry grass on top to hide the real material. This is such a charming flower.

Pumpkin souvenirs Gifts of autumn: quick and very beautiful
Well, in conclusion of everything, I would like to give many more ideas. Which you can implement and conquer your friends and classmates with them when autumn-themed events take place. We usually had fairs. And you?
Of course, I took the photos from the Internet and share my findings. Take vegetables and fruits, leaves, twigs, dried flowers and create! Let your imagination fly.


Well, that's all, with this I say goodbye to you. I hope you liked these ideas and you will certainly create something yourself at home, and then show it to everyone.
Good luck, creative success! Goodbye!
Best regards, Ekaterina
Do you know how easy it is to make pumpkin decorations for your home, crafts for kindergarten and school? Learn how to sew pillow pumpkins with our step-by-step tutorials.
How to easily make home decorations out of pumpkins?

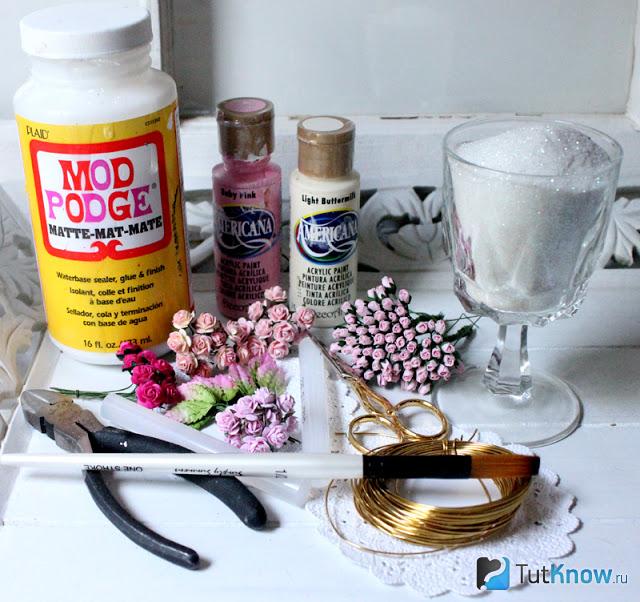
Here are some elegant decorative items you will get. To make your pumpkin so irresistible, you will need:
- dye;
- artificial flowers;
- wire;
- pliers;
- scissors;
- primer;
- shine;
- brush;
- pumpkins.
It’s better to buy a small vegetable; now they sell portioned varieties. Having purchased these pumpkins, you will need to paint them with a primer and let them dry.

Wrap the wire around a pencil or branch and cut off the excess with pliers. Screw artificial flowers to the opposite end, which can even be cut out of paper. Fix this decorative element on the tail of the vegetable, cover the peel with glitter.
Decorate several fruits like this and place them in beautiful flowerpots.

Such pumpkins will be an excellent gift, an unusual present. You can give it to friends on Halloween, when this vegetable is the center of attention.
This is how easy it is to make an elegant souvenir from a pumpkin. This is a great gift for Halloween or any other holiday.
Decorative pumpkin pillows for the sofa

To create this piece of furniture you will need:
- textile;
- scissors;
- threads;
- filler;
- a thread.

Cut a rectangle from the prepared fabric, the length of which is 2 times the width. Fold it right sides together and sew the sides on the wrong side.
Turn the resulting bag right side out and fill it with filling. Make sure that the internal contents are uniform. Sew along the edge with a basting stitch using strong thread. Tighten it and secure it in the center of the product.

Take a needle with a large eye and insert a thread into it. To sew the pumpkin-shaped pillow further, pierce the needle from the bottom to the top, giving it a flattened shape. Then, using the same thread, divide the resulting workpiece into 6 or 8 segments.

Secure the thread well by tying it in 2 knots. Make a cutting for this vegetable. To do this, you need to cut two identical oval-shaped pieces from the fabric and fold them with their right sides facing each other.
Trim the bottom edge of these blanks, it should be straight. Sew these two elements together, leaving the straight edge free for now. Fill the shape with filler through it and sew it to the pumpkin.

These are the beautiful ones you can make for your sofa.

You can make amazing items from this vegetable.
Pumpkin crafts - master class

To make such a beautiful house for a toy mouse, you will need:
- spacious pumpkin;
- newspapers;
- spoon;
- marker.

Now fill the pumpkin with newspapers, they will absorb excess moisture and allow the vegetable to dry out faster. When this paper becomes damp, remove it and add other crumpled sheets. You need to do this until the pumpkin inside dries out.

Put the dried lid back in place. Glue a porch made of thick cardboard where the entrance is located. All you have to do is sew a funny mouse or other animal like this, and you can send the craft to a competition or decorate your room with it.

If you want the fairy house to look like a real one, then place a candle inside. But the flame should not be left unattended.

See what other pumpkin crafts you can make.

In the top left photo you can see the figures, each made from two pumpkins of different sizes. Using pieces of wooden skewers, the small pumpkin is attached on top to the large one. It turned out to be a whole family. For dad you need to make a hat out of cardboard, for mom you need to make hair out of straw or yarn, and for your daughter you need to make a bow that is tied to the tail of a pumpkin.
All characters need to draw eyes and a smiling mouth, color their clothes or glue decorative stickers to these places.
No less cheerful characters are located in the top right photo. Some people need to put on a hat or glasses, glue on a mustache and attach a long carrot nose.
For pumpkin crafts (bottom left photo) you will need:
- straw;
- old hats;
- pumpkins;
- acrylic paints and brushes.
For the next DIY pumpkin craft (photo below right), you will need several of these vegetables of different sizes. From one you will make a head, from the other - a body.
- Transform small pumpkins or zucchini into bear paws. His eyes, ears and nose can be made from pumpkin scraps or squash. All this is secured with toothpicks or wooden skewers.
- A barrel of honey is also made from this vegetable. It is better to create an inscription on the surface so that it is clear what is inside. To do this, you first need to write the word “honey” on the pumpkin with a marker in block letters, then cut out the peel at this place using a stationery knife.
- Cut off the top of the pumpkin and scoop out the flesh. Dry the pumpkin using newspapers, you will get an excellent craft, and a container for storing honey.
Pumpkin for Halloween
If you need a decoration for this holiday, be sure to use this traditional autumn vegetable. For pumpkin crafts (top left photo) you will need these vegetables. The lid of each is removed, the pulp is removed, and the top edge is cut into wavy lines.
You can also cut it into squares, like for a pumpkin craft - photo top right.

To make your house look cozy in the evening, place a candle inside the vegetable and light it. If you liked carving pumpkins, then you will definitely love carving vegetables and fruits. Armed with special knives and practice, you can cut maple leaves or such amazing chrysanthemums on it.

But you can make a funny cat even without experience. The main thing is that you have two pumpkins of different sizes. Attach the small one to the large one as a head. To make Matroskin the cat, you need to remove the skin from the pumpkin in strips. Also use a sharp knife to cut out his eyes and smiling mouth. The pupils will become raisins or buttons, and the cocktail straws will turn into his mustache. Cut out the ears from pieces of pumpkins and attach them to the head with toothpicks.

Here is a list of what was needed for the job:
- two pumpkins of different sizes;
- sharp knife;
- buttons or raisins;
- cocktail straws;
- toothpicks.
All parts are dried and then coated with black varnish. When all this is dry, the ears are attached to the head with toothpicks. On the upper part of the body, metal rods with threads or screws are attached in a circle. A bowl of candles is placed between it.
When the lamp needs to provide light, it is lit and a cat's head is placed on top.

You can make these beautiful lamps with your own hands, or you can simply cut out a mask from a pumpkin and hang this decoration on the wall.

This vegetable can also be used when you make crafts on the theme of autumn. Nowadays this is very relevant, since kindergartens and schools are asked to bring such handmade works.
If growing pumpkins in your garden has become your habit, then there will be no problems with the source material. But for residents of the metropolis, getting a pumpkin is not difficult, since these vegetables are sold in stores and markets.
Pumpkin box

According to the idea, a toy mouse will live in it, but at the same time you can store all sorts of little things in this vegetable. For this DIY pumpkin craft, you need to prepare:
- pumpkin;
- cardboard;
- paints;
- tassels;
- wire;
- a twig or wooden skewer;
- thick green fabric;
- scissors;
- glue gun
To help the pumpkin dry better when you remove the top, immediately make holes for the door and windows.
- From thick green fabric, cut out a large leaf and a second small one. Glue a small one on the side of the vegetable, and a large one on its lid.
- To make a canopy over the porch, cut a strip of cardboard and fold it like an accordion. Now straighten it a little, you will have a wonderful roof, to which you need to glue the decorative elements of the sidewall.
- Cut out porch decorations from cardboard. If the material is thin, then glue together several sheets of cardboard. In the same way, make a door and a handle for it.
- You can make steps using a base of this shape. The cardboard is wetted in a mixture of water and PVA, taken in equal proportions. Now this soft pliable material is placed on the mold. When it's dry, peel it off and cover it with brown paint. When it dries, coat the steps with varnish.
- Paint the other elements of the porch in the same way and bend the wire into a railing. Stick it one side into both sides of the step.
- Make a lantern out of cardboard and attach a wire to it on one side. Make shutters, cut out tulle for curtains.
- Wrap the wire around a wooden stick or skewer, remove it and paint it yellow. Attach these tendrils to a large pumpkin leaf.
- While you have made the elements, the inside of the vegetable has dried, you can start decorating it. Attach the steps by inserting the second ends of the wire railing into the pumpkin. Attach the flashlight to the side in the same way.
- Using a glue gun, glue the shutters to the windows and attach the tulle here.

If you want, place a ladder at the back. For the steps, you can use wooden skewers or twigs, cut them into equal lengths. Tie them on one and the other side with a rope, and also paint them with brown paint and varnish.

But this is a pumpkin box, you can put various objects in it. To add strength to it, a well-dried vegetable needs to be painted with varnish and allowed to dry. To make the pumpkin shine better, coat the outside with the same clear varnish. The lid will fit better if you fold a strip of cardboard in half and glue it inside the lid, placing it on the end.

These are some wonderful pumpkin crafts you can make. If you want to quickly create a masterpiece, then make a vase from these vegetables. To do this, you just need to cut off the top and remove the pulp, dry the inside of the vegetable, and coat it with varnish. When it dries, pour water here and place flowers.

And the pulp is used in cooking. Take out the seeds, wash them, dry them and you will have a delicious, healthy treat.
See what an original gift you can make if you get a little creative. Then the pumpkin will turn into a clock.

Also prepare its shell, coat the inside with varnish. Place the clock mechanism here and attach the hands to the outside. Place artificial flowers in the upper hole of the round-sided beauty, and an extraordinary present is ready.
After such inspiring work, it's time to have a tasty snack. Make pumpkin puree soup. It is done very simply.
- Remove the seeds from the pumpkin along with the adjacent fibers. They need to be thrown away, and the seeds should be washed and dried. Carefully remove the pulp from the pumpkin and cut it into cubes. Place in boiling meat broth or regular boiling water.
- Cook for 20-30 minutes - the pumpkin should become soft. Then turn off the heat, wait until the soup has cooled and puree it using a blender, add salt. To prevent it from being too liquid, it is better to remove excess liquid in advance.
- Heat the cream soup. Pour it into the pumpkin. Place a piece of butter in the center or pour in a little milk. Decorate with greens.

After such a delicious snack, you will want to make other crafts.

You can carve flowers on the surface of this queen of beds or decorate it by taking:
- pumpkin;
- bush chrysanthemums;
- toothpicks;
It's quite easy to make a flower basket out of a pumpkin. You need to cut the vegetable as in the photo, remove the pulp, and dry the pumpkin. Now flowers are placed inside the basket, and if you wish, fruits.

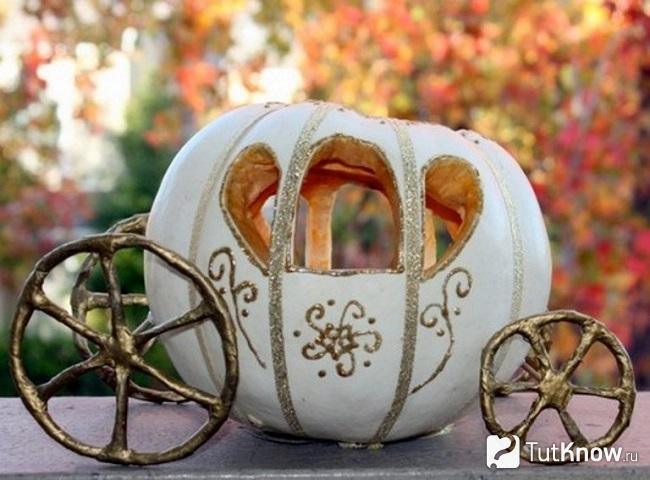
How easy is it to make a pumpkin carriage?
If Cinderella knew what kind of carriage could be made from a pumpkin, she would probably want to ride in such a carriage.
Take:
- pumpkin;
- marker;
- spoon;
- gold paint;
- wire;
- foil.
- On the pumpkin, draw the outlines of the doors of the future carriage, cut along these markings with a knife. Use a spoon and knife to remove the pulp.
- When the pumpkin is dry, paint the monograms with gold paint.
- Twist wheels from wire and wrap foil around them. Pierce the pumpkin with a metal rod and secure these connecting elements to the wheels using wire. This is how you need to make the front and back pair.
If you have metal parts in your workshop, make wheels from round ones. Turn others into doors, windows and other elements of the carriage.

Here are some wonderful pumpkin crafts you can make. The main thing is desire and imagination. And to inspire you even more, we have prepared useful master classes on this topic in video format:
Here's a video on how to make an autumn pumpkin vase:
We also recommend
 New Year's topiary “Berries on the Snow”: master class, photos and videos Making topiary for the New Year
 What crafts can you make from clothespins with your own hands?
 How to make a night light with your own hands: the best ideas for handmade
 DIY pumpkin crafts for kindergarten and school
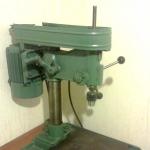 Review and description of tabletop drilling machines Tabletop drilling machine ns 12 m passport
 What devices can work in “weak” networks?