How to dock a plastic apron in the kitchen. Kitchen apron made of PVC panels - material features. We choose plastic panels for the kitchen apron. Attaching the apron to the wall
A plastic apron is good because it allows you to update the interior of the kitchen super-quickly, on a budget and without dirt. The only condition is that the plastic panel cannot be adjacent to the gas stove (although this is fixable). Otherwise, it is an excellent "workhorse", heat and moisture resistant, easy to maintain and install.
However, plastic plastic is different both in price and in performance. Today we will consider three types of plastic aprons for the kitchen:
- Made of ABS plastic;
- Made of polycarbonate;
- From PVC.
Option 1. ABS plastic apron
This kind of plastic apron is flexible and lightweight sheets of polymer material, named after the three monomers Acrylonitrile, Butadiene and Styrene.


Dimensions: The ABS plastic apron is sold in sheets 60 cm wide, 1.5 mm or 2 mm thick and 3 or 2 meters long. Many firms can make an apron not standard sizes and configurations, for example, 77 cm high or 120 cm high in the hood area.
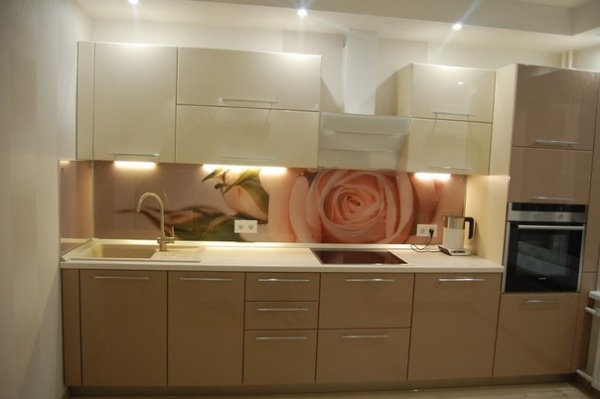
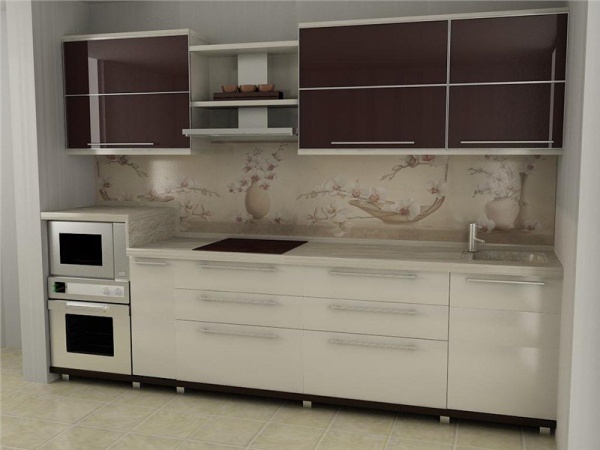
Design: Apron made of ABS plastic is most often made out by photo printing, and therefore outwardly it is very similar to a glass apron-skinali. The image is selected from the manufacturer's catalog or a customer's print is applied. Then the picture is covered with a heat-resistant glossy or matte varnish coating. Another option for the design of a plastic apron is with a metallized mirror coating.


Mounting Features: ABS plastic panels are most often mounted on liquid nails for polymers. They can also be installed using special wall profiles or screwed onto self-tapping screws.
- Not all liquid nails are suitable for installing an ABS plastic apron, but only those designed for polymers.
- Availability - the price of one panel 3 m long is about 2000 rubles, which is much lower than the cost of an apron made of glass, MDF or tiles. In addition, the ABS plastic kitchen apron saves on shipping and installation costs.
- Impact and bending strength.
- Resistant to minor scratches.
- Flexibility, due to which the apron is easily installed even on a not perfectly flat wall, as well as a curved one.
- Thanks to its flexibility and lightness, the apron very easy to transport- it is enough to roll the sheet into a roll and bring it home yourself.
- Easy to install- a plastic apron can be quickly and without dirt installed with your own hands (on liquid nails).
- ABS plastic apron not afraid of wet cleaning with aggressive cleaners and light abrasives.
- Decorative, the ability to apply any image or mirror coating to the panel.
- Heat resistance - the material can withstand heat up to 80 degrees, does not emit toxic substances during combustion and melting.
Disadvantages of ABS kitchen apron:
- ABS plastic is not suitable for finishing the apron kitchens with gas stove, since from prolonged heating and high temperatures deformed. The material withstands heating up to 80 degrees and only short-term heating at a temperature of 90-100 degrees.
- Weak touches with a knife are not terrible for a plastic apron, but, if you hit the surface with force, then a scratch or chip will inevitably appear on it.
- ABS plastic fading in the sun.
- Can't handle contact with acetone and solvents.
- If the base wall is very curved, then the plastic apron can come in waves.
- The service life of the ABS panel is short and is about 3-5 years depending on the load.
Option 2. Apron made of acrylic glass (polycarbonate, plexiglass)
Acrylic glass apron is an inexpensive, but more impact-resistant and lightweight alternative to tempered glass and skinali. Outwardly, polycarbonate is practically indistinguishable from silicate glass - it is just as smooth, shiny and transparent.
Dimensions: Acrylic glass thickness is 3-4 mm, width is 60 cm, and the standard length of one panel can be 3 or 2 meters.
Design: Acrylic glass apron is most often made out by photo printing, but it can also be colored (solid) or simply transparent.

Transparent polymer glass can protect painted or wallpapered walls and even hung photographs, magazine clippings, letters and postcards.


Homemade design ideas for a clear polycarbonate apron
As for installation, anyone can install an acrylic apron with their own hands, but still the work requires accuracy, especially since the sheet tends to bend. Holes for sockets and fasteners are made with “feathers” in several approaches. If necessary, the dimensions of the sheet can be adjusted with a grinding machine. An acrylic apron is installed to the wall using special fasteners for glasses and mirrors or using aluminum profiles.
Advantages of an apron made of acrylic glass:
- Acrylic glass clearer than ordinary glass;
- low cost compared to glass skinali - from 5 t.r / sq. m;
- Impact resistance (breaking and even more so breaking a plastic polycarbonate apron is almost impossible!), bending strength;
- Does not fade in direct sunlight;
- fireproof- polycarbonate does not ignite even with an open fire, instead it melts without forming toxic substances;
- Can be installed by yourself.
- In the category of plastic kitchen aprons acrylic skinali - most expensive material.
- acrylic apron does not tolerate cleaning with abrasives and aggressive cleaning agents.
- It is not recommended to use near gas stove .
Option 3. PVC apron
If you need a super-economical and quick solution, say, for finishing the backsplash of a country house kitchen or rental housing, then we suggest considering PVC wall panels. Aprons made of PVC come in two formats: sheet and rack (in the form of lining).
Dimensions: The most common format for panels is 950x480x3 mm, lining - 3000x100x10 mm, 3000x100x12.5 mm, 3000x195x12 mm and others.

Design: The panels are sold with a ready-made design - with patterns and pictures applied by offset printing (drawing + protective varnish). Also pvc apron can imitate natural finishing materials, for example, brickwork, mosaic, leather, stone, etc. The lining can be white, “wooden”, “stone”, sometimes it is complemented by patterns and colored / metallized edging. The coating of the PVC apron can be glossy (for laminated panels) or matte.
- The wear resistance of glossy panels is slightly higher than matte ones.


Mounting Features: Their PVC kitchen apron is installed on glue, liquid nails or screws. If desired, PVC lining can be laid both vertically and horizontally.
Advantages of PVC apron:
- Ease and speed of installation with your own hands;
- Low price - 160-300 rubles / sq. m.
Cons of a PVC kitchen apron:
- Low stability to mechanical damage and abrasion.
- Fading and yellowing over time from exposure to sunlight and cleaning products.
- Low temperature resistance: Deformed at temperatures above 80 degrees, easy to ignite, when burned, low-quality PVC can release toxic substances.
Tip 1. When buying a plastic apron, make sure that it has a quality certificate and is suitable for decorating kitchen walls, that is, at least it does not emit toxic substances (including during combustion / melting), it has moisture and heat resistance.
Tip 2. The service life of any plastic apron can be significantly extended if a transparent glass screen is additionally installed in the stove area (over the apron as shown in the photo below). So you save the panel from grease and dirt and, accordingly, from cleaning and detergents. In addition, the glass screen will be able to protect the plastic from the open fire of the gas stove.

By the way, about the gas stove. It is generally accepted that a plastic apron is incompatible with it, but this is not entirely true. If desired, you can install the stove at a distance of 15 cm from the apron or install a glass screen, as we noted above.
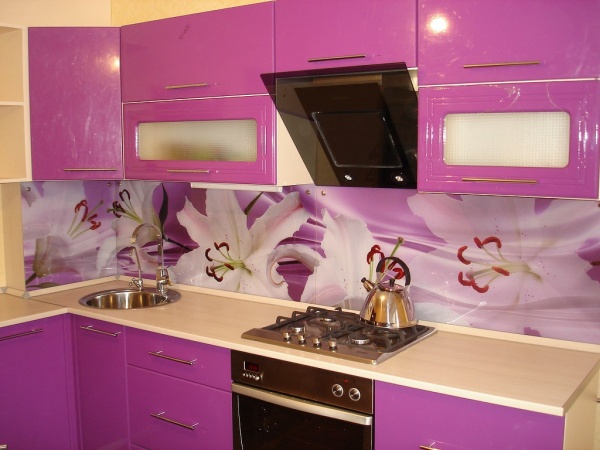
Tip 3. Most often, plastic panels are decorated with photo printing - patterns, textures, beautiful photographs or drawings. Such a catchy design must be chosen much more carefully than ordinary tiles or MDF, otherwise the apron will make the interior clumsy and quickly get bored. There are two main principles to follow:
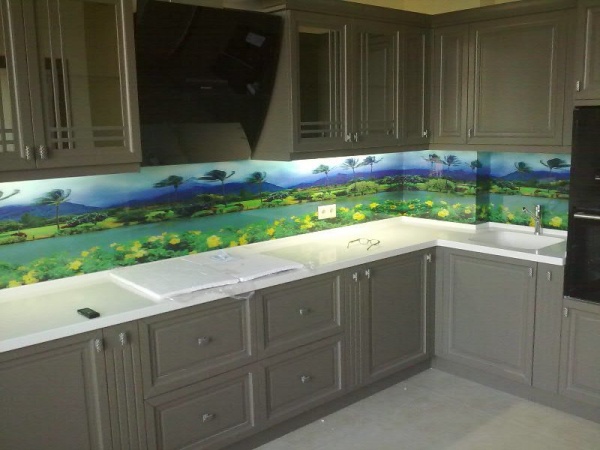
- The kitchen apron should echo the color scheme and style of the interior as a whole. So, for example, the color of the panel can be matched to the tone of the facades of the headset and / or other elements of the situation, say, to match curtains or wallpaper .

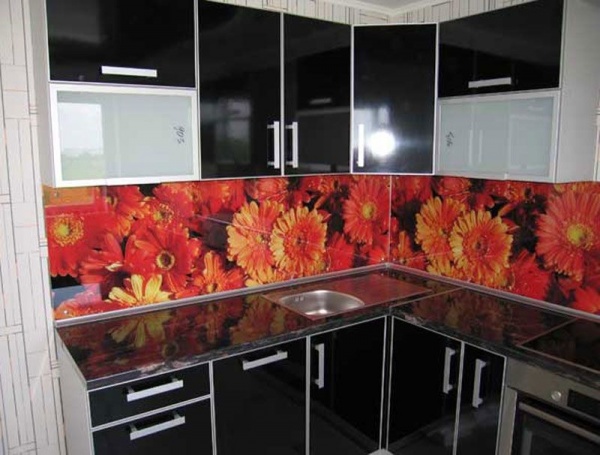
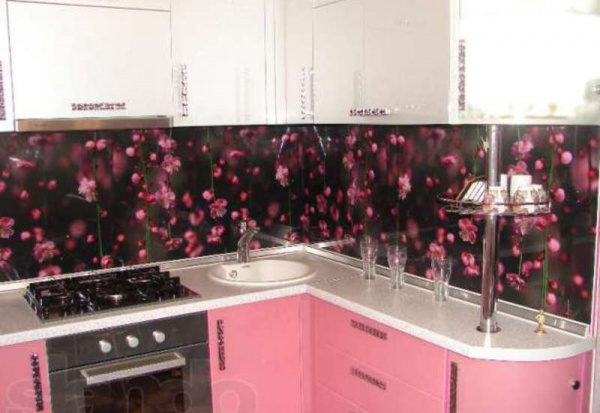
Afraid to make a mistake with color and design? Choose an apron in a neutral color, such as white, light gray or beige, perhaps with a simple floral or geometric print (diamonds, stripes, plaid). But dark colors should be avoided - even the smallest speck of dust or a drop of water will be noticeable against their background.

- The more complex, detailed and multi-colored the interior of the kitchen, the more concise the design of the apron should be. If the walls are pasted over with bright wallpaper with a pattern or the facades of the headset are decorated with gilded carvings, then it is better to choose an apron in a plain color or with a discreet pattern.

Laconic design of a plastic kitchen apron
If the kitchen set and the interior are decorated minimalistic, then the plastic apron can and should be chosen bright.

Tip 4. Want to be able to change the design of the apron according to your mood? This is possible with a double-sided ABS or PVC backsplash installed not with glue, but with wall profiles. A double-sided apron can be purchased at IKEA or ordered in some workshops, while profiles are sold in building hypermarkets and in the same IKEA.

IKEA plastic double-sided apron
Do-it-yourself plastic apron installation
To install an apron from plastic panels, sheets or lining with your own hands, you need to do the following:
- We determine the dimensions of the apron - it should be such that it protrudes 1-3 cm beyond the countertop, but in height from the countertop to wall cabinets it can be anything - directly to the level of the cabinets, go a little behind them or be lower. In the latter case, you need to properly seal the joint between the sheet and the wall and decorate the visible ends with molding;
- We cut plastic panels, sheets or lining with a hacksaw with fine teeth. Some panels are cut with a regular cutter as shown in the photo below.

- We fix the panel on the wall. This can be done in three ways:
- Express method: just glue the plastic to the wall with liquid glue, which is applied to the wall and panels with a distance between adhesive strips of about 15 cm. This method is good if the panels are glued only to the backsplash, and not to the entire wall / walls, otherwise dismantling would be problematic. In addition, it is advisable to glue the panels on the base, prepared in the following sequence: primer, leveling and sealing the cracks with plaster to a satisfactory or good condition (you can not bring it to the ideal), then after the plaster has dried, the primer is applied again.
One of the most popular and in demand today are kitchen aprons made of plastic. Such finishes are distinguished by the widest range. In stores you can find panels of various colors. Original copies with drawings and various patterns are also in great demand. Today we will take a closer look at how to properly attach plastic aprons so that they hold firmly and securely.


What are they?
The so-called apron is installed in the working area of \u200b\u200bthe kitchen. It is in this area that cutting table, stove and sink. In most cases, aprons are installed along one of the walls of the room. Since food is being cooked in that area, the wall there may lose its presentable appearance due to splashes and grease stains. This is where an apron made of a more practical material comes to the rescue, which can be easily washed from any dirt.


Advantages and disadvantages
Plastic aprons are among the most popular, because they have a number of important advantages over other options for such finishes.
- Plastic aprons are inexpensive. This feature is especially important if we are talking about the design of a large kitchen, where a fairly large apron is needed to cover a spacious working area. If desired, such material can be replaced with a new one without serious financial losses. Such a finish with the installation of tiles can cost a tidy sum, and installation work in this case will become much more complicated.
- When working with such material around the master will be relatively clean. There will be no dirt or clouds of construction dust. As a result, there will be almost no construction debris left.


- Installation of a plastic apron will not take much free time. Usually it takes no more than one day, especially if everything is done correctly according to the instructions.
- This finish looks attractive. Moreover, in stores you can find aprons made of plastic, made in a variety of colors and shades. Popular and copies with images. For example, it can be cute floral motifs, calming landscapes, animals or kitchen-themed drawings.
- A minimum of dirt and grease adheres to plastic aprons. If this happens, they can be easily washed without spending a lot of time and effort. To do this, you need to stock up on a regular damp sponge. Plastic bases can be washed using household chemicals. This will not affect the material in any way. Do not just turn to abrasive products - they can scratch the plastic.


- The plastic apron does not have a large number of joints in which dirt, grease and dust accumulate. The seams in such options are barely noticeable, and pollution does not clog in them.
- The weight of the plastic apron is very small, which makes it easier to work with it. Yes, and such a detail will not create serious loads on the wall.
- Plastic is not afraid of harsh operating conditions. This material cannot be damaged by high humidity or temperature changes. When exposed to aggressive sunlight, the plastic apron will not lose color saturation.


- A high-quality plastic apron will not emit a sharp chemical smell, indicating its toxicity.
- The installation of such materials is not difficult. Even an inexperienced home master can easily cope with such work.
- Plastic panels installed in an appropriate way can be easily replaced as soon as you get tired of them and want something new.


However, a plastic apron is not perfect. And such finishing materials have their own weaknesses, which must also be taken into account. Let's get acquainted with the disadvantages of such instances.
- If the plate is located too close to the plastic apron, it may become deformed. That is why professionals are advised to turn to such materials if the house does not have a gas, but an electric or induction stove.
- Plastic panels do not tolerate cleaning with abrasive products. Of course, they are more efficient, but such an apron cannot be cleaned with their help. Otherwise, the finish will simply quickly lose its presentation. It will be impossible to correct the situation - you will have to change the apron to a new one.


- In many cases, such a detail in the kitchen can only be installed if the wall surface is perfectly flat. Since in modern dwellings there are big problems with the evenness of the walls, it is necessary to prepare the grounds for the installation of plastic panels in advance. This can take a lot of time, effort and materials, especially if the walls have significant damage.

How to fix on the wall?
It is quite possible to install a kitchen apron with your own hands. Let's get acquainted with several ways to fix such a finish.
On guides
As mentioned above, a plastic kitchen apron is inexpensive. That is why such a finish is often replaced as soon as the old one gets bored. If you assume that over time you will want to turn to the installation of new plastic parts, then you should install them on the wall using guides, which are metal rails.
Guides must be attached to the walls using self-tapping screws. Plastic panels are simply fixed on these rails like rails. If necessary, they can be put forward and new elements put in.


self-tapping screws
If you want to install a plastic kitchen apron thoroughly and are not going to replace it in the near future, then you should turn to fixing it with self-tapping screws. Plastic can easily be drilled through. But keep in mind that for this method of installation, you will need to prepare the walls - they must be perfectly even, without potholes and drops. Do not be afraid of marks from self-tapping screws that appear on plastic decorative coatings. If desired, they can be easily and quickly closed using special color-coded plugs.
With this method of fastening, the plastic apron will not fit snugly against the wall base. Behind this detail will remain a small free space. Many craftsmen hide unattractive electrical wiring there, making the interior more aesthetic and neat. In addition, the apron, mounted on self-tapping screws, can also be easily removed as soon as you want.

On the crate
This is another popular way to install a plastic apron. It should be addressed only if the kitchen area is not too small. Many users prefer not to waste time by installing the apron directly on the rough base of the wall, but here you can encounter significant irregularities. In this case, the installation of the crate can save the situation.
The crate is a set of metal slats or wooden blocks that are attached to the wall base along the perimeter of the future kitchen apron. First, a kind of square is formed on the wall, which has the same dimensions as the plastic part. After that, vertical and horizontal strips are installed inside this square with the help of self-tapping screws. These details are needed to make the design stronger and more reliable. A plastic panel is also attached to the resulting crate with the help of self-tapping screws. At the same time, a small free space will remain between the apron and the wall, where it will be possible to place electrical wiring or build a beautiful backlight.


On glue
You can attach a plastic apron using a high-quality adhesive composition. This method of installation is rightfully recognized as the simplest and most understandable. Even a beginner can cope with its implementation.
In this case, for fixing, you can use a special high-quality glue or good liquid nails. Of course, it is better to turn to the second option. The glue will need to be applied to the prepared wall base in thin stripes, keeping a very small gap between them. After that, the selected plastic panel just needs to be pressed against the applied adhesive.


The main advantage of this installation method is its simplicity and speed of execution. However, we must take into account that sticking a plastic apron will work well only in a well-prepared basis. The wall should be perfectly flat and neat. It should not have traces of the old finish. Potholes, bumps, chips and cracks are also unacceptable.
Do you want to create a beautiful and original interior in your kitchen and at the same time for a reasonable price? In this case, pay attention to plastic aprons for finishing the work area. Modern plastic in terms of strength, performance and durability is a worthy competitor to glass and ceramic tiles when creating a kitchen apron. And the use of photo printing allows you to make the kitchen more comfortable and beautiful.
To enhance the color balance in the room, designers recommend using kitchen aprons that contrast with the furniture. When combining different shades with plot drawings, you can design and highlight the work area in a rather original way.

In case if bright colours do not fit with the general interior, then you can install transparent plastic, making a backlight behind the apron, which will add depth, visually expand the space and create a festive mood.
A plastic kitchen apron with photo printing is an excellent solution in terms of price-quality ratio and ease of installation. It is worth figuring out what plastic is inferior to glass, ceramic tiles and other facing materials, and what it can compete with.
Types of plastic kitchen aprons
Among the produced plastic panels for creating a kitchen apron, there are three main types:
- PVC panels are produced with a width of 100-500 mm, a length of 2600, 2700 and 3000 mm and a thickness of 5-10 mm. During installation, seams are formed and if the installation is done unprofessionally, then there may be gaps into which fat and water will subsequently enter, and this can create an environment for the development of microorganisms. To avoid problems, it is better to make a plastic apron with photo printing to order and entrust its installation to specialists.
- Sheet plastic. It makes it possible to obtain a smooth and seamless surface, for which a panel of the appropriate size is cut out of a solid canvas, which is then mounted on the wall.
- The most durable is another type of plastic - carbonate glass. This material is transparent and has refractory and metal-like characteristics. It is very difficult to break and almost no dents form on it. And so that, besides his functional purpose the kitchen apron was also pleasing to the eye, it is worth ordering panels with photo printing.
Advantages and disadvantages of plastic panels
Using plastic aprons with photo printing in the kitchen has a lot of advantages, namely:
- low cost compared to other materials;
- high moisture resistance;
- resistance to high temperatures;
- resistance to household chemicals and food acids and fats;
- bacteria, mold and other microorganisms do not multiply on the surface;
- lightness and ease of care;
- light weight;
- the possibility of self-assembly.
However, the most important advantage of using a plastic apron in the kitchen is that it can be replaced at any time if the color or pattern is already boring. And you don't even have to move the furniture.
However, there are also certain disadvantages:
- the likelihood of plastic deformation when located close to the gas stove burners, and for this reason, experts advise mounting a plastic apron only if there are induction or electric stoves;
- high wear, especially when using coarse brushes and cleaning agents with abrasives during maintenance. However, if the apron has a photo print with a small pattern, variegated colors and imitation of natural materials, then minor scuffs and scratches will be invisible.
Where can I buy a plastic apron
Plastic is a modern durable material that is cheaper than other finishing materials. So, now you can buy a plastic kitchen apron at a fairly reasonable price, if you resort to a budget option. However, the cost of a plastic apron with photo printing, and even more so made to order, is much higher than usual, but it's worth it.
Not everyone knows where you can buy a plastic apron for the kitchen. It can be bought in specialized stores of building materials or furniture fittings and accessories. Store consultants can give expert advice on how to install an apron on the wall, how many panels are needed, which panel should be preferred.

Most consultants recommend buying finishing material from well-known foreign manufacturers, as it is considered to be of higher quality. When purchasing plastic panels, it is necessary to check that the seller has a hygiene certificate for the material in order to exclude the purchase of fakes made on the basis of plastics that emit toxic substances when heated.
Fixing a plastic apron with your own hands
There is nothing difficult in installing a plastic apron with photo printing and every man can do it, at least once, holding a screwdriver in his hands.
The dimensions of the kitchen set determine the dimensions of the plastic apron, which should completely cover the working area of \u200b\u200bthe wall. For this reason, you first need to determine the size of the panel. In height, the plastic apron should be one centimeter below the countertop and reach the bottom edge of the wall cabinets. Usually the distance between the tabletop and the hinged sections is 60 centimeters.
It is advisable to cut plastic panels for a kitchen apron with a sharp manual hacksaw with fine teeth. An electric jigsaw will cope with this task much faster, but without the proper skill and ability it will be quite difficult to make an even and high-quality cut.
Attaching a kitchen apron with photo printing can be done in three ways:

Caring for plastic aprons
Caring for a plastic kitchen apron is very easy and simple. It must be periodically wiped with a soft sponge dipped in warm water using dishwashing liquids. Next, the surface of the plastic panel should be wiped dry with a dry soft cloth so that there are no traces and stains from water. It is also worth remembering that experts categorically do not recommend using products with abrasive substances to clean the plastic surface, so as not to scratch or erase the pattern, if any.
You also need to watch out for children who everyone loves to test for strength, and the plastic panels of the kitchen apron are easy to pierce or scratch with any sharp object. However, this is more likely to apply to cheap low-quality plastic, while more expensive and high-quality panels from the best manufacturers All these troubles do not threaten.
Afterword
As can be seen from the foregoing, one of the most problematic areas of the kitchen, which is daily exposed to moisture, steam and grease, can be given a rather attractive appearance just install a plastic apron with photo printing. Installing plastic panels in the kitchen in the working area will not only give the room a special personality, but will also allow the housewives to save quite a lot of time and effort spent on cleaning.
Do you want to update the working area in the kitchen space, but are limited in financial and time resources? An excellent option in this case would be an apron in the kitchen made of plastic. In this article, we will analyze the installation procedure, the nuances of installation and answer the most frequently asked questions.
Benefits of plastic
Consider what advantages plastic has over other facing materials before attaching an apron:
- This type of work does not require building skills and special tools and can be done by hand.
- It is possible to carry out installation in one day, because preliminary preparation of the base is not required.
- Absence of an abundance of dust and debris during installation.
- Affordable price for lamellas and fixing material.
- Huge selection of colors and textures. You can easily find plastic that blends harmoniously with kitchen set, countertop or basic wall decoration.
- Easy to care for and use, there is no need for daily rubbing, just wipe regularly with a damp sponge.
Of course, it should be noted that the plastic coating has some disadvantages. The most significant include:
- Positioning the hob too close to the wall can cause the plastic to warp when exposed to high temperatures.
- Abrasive and aggressive chemical metal brushes used in the cleaning process are capable of breaking the integrity of the pattern applied to the panel in a short time.
Varieties of plastic panels
The range of plastic panels has long ceased to be limited to only a white narrow lining. Today, the market is filled with samples of lamellas imitating wood, stone, leather, mosaics, as well as photo-printed panels.
You can assemble an apron for a plastic kitchen from the following types of material:
- Plastic lining 100 - 120 mm wide, up to 3 m long.
- PVC panels with a seamless connection, the width of which ranges from 150 mm to 500 mm and a length of 2.7 - 3 m.
- PVC wall sheet 1035 x 500 mm.
- Kitchen aprons made of polycarbonate, the dimensions of which are 3x600x2000mm; 3x600x1000mm; 3x600x3000mm.
Based on the dimensions of the kitchen apron, the material is calculated and selected. When buying the required quantity, you should start from the length and width of the panels, at which the minimum amount of waste will remain, and therefore it will be possible to save some of the financial resources.
We mount the apron
Depending on the chosen plastic, the method of its installation also depends.
In cases where the base of the walls does not have dents, bulges, irregularities and is located in a single vertical plane, the fastest installation of plastic panels can be done by gluing an apron onto liquid nails.
If the wall has a number of the above defects, a plastic apron in the kitchen is installed on a pre-mounted crate. Let's consider both methods.
Mounting on a crate
crate
To assemble the crate, a wooden beam, PVC guides, thin slats (shingles), or a galvanized profile are used.
Important. When there is a need to hide water or gas pipes and electrical wiring under the kitchen apron, a gap is left between the base of the wall and the crate, in other cases thin slats can be dispensed with.
The kitchen belongs to rooms with high humidity and frequent temperature changes, and these are the most favorable conditions for the growth of mold fungi. Therefore, initially it is necessary to minimize the likelihood of this unpleasant process. To do this, it is enough to treat the surface of the walls with antifungal and antiseptic impregnations. If you prefer a wooden beam for assembling the crate, it will not be superfluous to impregnate it with hydrophobic impregnation. After that, the wood will lose its ability to absorb moisture, which is necessarily formed during the cooking process.
Depending on the planned arrangement of the panels (vertical or horizontal), battens are mounted. Standard distance from countertop surface to bottom edge kitchen cabinets is 600 mm, sometimes with a vertical arrangement of lamellas, only 2 horizontal slats are stuffed, this is enough to withstand the weight of the plastic. However, we strongly recommend installing at least 3 beams to increase the rigidity of the pavement.
In cases where a horizontal arrangement of lamellas is planned, the pitch of the bars is 200 - 400 mm. Fasten it vertically to the wall on the dowel nails every 250 mm. In this case, the extreme bars are stuffed strictly at the level of the location of the first and last panels.
During the installation process, it is necessary to use the building level and make sure that the surface of the crate forms a single vertical plane. This necessary condition to create a smooth plastic base.
Installation of lamellas
To ensure accurate panel connections in the corners of the kitchen, as well as the finished look of the ends, start strips and inner corners are purchased. The connecting fittings have a variety of colors and you can easily choose the right elements for the plastic used.
- In the upper part of the crate, a starting bar is mounted, which can be easily attached with a construction stapler.
- If you plan to install the skirting board on the countertop, then there is no need to mount the starting bar, because the joint will be hermetically protected and decoratively decorated.
- Depending on the configuration of the kitchen, the required number of internal corners and vertical starting strips are attached.
- Sometimes in the kitchens there are water heaters that are at the level of the apron. In this case, the starting bar is mounted around them.
- Lamellas are cut into strips according to the given sizes. It is better to use a wallpaper knife or a hacksaw for metal for cutting. If necessary, cut holes for sockets. If you decide to use an electric jigsaw or grinder, remember that too high a speed can lead to melting of the plastic at the cut points.
- Options in which you do not have to cut the last panel in width are very rare. It is much more convenient to mount the trimmed bar in the first place.
- The first lamella is inserted into the grooves of the end strips and pushed in until it stops. The free edge is fixed with self-tapping screws or building brackets.
- Subsequent panels are mounted in the same way. Between themselves, each section is fastened with a groove-comb connection, and to the crate with brackets or small self-tapping screws.
- Install the kitchen plinth, carefully sealing the joint between the base of the plastic coating and the countertop. The use of aquarium sealant will help to make a quality connection through which liquid from the tables will not leak.
- In a similar way, a crate is assembled from plastic guides, but in this case, to fix the lamellas, instead of staples and self-tapping screws, specially designed clamps are used.
gluing
If the wall is smooth without defects, you can glue the apron to the base. Such installation will take quite a bit of time and can be done in a few hours.
In cases where there is wallpaper on the walls, they must be removed. The wall is cleaned of impurities of grease, dust, other contaminants and must be primed. Wet room primers with antibacterial and antifungal composites should be preferred.
- You should not save on glue, its quality should not cause the slightest doubt.
- A cylinder with an adhesive composition is installed in the gun, and distributed over the surface of the plastic in zigzag movements.
- Apply the treated area to the wall, press down well and hold for some time until the adhesive adheres.
Gluing the apron to the wall will not be difficult, even for those who are engaged in repair work for the first time. Having given preference to polycarbonate sheets with photo printing, you will not have to trim in width, because they are produced in standard sizes with a width of 600 mm, and their length varies and is 1000 mm, 2000 mm, and 3000 mm. Although there are options for making an apron for individual orders, taking into account the size and selected pattern. You just have to stick it on the base.
Video: Installation of a plastic apron
Do you want to update the work area in the kitchen space, but are limited in money and time resources? good option in this case, the apron in the kitchen will be made of plastic. In this article, we will analyze the installation procedure, installation aspects and answer more frequently asked questions.
Let's consider what advantages plastic has over other facing mi, before attaching the apron:
- This type of work does not require a system of abilities and special tools and can be completely done by hand.
- It can be installed in one day, because preparatory preparation of the base is not useful.
- No wealth of dust and construction debris during installation.
- Affordable cost for lamellas and fasteners
- Huge selection of colors and textures.
It will be easy to find plastic that harmoniously combines with a kitchen set, countertop or basic wall decoration.
- Easy to care for and use, there is no need for everyday rubbing, it is enough to wipe it often with a moistened sponge.
Of course, it should be noted that the plastic coating has some drawbacks. More important ones include:
- Placing the hob too close to the wall can cause the plastic to deform under high temperatures.
- Abrasive and brutal chemical iron brushes used in the cleaning process are capable of breaking the integrity of the pattern applied to the panel in a short time.
Varieties of plastic panels
The range of plastic panels has long been not limited to snow-white narrow lining.
Now the market is filled with standard lamellas that imitate wood, stone, leather, mosaics, as well as photo-printed panels.
You can assemble an apron for the kitchen from plastic from the following types
- Plastic lining width - mm, longish up to 3 m.
- PVC panels with a seamless connection, the width of which varies from mm to mm and the length is 3 m.
- PVC wall sheet x mm.
- Kitchen aprons made of polycarbonate, the dimensions of which are 3xxmm; 3xhmm; 3hmm.
Based on the dimensions of the kitchen apron, they calculate and choose. When buying the right amount, you should start from the length and width of the panels, at which a small amount of waste remains, and therefore it will be possible to save some money.
We mount the apron
Depending on the chosen plastic, the method of its installation also depends.
In those cases where the base of the walls does not have dents, protrusions of irregularities and is located in a single vertical plane, the fastest installation of plastic panels can be done if an apron is glued to watery nails.
See also: Professional advice on installing the crate for plastic panels
If the wall has a number of the defects listed above, the plastic apron in the kitchen is installed on a pre-mounted crate.
Let's look at both methods.
Mounting on a crate
crate
To assemble the crate, use a wooden beam, PVC guides, thin slats (shingles), or a zinc-coated profile.
Important. When there is a need to hide water or gas pipes and wiring under the kitchen apron, a gap is left between the base of the wall and the crate, in other cases thin slats can be dispensed with.
The kitchen belongs to rooms with high humidity and frequent temperature changes, and these are more suitable conditions for the growth of mold fungi.
Therefore, first you need to minimize the possibility of the appearance of this nasty process. To do this, it is enough to treat the surface of the walls with antifungal and disinfectant impregnations. If you have given preference to a wooden beam for assembling the crate, it will not be superfluous to impregnate it with hydrophobic impregnation. After that, the wood will lose its ability to absorb water, which is certainly formed during the cooking process.
Depending on the planned arrangement of the panels (vertical or horizontal), the battens are mounted. The usual distance from the surface of the countertop to the lower edge of the kitchen slates is mm, from time to time, with a vertical arrangement of lamellas, only 2 horizontal slats are stuffed, this is enough to withstand the weight of the plastic.
In those options when horizontal placement of lamellas is planned, the pitch of the bars is - mm. Fasten it vertically to the wall on the dowel nails every mm. In this case, the last bars are stuffed strictly at the level of the location of the first and last panels.
During the installation process, you need to use the building level and make sure that the surface of the crate forms a single vertical plane. This is a necessary condition for creating a smooth plastic base.
Installation of lamellas
To ensure careful panel connections in the corners of the kitchen, as well as the finished look of the ends, starter strips and internal corners are obtained.
The connecting fittings have a variety of colors and it is easy to find suitable elements for the plastic used.
- In the upper part of the crate, a starting bar is mounted, which can be easily attached using a construction stapler.
- If you plan to install the skirting board on the countertop, then there is no need to mount the starting bar, because the joint will be hermetically protected and decoratively decorated.
- Depending on the configuration of the kitchen, the required number of internal corners and vertical starting strips are attached.
- Sometimes kitchens have water heaters that are at the level of the apron.
In this case, the starting bar is mounted around them.
- Lamellas are cut into strips according to the given dimensions. It is better to use a wallpaper knife or a hacksaw for alloy for cutting. If necessary, cut holes for sockets. If you decide to use an electric jigsaw or a grinder, remember that very high speeds can lead to melting of the plastic at the cut points.
- Variants in which it is not necessary to cut the last panel in width are very rare. It is even more convenient to mount the trimmed bar in the first place.
- The first lamella is inserted into the grooves of the end strips and pushed in until it stops. The free edge is fixed with self-tapping screws or staples.
- Subsequent panels are mounted in the same way.
Between each other, each section is fastened with a groove-comb connection, and to the crate with brackets or small self-tapping screws.
- Install the kitchen plinth, painstakingly sealing the joint between the base of the plastic coating and the countertop. Using an aquarium sealant will help make a high quality joint that won't seep liquid off the tables.
- In a similar way, a crate is assembled from plastic guides, but in this case, in order to fix the lamellas, instead of staples and self-tapping screws, specially designed clamps are used.
We also recommend
 General characteristics of the zodiac sign Sagittarius Sagittarius character by date of birth
 Monkey male horoscope Male born in the year of the monkey character
 The Soviet "aircraft carrier killer" was observed from space Excessive cost of the project summed up
 Power yoga - exercises for those who want to lose weight and find harmony with themselves Dynamic power yoga
 Public suicide of Bud Dwyer
 Why dream of a tree, climb a tree in Miller's dream book