DIY iron ashtray. DIY ashtray: a simple master class with step-by-step photos and videos. The easiest way
Option one.
One of the most popular is some kind of empty jar.
Small coffee cans are ideal. You just need to remove the cover.
Step 2
But even this simple device can be conveniently improved.
Most cans are not made of very durable material. Therefore, we take a knife in our hands and make two parallel slots in the edge of the can. It is necessary that the distance between them is approximately equal to the diameter of your cigarette.
It is very simple to calculate it - by holding the cigarette to the can and making marks on the edges of the cigarette.
After that, you need to bend the resulting "cutouts" outward at an angle slightly less than 90 degrees, ie. almost perpendicular to the bank. You will have a convenient holder for a cigarette, which, moreover, will not fall out and not go out as quickly as if it was simply dropped into a jar.
Step 3
Option two.
Plastic bottle. Any volume is suitable.
Cut off the neck in a circle, trying to make even edges.
Further - we make convenient holders according to the same principle as with a can of coffee.
And be sure to pour water into the bottle so that the plastic does not melt.
Step 4
Option three.
Hastily. You can use glasses, cups, mugs.
It may not be very aesthetically pleasing, but the mug will be difficult for you to burn through and easy to clean.
Step 5
Option four.
Empty pack of cigarettes. Sometimes not everyone could guess about such a simple solution.
But in my opinion, it is more convenient to first make the structure more stable, because the pack in its original form is sometimes closed, it can easily fall.
To do this, you just need to gently tear off the lid and insert it into the pack in such a way that there is one slot (rather wide) on the top side.
Step 6
Fifth option.
"Walking". If you need to move (for example, on a walk), and shaking off the ashes on the ground, and even more so, throwing cigarette butts disgusts you, and besides, there are no trash cans nearby.
A simple paper bag can save you. But you need to roll it up from several dense sheets, so that it is not easy to burn them. The edges should be folded several times so that they turn out denser and you can safely extinguish cigarettes on them.
Fighters for the purity of nature will rejoice.
Step 7
If, nevertheless, you find these methods inconvenient, then make it easier - buy several ashtrays and, if necessary, carry them with you.
This will help keep you clean.
If a smoking person lives on the same living space with you, then you know firsthand that there are never too many ashtrays. They can wear out over time, lose attractive appearance, beat, break and crack, and sometimes just disappear. Therefore, it is necessary to have a couple of these accessories in reserve. It is very easy to buy such a thing. Stores abound with this kind of product. But I want the object not only to serve its owner, performing its direct function, but also to evoke pleasant emotions or eloquently testify to the silent feelings. Therefore, it is much more pleasant not to buy a soulless finished product, but to make an ashtray with your own hands.
Ashtrays are made of various shapes and configurations: convex, flat, rectangular, round, square, curly. They can be with a lid so that the smell from cigarette butts does not spread throughout the room, and without it.
The material for the manufacture of this household item can be wood, stone, metal, shells and even dense plastic.

A few DIY ideas
The most common DIY ashtray option is making it from a beer can or drink. Cutting off empty carbonated beverage containers creates a primitive urn for cigarette butts. It takes a little work to make the product more cultured and elegant.
The step-by-step master class shown in the illustration below explains in detail how to get a cute ashtray with sides from an ordinary metal can.

Salted dough is an excellent material for making various crafts from it. It is plastic, it can take any shape when sculpting. After drying in the oven, salted dough products harden and do not change their shape. All these qualities are the best fit for creating an ashtray out of it.

You can fantasize about the shape and size of the dough smoking attribute for an infinitely long time. Experienced craftsmen will cope with the presented copy, while beginners need simpler models.

Correctly kneaded dough is half the success in making crafts from it. There are many recipes on a given topic: based on glue, vegetable oil, baby cream... The best is the classic way, due to which the dough is moderately elastic, plastic, does not crack when dried. The composition of such a mass includes only fine salt "Extra", water and wheat flour.
A more spartan and simpler version of a wood ashtray can be made from four planks. Even a schoolboy can cope with this work.

For this, the workpieces are glued together. Then the product is dried for at least 4 hours. After that, the craft is sanded with sandpaper, tinted with a stain or a special dye, if desired, and covered with a mordant.
As a gift for any event or holiday, decor lovers can decorate an ordinary glass ashtray. Compositions from shells on such an accessory will look not only stylish, but also exquisite. Such a present will take its rightful place in the interior of its owner and will become a real decoration of the room.

Decoupage instructions are given below:
- Degrease the glass surface with an alcohol-containing liquid;
- The selected pattern is glued to the bottom of the ashtray using acrylic varnish. It is better to use a marine theme so that the thing is executed in the same style;
- Further, the ashtray is tinted with white or blue acrylic paint;
- With a glue gun, shells, rhinestones, beads, and other small parts made of polymer clay, prepared in advance, are glued to the prepared surface;
- If necessary, the finished craft is painted in the desired colors.
Professional options
Wooden ashtrays are less durable because of the marks that form in them, moreover, there is always a risk of fire from an unextinguished cigarette. Nevertheless, the smoking accessory carved from wood is in great demand and respect.

It is quite difficult to carve such a model. For work, you will need special sawing and turning machines, as well as specialized tools such as chisels, clamps and files. But this will not frighten true masters, and the final result will delight with its spectacular appearance.

Craftsmen of chasing and artistic forging can create a masterpiece from metal.

With the help of a welding machine, exclusive works of authorship presented in the photo come out from under the golden hands of craftsmen.

Related videos
Even more ideas for inspiration are contained in a selection of videos that reveal the secrets of craftsmen and collect various master classes on making ashtrays with your own hands from glass jars, ceramic tiles, gas cylinders and other materials.
Smoking is one of the harmful habits that creates great inconvenience to others. Discomfort is caused by both harmful tobacco smoke and pollution of the surrounding space by ash and cigarette butts. There are special ashtrays for such consumers of tobacco products. A wide range of them is presented on store shelves. However, some smokers prefer to use artisanal ashtrays. For collecting ashes, empty matchboxes and other jars, as well as more complicated products, will fit. You will find information on how to make an ashtray with your own hands in this article.
The easiest way
Judging by numerous reviews, you can make an ashtray with your own hands from an empty cigarette pack. The master only needs to rid it of the inner foil insert, which will only interfere. It is advisable that the closing part of the pack remains in place. In the future, it can be used to extinguish cigarettes. This is the easiest way and does not require any tools or skills. The process will only take a few minutes.
DIY street ashtray
Before starting work, you should get one tin can, metal scissors, pliers and gloves. Do-it-yourself ashtray is made as follows:
- At the beginning, its upper part is cut off from the can.
- After that, you need to divide the walls of the container into several strips. According to home craftsmen, there should be at least 14 of them.
- Then they should be bent so that they tilt over each other. First, bend one strip and put it to the left, obliquely to the next one. With that, you need to do the same procedure. At the end there will be only one strip. It is simply removed.

Due to the fact that the strips cut from the tin are with very sharp edges, you need to work with them very carefully. Some home craftsmen do not bend the strips, but simply twist them with a match.
Second way
It will not be difficult to make an ashtray from a can with your own hands using paper tape, twine and glue. It will be easier to work if you adhere to the following sequence of actions:
- The top of the can is cut off first.
- Then you need to wrap it with tape.
- After that, an adhesive is applied to the workpiece.
- The product is being wrapped. Twine or rope is suitable as a winding.
Empty beer cans should not be thrown away immediately. You will find a use for them if you smoke and want to make an ashtray with your own hands. A photo of such homemade products is presented in the article.

Coconut handicraft
This method can be used by lovers of exotic fruits. For work, you need exactly the hard part. The shape of the future homemade product will depend on how the nut was opened. After all the coconut flesh has been extracted, a craftsman processes the edges of the nut. It is desirable that they are even and level with each other. After that, you need to make several 10mm indentations for the cigarettes. To do this, a drill is brought to the desired place at the edge, with which a notch is made. The homemade product will have refractory properties if it is coated with a special varnish.

Shell product. What do you need?
Some craftsmen, making ashtrays with their own hands, use the decoupage method. Shells are suitable as decorative elements. Judging by numerous reviews, the best handicraft ashtrays are made from glass. Unlike tin ones, they do not smell so much, and they do not need to be covered with a lid or hidden in a plastic bag. It is enough to shake out and wash the glass ashtray more often. Therefore, a jar or glass is suitable as a basis for a future product. The ashtray will look much more impressive if you decorate it. Therefore, before proceeding with the implementation, the home craftsman needs to get hold of the following tools and consumables:
- Adhesive composition.
- Twine or rope.
- Craquelure substance.
- Natural or artificial shells.
- A sheet with a nautical chart printed on it.
- Paintwork material.
- Tassels.
- Putty.
- Decoupage card.
Progress
To make an ashtray with your own hands, you need to do the following:
- At the very beginning, the glass base is thoroughly cleaned and degreased. At this stage, experts recommend using alcohol.
- After that, the printed nautical chart... This must be done in such a way that its front part is turned down. To remove excess paper, you will have to work with sandpaper.
- Then a craquelure substance must be applied to the surface. With this coating, the artisanal ashtray is given a spectacular antique look.
- After applying this composition, cracks will begin to form on the surface of the product. They will become more visible as they dry. The home craftsman should wait until this substance is completely dry.
- Then the ashtray is carefully putty with a bituminous compound. With it, judging by the numerous reviews, the resulting cracks will visually look much more noticeable and deeper. Despite the fact that the instructions for the craquelure substance indicate that its top layer should be washed off, in this case it is not worth doing this. This recommendation is due to the fact that with yellowness, the ashtray will better match the old style.
- At this stage, the product is primed. Putty is applied to the sides and rolled in shells and sand. Transparent acrylic varnish is evenly applied on top. This is necessary in order to reliably bond the putty and sand to each other. When the varnish dries, the product can be freely picked up without fear that the shells will fall off.
- Large shells are attached with an adhesive. Then they are colored.
- Roll up the twine with a snail and glue to the bottom.

Alcohol will work to remove excess paint. The product must be allowed to dry for several hours.
Finally
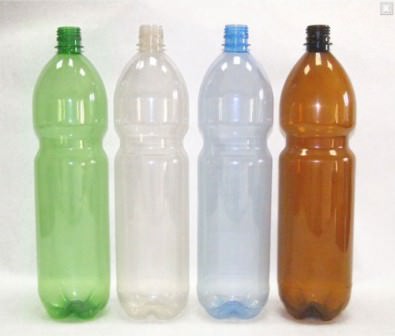
Those who do not like tinkering can be advised to use a simple plastic bottle. To prevent it from melting, a little water should be poured into it.
Greetings to all. Today we will make a men's metal ashtray for a workshop. There is not much work, and in the end we will have an original thing, instead of an old annoying ashtray made of a bent vinyl record.
Required tools and consumables.
1. Welding inverter.
2. Angle grinder.
3. Industrial hair dryer.
4. Gas burner.
5. Sharpening machine.
6. Welding electrodes.
7. Cutting wheels for angle grinders.
8. Black, heat-resistant enamel.
9. Paint imitating bronze.
10. Hammer.
Donors who took part in the creation.
1. Steel pipe with a diameter of 100 mm.
2. Sheet metal, 1 mm thick.
3. Old bicycle chain.
4. Broken, rear bicycle sprocket.
5. Two unnecessary open-end wrenches.
First, measure the height of the bicycle chain and multiply by 3. The resulting size is measured on the pipe and cut off.


We grind irregularities on a sharpening machine.

We mark the pipe diameter on the sheet metal.


Observing the utmost care, we cut out the circle with a grinder.


We clean out burrs and irregularities.

We wrap the bicycle chain around the pipe, measure the size and cut off three sections.


The preparatory part is over, let's move on to welding. We weld the bottom of the future ashtray to the pipe trim.


We clean up the joints.

We grab the chain cuttings to the pipe.

The lower segment can also be grabbed to the bottom, the rest only along the end.


We hide the junction of the chains, grabbing two more pieces across.


For decoration, we weld a bicycle sprocket to the bottom of the ashtray.

Now we need two obsolete wrenches.

We heat one key with a gas burner and bend it slightly with hammer blows.


We weld this key to the ashtray. This part has two functions, to fix the top section of the chain and serve as a cigarette holder.

Weld the second key to the top of the ashtray. It also acts as a chain retainer and serves as a lighter stand.

We get rid of dirt and grease residues by burning the product with a burner.

We paint the product with heat-resistant enamel.

After drying, we warm it up with an industrial hair dryer for baking the enamel.

Finish our ashtray with paint imitating bronze.
Buying a lot of country accessories involves serious waste, but today we are learning to save money and make some of them with our own hands. Garbage cans, trash cans and ashtrays for giving from improvised means - it's not as difficult as it might seem!
Of course, many are already accustomed to using an old bucket instead of an urn, and a small glass jar instead of an ashtray. It is quite real that it is convenient and inexpensive, but only such devices do not have any kind, more precisely, they spoil many of our achievements in design and decoration with their too simple appearance. That is why we decided to find a way to rectify the situation and tried some hand-made on ourselves, thereby learning how to make urns and ashtrays with our own hands for a summer residence. Everything is very simple, and now we will tell you how to do such interesting things on your own without spending a lot of money and time.
Waste bin made of plastic bottles
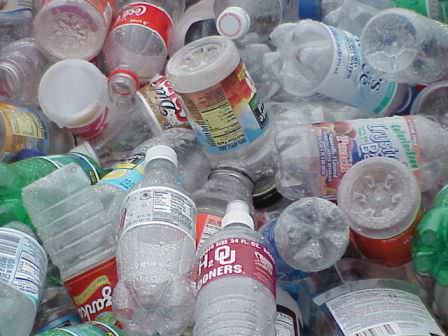
It is possible to make a trash can for use in the country from a variety of scrap materials, but we were most interested in the production of plastic bottles, which can be considered a free building component. That's right, because there are plenty of bottles in every country house, they remain after water and drinks, after big gatherings, and you should not throw them away.
The first thing we need for production - metal carcass, which can be made from wire, aluminum plates and even a metal profile for drywall. By and large, we need only 2-3 identical elements of an oval, round or rectangular shape to build the base, the top of the tank and the middle jumper from them. Having adjusted all sizes and shapes, you can proceed to the next stage.
To do this, we need 2-4 pieces of reinforcement or the previously mentioned profile. These metal elements are necessary to fasten the main parts together and make the racks. You can choose reinforcement and tie it with ovals or circles with wire, or you can bend the U-shaped profile for drywall in one plane, and connect the posts from the profile with the main parts with clamps or even rivets.
When the frame of the homemade trash can is ready, we proceed to the final stage - we build the walls of the tank from plastic bottles.
So, for this we need a steel wire, a nail, an assembly knife, and a pair of pliers. First of all, we measure the pieces of wire along the height of the tank and cut them taking into account the attachment to the upper, middle and lower parts of the structure. The length of each piece should be 20-30 cm more than the height of the future tank.
Next, with pliers we clamp the wire on the bottom of the tank, throwing several turns on the frame, put 1-2 bottles on the wire, making a hole in them with a nail, make several turns of fastening on the middle part of the frame, again a couple of bottles and now fastening to the upper part.
It is highly advisable to think over the size, shape and color of the bottles in advance so that chaos does not turn out. You can define a uniform pattern using bottles of the same displacement and color, or you can transform the craft a little by choosing bright bottles.
Consistent fastening of bottles and a good tension of the wire, tight fit of the bottles to one another vertically and in rows will ensure the high quality of a homemade trash can. Of course, after production, it is worth remembering that it is not designed for heavy waste and burning debris.

These bins can be created with or without a bottom, but today most of these bins and bins are built without a bottom so that they do not have to be turned over during cleaning. It will be enough to just lift them.
Small urn from an old bucket or barrel
Retired tanks for liquid and bulk products should not be immediately assigned to a landfill, because they can also serve well in the perimeter. suburban area... As an example, we would like to cite old buckets and barrels that can be easily converted into waste bins and small trash cans.

Any old bucket that is not too dilapidated, or a barrel that is not rotten, can become a garbage container in the gazebo, near the summer kitchen, and so on. To do this, we do not have to modernize a lot, but only adjust the tank to its size, perhaps patch up the old holes a little, repaint it in a cheerful color and install it where necessary.
Buckets can serve almost immediately, but barrels often need to be trimmed a little because they are too large. After carrying out the simplest reconstruction work, you can upholster the tank with building materials - plastic, wood, thick cardboard, after applying patches of tin or aluminum sheet. That's it, now only painting in the desired color or a bright drawing in the style of the location.

Country ashtrays with their own hands
Ashtrays in the country can be of two types - desktop and floor.
Making a table ashtray
Each craftsman makes table ashtrays in the country in his own way - pours out of plaster, clay and other materials, carves from wood or bamboo, cooks or rivets from metal. We offer the simplest, almost minute version, which is already known to many. This is a beer can ashtray.
To make it, you will need an empty and clean can of beer or soda. Its top should be carefully cut with a knife, then, also neatly, but with scissors, dissolve the jar vertically into a certain number of strips, leaving a little depth in the lower part, only a few centimeters. Now you need to wrap the stripes down, rolling them into a kind of roll, and that's it - the table ashtray is ready.

Floor ashtray making
With a floor ashtray for a summer residence, things are a little more complicated, but not so much. You can use an old milk can for its manufacture or even a piece of a stainless steel ventilation pipe large diameter... With a can, it's a little easier, because you just need to throw a removable fine mesh on it, say, from an old construction sieve, and that's it. Further, only a kind of decor, and the ashtray goes to its workplace... You will have to tinker with the pipe, since it will need to attach the bottom. But here, too, ingenuity comes to the rescue, and we simply put inside an old bucket or its neatly cut bottom, which, resting its edges against the inner circumference of the pipe, becomes the bottom. Now the mesh on the top and decorative embellishments.

When working with metal forms and parts that need to be cut, we recommend that you be extremely careful and take all the necessary safety measures, as unpleasant injuries are possible.
How to make an ashtray for a summer residence with your own hands (video)
As you can see, there is nothing supernatural in the manufacture of such accessories, and therefore, as soon as there is a free minute or an urgent need for an urn, trash can or ashtray in the country, you can immediately start manufacturing and complete the project within an hour or two.