How to fix the built-in oven with your own hands. How to install a built-in oven: with and without a hob
Today in many kitchens you can see the built-in oven. This is really convenient, practical and useful household appliances in any household, which allows you to significantly expand the list of dishes that can be prepared. However, cooking will only be a pleasure and no problems only if the owners have managed to properly connect the oven. And in order to prevent serious mistakes that can not only complicate the operation process, but also cause serious harm to equipment and furniture, you need to know a few nuances.
Types of Ovens
On sale you can see two types of ovens:
- dependent (set only with hobs);
- independent (set separately, as an independent element of technology).
Both the first and second are usually equipped with touch panels and doors, complemented by telescopic opening systems. In this case, the first are connected by electric cables to the hob mounted on top. The controls they allow you to adjust all the equipment - both the cabinet and the hob.
The cabinet itself is best installed under the countertop. The hob will be positioned right above it. This allows you to save usable space and just conveniently divide the entire room into functional zones. It is worth remembering if you do the work yourself, with your own hands, and do not trust it to specialists who will definitely take this into account.
Install the oven in such a way that its upper edge is at the level of the belt or slightly higher. In this case, the greatest comfort is provided during cooking. In addition, it is most convenient to clean the oven from contamination precisely with such contamination.
Proper location is the key to safety
Before installing the oven with your own hands, you need to prepare a place for work in advance. First of all - a niche where it will be installed. It is important to ensure that there is not the slightest distortion. To do this, use the level.
If you allow at least a slight bias, the device may fail after several years of operation - the heat will be distributed incorrectly and unevenly, which will damage the thin electronics.
When the built-in oven is operating, a large amount of heat is generated. Its accumulation can lead to a variety of problems. The product itself may fail due to overheating. Even worse, if a wooden cabinet becomes smoldering and then lights up, it will cause a real fire. Therefore, to install such a technique yourself, you need to carefully calculate each step.
The risk of overheating and fire will be zero if you correctly position the cabinet in a niche before connecting it to the network. Experts set such a distance from its walls to the edges of a niche:
- 40 millimeters from the back wall;
- 50 millimeters from the left and right walls;
- 90 millimeters from the bottom.
At this distance, high-quality ventilation is provided, completely eliminating the risk of overheating of equipment.
Installation progress of the electric oven
Connecting an electric oven is much easier than a gas oven. Therefore, many people decide to do this work on their own, without overpaying to specialists. Yes, there are no hoses through which gas flows, but still you cannot relax, forgetting about the basic rules of electrical safety. After all, one mistake is enough for a short circuit to occur, which may well lead to a fire.
First of all, you need to seriously approach the connection of the cabinet to the network. An electric oven is a very powerful household appliance. Therefore, to connect it, you must use a separate branch of the wire. Moreover, its cross section should be at least 2.5 square. Throughout the wire there should not be twists (even very high quality connected) and any other damage. Otherwise, the risk of a short circuit increases sharply.
A branch designed to provide power to the oven must be equipped with a circuit breaker. The power is calculated for a specific model, depending on the strength of the current consumed during the operation of the oven. In most cases, this number ranges from 16 to 20 amp. In cases where the electric hob is connected with the oven, you should choose a machine, taking into account the total power consumption.
Grounding is an essential attribute of a modern oven. Only it allows you to ensure the complete safety of working with an electric oven. If we are talking about a private house, then there is no problem. In apartments, especially old ones, this is much more difficult - the wiring simply does not provide grounding. It is better to entrust this work to specialists. If you decide to connect the oven with your own hands, you need to stretch an additional wire from the kitchen to the common panel on the landing and connect it to a suitable metal object.
Only if all work has been done correctly and accurately can the safe operation of the new oven be guaranteed.
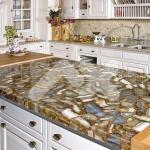
For many people, the understanding of modern kitchen is somewhat limited - in their heads they draw beautiful furniture, multi-level dropped ceilings, expensive wall and floor decoration, but do not want to notice that all this is secondary. First of all, a modern kitchen is a convenient and functional room in which household appliances play a significant role. About her, or rather about one of its varieties, will be discussed in this article. Together with the site okuhne.net, we will consider the question of how to choose an oven - we will study the varieties of this technique, its capabilities and functionality.
How to choose an oven photo
How to choose an oven: two types of energy
Probably, I will not reveal to anyone a big secret if I say that all modern ovens are divided into two types - gas and electric. This is the very first moment that you need to pay attention to, wondering which oven to choose? If you think that the choice between this or that device is quite simple and is made upon the presence of gas in the house or apartment, then at least you are mistaken. Here, everything is somewhat more complicated - even if there is gas in the house, people prefer to choose electric ovens. Why it happens? But with this we will try to figure it out, having studied in detail the advantages and disadvantages of gas and electric ovens.

This is the case with gas and electric ovens - for this reason, most modern kitchens equipped with gas welding surface and electric oven. This combination is optimal. You can verify this by watching the short video attached below on the topic of how to choose an oven?
Types of ovens: functionality of electric ovens
If the functionality is limited in gas ovens, then in electric ovens it can be said to be unlimited. If in the first units the timer, gas control and a rotating spit are considered to be the top of perfection, then in the second machines the matter is not limited to such additions. You need to deal with them in detail, since what you can cook in an electric oven depends on them. Let's start in order - with security features.
- Double pane windows on the door. This nuance will not allow you or your little children to get burned on the door. In principle, this point is almost always taken into account by manufacturers, but there are exceptions, especially when it comes to cheap household appliances.
- Forced cooling of the walls of the oven. This function has a dual purpose - it is designed to take care not only of human safety, but also of the safety of the furniture in which it is built.
- Blocking from accidental inclusion. This is a very important moment for families in which a young curious and ubiquitous generation is growing up.
- Retractable trolley. This is primarily convenience and safety - this function allows you to easily pull out the same baking sheet or wire rack with a slight movement of the hand and not even burn yourself a bit.
- Skewer. Allows you to cook kebab or just fish and meat with uniform frying over the entire surface of the food.
- Grill. In fact, this is one and the same, only it is intended more for chicken (for the preparation of large pieces of meat).
- Convection. It is she who is responsible for the uniform temperature at any point in the oven. When wondering how to choose a built-in oven, it should be understood that this function is mandatory - without it, there can be no question of high-quality cooking.
- Temperature probe. This feature is not even inherent in all expensive models. In fact, it is a temperature sensor that is introduced directly into the cooked product. The function will be useful in the process of preparing complex dishes.
- Microwave function What is a microwave, modern people can not tell.
- Programmable functionality. It contains the beauty of electric ovens. It is at the moment that you need to pay special attention to the process of resolving the issue, how to choose the right oven In this regard, electrical engineering is very diverse - modern ovens can not only pinpoint cooking time, but also many other useful things. They are able to defrost, dry foods, cook specific culinary masterpieces and completely exclude human intervention in the cooking process. As they say, they downloaded the products and forgot about them until they are completely cooked.

In general, draw conclusions and decide which of the above is more important to you. Naturally, it would be nice to get an oven that can do everything, but you should understand that its cost will be very high - that’s why you need to choose the best option that will fully satisfy your needs.
Oven selection: available sizes
Whatever one may say, the dimensions of the acquired built-in appliances are of great importance - the convenience of operating the kitchen, and many other nuances, depend on them. Therefore, if you want it or not, you will have to pay a little attention to this moment. Everything is quite simple here, since there are certain standards. The depth of almost all ovens built into furniture is a constant - it is 570 mm from edge to edge. The width can be different - there are 600mm, 700mm ovens, and a similar technique with a width of 900 and 1200mm is also considered standard. The height of this household appliance is also constant and equals 594mm.
There is one caveat - all of the listed sizes are not installation. To install the oven, a smaller niche is made, since the built-in part of the oven has smaller dimensions. Under a standard oven with a width of 600 mm, you need a cabinet with a width from the outer edge to the edge, equal to 600 mm, the height of the niche in the cabinet should be 591 mm, and the depth should be 600 mm.
![]()
How to choose electric ovens a photo
In general, that's all, and it remains to add quite a bit - about such moments as the inner coating of the oven, which affects the way the oven is cleaned. Surely you've heard about a system such as self-cleaning surfaces - this is undoubtedly the best option, but there are others besides it. And to understand it in the literal sense of the word is not worth it - in any case, you will have to wash the inside of the oven. Another thing is how this will be done - easy and difficult. There are two options here: the inside of the oven can be coated with easy-clean enamel or equipped with a pyrolytic system, which is referred to as self-cleaning. In fact, all the grease and dirt burns out under the influence of temperature, and a person can only brush away the coals with a rag.
And so it is with the question of how to choose an oven? Now it's up to you, or rather, your right decision — all you have to do is weigh the pros and cons, figure out which of the functions are more important to you and decide on the size. The last moment is better to clarify at the stage of manufacturing a furniture set.
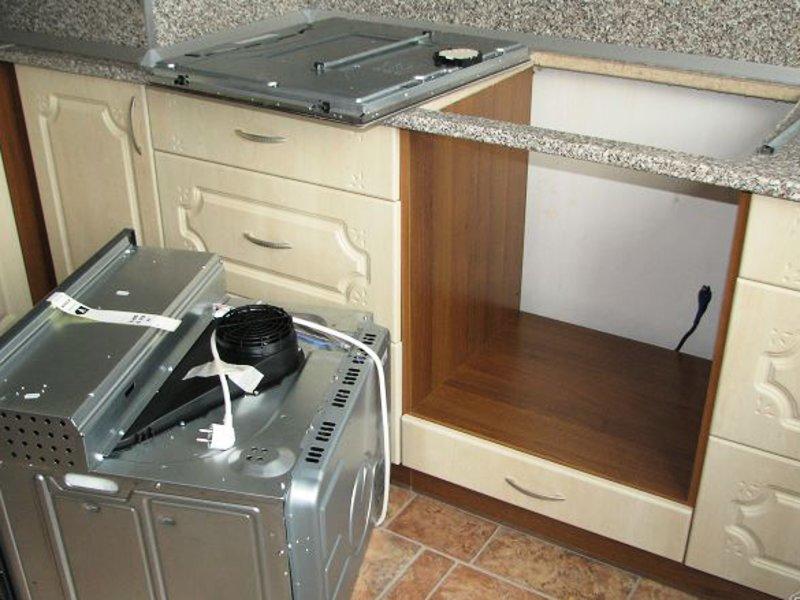
Traditionally built-in appliances are assembled by furniture makers who assemble the entire kitchen set. But there are situations when the installation of the oven has to be done in already installed furniture. As a rule, most people resort to the services of masters, and only some of them are interested in how to do it yourself? This is exactly what the conversation will be about in this article, in which, together with the okuhne.net website, we will clarify the situation with the question of how to install and connect the oven? We will consider the installation of a gas and electric oven separately with all their intricacies and nuances.

DIY oven installation photo
Connecting the oven: the general principle of self-assembly
Do not believe it, but any oven (both gas and electric) is installed very, very simply - if the dimensions of the mounting niche were exactly observed during the manufacturing of furniture, then this process will not take half an hour. At least from a professional. If we talk about a man who had never before been engaged in such work, then for sure he will need a little more time. To make sure of this is quite simple by watching the video below, which demonstrates how to install an electric oven.
Have you looked? Now we will deal with this issue in more detail. In principle, you can add a little to the video material - in particular, you can only comment on the moment with the ventilation gap. If the installation of the built-in oven is carried out in the lower cabinet (traditionally under the hob), then there can be no question of any gap here - there simply is no place for it. All ventilation and blowing the walls of the oven is carried out through a gap on the back of the furniture. In addition, if we are talking about an oven with forced blowing of the walls, then for them this nuance is not important at all.

Connect oven photo
Otherwise, everything is done in the same way as on the video - the oven is simply inserted into a niche, and so that it does not fidget inside, it is fastened with four small screws. Everything is elementary simple, unless, of course, we take into account the process of connecting the oven to the gas pipeline or the electric network of a house or apartment, which precedes all this.
Do-it-yourself oven installation: the intricacies of connecting a gas oven
Most people, when connecting an oven of this type, frighten off the need to connect it to the gas pipeline - it is already an opinion that all the work related to this energy source should be performed by the corresponding services.
The situation with the question of how to connect the gas oven is somewhat different - it should be understood that everything that is after the shut-off valve is not within the jurisdiction of the gas services. And this means that you can connect gas consumers yourself.
But you should not relax - if something is done wrong, you will be fined and forced to redo everything. It is this moment that scares people away.
In fact, everything is quite simple, and you can not even touch the gas shutoff tap - disconnect the gas stove or hob from it and screw a good and high-quality tee straight onto the tap's outer pipe. Screw it with tow - the thread itself, and then the tow should be well lubricated with paint and only then screw and tighten the tee tightly. After this, the two branches of the tee are equipped with taps (the gas taps have yellow handles, and this must be remembered) - they are installed in the same way as the tee. After installation, all joints must be checked for leaks - open the central tap (the one that is located to the tee) and grease all joints with soapy water. In the event of a gas leak, bubbles will go, and this means that everything needs to be redone.

Connecting a gas oven photo
And if there are no bubbles, then you can safely move on and proceed to a direct solution to the question of how to connect the oven? The cabinet and the crane intended for it are connected by a flexible eyeliner - if you want to get a durable and high-quality connection, it is better to use a corrugated metal hose. A gasket pre-lubricated with solid oil is inserted in the union nut - after that the nut is screwed on and tightened with a key with force. Do not overdo it, otherwise the nut may burst!
In principle, everything, after the connection of the hose is finished and the hose is checked for leaks with soapy water, the oven can be installed in a niche and checked for operability. Yes, and do not forget that most gas ovens require an electrical connection - this is the backlight, and features such as gas control, and much more.
Directly behind the oven, it is better not to install the outlet - at least it needs to be taken out into an adjacent cabinet (for example, under a sink).
How to connect the built-in oven: features of installing an electric oven
With the installation of an electric oven, things are a little easier - there are no gas hoses, and there is practically nothing to fear. But this does not mean that you can relax and not follow the rules of electrical safety. Here, it’s just the opposite, and an incorrectly connected electric oven can cause a host of problems, the most serious of which is a short circuit and, as a result, a fire. Be sure to do everything right - in particular, follow a few simple rules.

And in everything else, installing and connecting an electric oven is no different from installing a gas oven. The only thing that needs to be done here is to equip the oven wire with a plug - everything is very simple here. The cable has three conductors, one of which is grounding - usually a yellow or green wire. They must be connected to the ground terminal. The remaining two wires are screwed to the two other terminals of the plug - which one and where it makes no difference. The contacts must be crimped tight so that they do not heat up and the insulation of the wires does not melt - this, again, can lead to a short circuit.
And the final step in installing any oven is to check its performance and the first idle start. Just turn on the oven according to the instructions, first check the display, then heat, and when you are sure that all the heating elements or burners are working, we start it at full power. On the thermometer we set the temperature to 150 degrees and burn out the factory grease inside the oven. Perhaps, or rather, surely, smoke will pour out of it. There is no need to be afraid, for this there is the concept of the first start-up - after the smoke stops flowing, the oven can be fully used.

How to connect the built-in photo oven
In principle, that's all. Now it's up to you. The only thing I’ll say more is that if you are not confident in your abilities, then it’s better not to undertake this work. Otherwise, everything is quite simple, and, by and large, there is nothing to be afraid of - especially if you at the stage of repair took care of laying a separate branch of an electric cable.
Today, manufacturers can offer a huge selection of gas and electric built-in ovens. In order to know what to choose, you need to understand the assortment.
How to install a do-it-yourself oven
For those who do not like to overpay to masters for installation and want to integrate the oven on their own, you must first understand the phased connection technology. In the kitchen in the niche intended for the oven, you should leave a small gap of a few millimeters between the walls and household appliances. This is necessary so that an air gap and a place for ventilation are formed. To connect the appliance, the outlet according to the standard must be 10 cm from the floor, and also not located opposite the rear side, as it can interfere with the installation of the oven in depth and also cause an electrical short circuit. In no case can you cut the wire if it has a non-separable outlet, because due to such a trifle, in the event of a breakdown, warranty service will be refused. After all the recommendations are completed, you can proceed to the installation itself:
1. If the panel for connecting the cable is brought out, then most often it needs to be disassembled and a longer cord connected to it. In the event that the plug is collapsible, it can simply be removed and, using the terminal, add the missing wire to it. It should be 3-core with a 4 mm cross section.
2. The oven is mounted on at least 16 amp plugs. All connections are made with the obligatory use of grounding.
3.. For fastening, screws are selected that are screwed on the front side, most often there are 4 of them, and they must be located in the end parts on the side walls of the niche into which the installation will be carried out.
4. After everything is mounted, you need to align the gaps that could remain, since the dimensions of the built-in oven are very different, despite the fact that manufacturers make them most often standard. Next, fixing screws are fixed, and the process successfully completes.
Where is better to install an oven

Depending on where the equipment of this type is located, it is divided into the following types:
The dependent built-in oven and hob have a common control circuit, so the oven should only be mounted together;
Independent ovens can be mounted below the surface, in a drywall wall, above the top drawer, or on a countertop.In order to decide where to install the device, listen to yourself and think about where it will be easiest to get to the baking sheets, so that there is no need to bend too much, and you also do not have to keep your hands on weight.
Regardless of the location, the most important is the correct installation, that is, without distortions, since otherwise additional vibration will be created, which will affect the quality of cooking.
Types of built-in ovens

If you can choose a combination of electric and gas burners when purchasing a built-in hob, then the oven does not have such a variety. It is worth noting the prevailing trend that today a gas built-in oven is less popular than an electric one. The main reason for this is the extensive functions and operating comfort of the latter. It is important to know that gas ovens are less environmentally friendly than electric ovens, but the latter have increased electricity consumption. The power of such devices varies from 2 to 4 kW. For those who give their preference to blue fuel, it is imperative to take care of the presence of a quality hood. However, a gas built-in oven will be a profitable and indispensable option for those who:
The house has very weak wiring, and the use of such a solution is not possible for safety;
Remained a habit of using gas;
For economical people (after all, an electric device will cost more both when buying and in operation).
Oven Modes

Depending on the model, type and manufacturer of the oven, a set of cooking modes and functions is determined. The cost of the product depends entirely on the capabilities that it can offer. The simplest stoves have a lower and upper heating, grill. The most common modes are accelerated defrosting and heating. Multifunctional devices boast the presence of 12 or more useful modes.
Recently, such a necessary setting as "3D hot air", which, in particular, has a Hansa built-in oven, is increasingly found. This function allows you to bake on several levels at once.
The presence of a variety of cooking modes boasts multi-functional ovens. Thanks to them, you should not worry about the cooking time and the choice of temperature. In addition to the standard list of functions, the modes can provide raising the dough, pasteurization, cooking yogurt, etc. Leading manufacturers today include in their products and functions a double boiler or microwave. The combination of grill with quick cooking, as well as various types of steam and heating, will help to make a crispy dish and preserve all the useful vitamins and valuable properties of food.
Key Features and Security

Those who plan to purchase and build an oven in kitchen furniture, you need to know what the basic functions of the device may be present in it:
Retractable trolley. Most housewives will be glad to have this option, as you can look into the pan and check how ready the chicken is, eliminating the risk of getting burned. To do this, you only need to move the trolley to you, which will be much more convenient than climbing inside the oven.
Cold Oven Door. For the manufacture of this part of the furnace, production technology from special materials is used, which prevents it from heating up during cooking. Thanks to this, you can save a little on electricity. This feature is very relevant for those who have small children, since there is no longer any need to worry about their safety.
Timer. This is a real miracle for forgetful and busy housewives. This option is also very useful during a festive feast, when you need to do many things at the same time. For cooking, you need to set the timer for a certain time, for example, the Ariston built-in oven, equipped with this function, will do the work itself. Also, in some models there is also an alarm clock, which gives an audible signal, thereby notifying that it is time to start cooking.
Skewer. This is a fixture designed for cooking chicken or kebabs. It can be found in many models, for example, the Bosch oven is equipped with it. Built-in appliances are more popular due to the presence of such an addition.
Grill. This is an additional program with which you can cook with a crispy and tasty crust. Most often, in the oven it looks like a spiral, which works for a short period of time. Food made using this mode is much tastier and more aromatic.
Thermal probe or thermal probe. This is a safe needle that is connected to the control center of the oven. With this function, you can constantly monitor the temperature when cooking meat. The oven displays all cooking information. Using this program, you can cook the perfect meat or heat it to the required temperature.
Auto ignition. This function remains relevant only for gas ovens. With the help of the device, a fire is ignited automatically and without matches.
Grease filter. Such a device is installed on the back of the oven. This appliance absorbs grease and all odors and also helps protect the fan from unwanted contaminants that can cause breakdowns.
Convection. Every housewife dreams that her pastries would be the most delicious and evenly baked. The leader in introducing such a program is the Gorenje brand. The built-in oven uses a fan to evenly distribute heat throughout the volume thanks to proper air circulation.
Types of Door Opening

An important point for those who want to build in an oven is the type of door opening. The following options are possible here:
Hinged door. This is one of the most common types where the use of telescopic rails greatly facilitates the loading and unloading of dishes.
Swing. In this case, the door will open 180 degrees to the left and right. Before installation, it is necessary to provide for the placement of the oven in the layout of the kitchen.
Retractable trolley. This type is present in the lineup. famous manufacturers. Despite the dimensions and dimensions of the built-in oven, all fasteners are installed directly to the door and leave with it after opening. It is very easy to remove cooked dishes from it; the process of cleaning the oven is also simplified due to easy access to it. There is only one minus: if the door is often opened during cooking, the heating temperature is quickly lost.
How does the oven control
With gas heating, only mechanical control can be distinguished, and with electric, there are such options as: a touch menu, electronic with a display and electromechanical with rotary knobs. Thanks to the use of modern electronics, the temperature is precisely set, the required heating mode is selected, and there is also the opportunity to observe the cooking. For example, all this can be the oven "Ariston". Built-in appliances with an improved set of options are provided for comfortable use by its owners. Even the rotation knobs are hidden in the display, that is, after all modes are selected, they are hidden inside the device used. Most often, this part plays an important role in the formation of the design, since it can be processed antique or in a different style.
Why take standards into account?
In order to properly and correctly integrate the oven, it is necessary to place it in a niche so that even the slightest gaps are invisible in the furniture, and at the same time, the functions of the appliance are easily accessible and correctly configured. The exact dimensions of any equipment are indicated in the documentation attached to the product. Most often, manufacturers produce European standard furnaces, and the Bosch oven can also be attributed to them. The built-in appliances of this company have long won leadership positions in the consumer market.
Almost all gas and electric stoves are designed to use a niche of 60 cm, since this is the generally accepted depth of the lower kitchen tables. The width of such devices can be very diverse depending on the usable volume that can be allocated for it. Of course, there are other options. The height of the purchased devices also varies, this must be taken into account when designing a kitchen. The biggest advantage of standard options is the trouble-free replacement of the old oven with a new, more modern one. To do this, you do not need to carry out a radical redevelopment of kitchen furniture.
Oven cleaning options

There are four types of oven cleaning: light, pyrolytic, catalytic, hydrolysis. The most common option is the first type. In this case, the surface inside the oven is smooth, due to which it is easy to clean from various impurities. For the rear and side walls, a catalytic coating is mainly used. Thanks to the use of special enamel, it is much easier for the user to wash the dirt, and in it, under the influence of temperature, the fat begins to break down independently. The most expensive system is pyrolytic, because when using this mode, the temperature rises to 500 degrees and the accumulated garbage with dirt is literally burned. The hostess can only remove the ash that appears after the end of the procedure. The hydrolysis mode is also very often used, it provides for cleaning with water vapor and a small amount of special detergent. The prepared liquid is poured into the pan, after which a special program is activated. At the end of the procedure, the sash opens, the built-in oven is wiped with a porous sponge. Reviews about cleaning systems are very diverse. There are both positive and negative comments. As a result, everyone chooses for himself that model and cleaning system that is more suitable for him.
Oven prices
It's no secret that everyone provides comfort in their home, resorting to a variety of modern means. The use of such a device as a built-in oven is not an exception. Prices for such products can vary in a fairly wide range. For example, the simplest devices can be purchased for 20,000 rubles. Options with a large number of functions will cost customers in the amount of 21,000 rubles. up to 50,000 rubles., and if you want exclusivity and novelty, you will have to pay several times more. Manufacturers are constantly releasing new models, both expensive and cheap, and include new features.
The price of an oven depends entirely on the range of programs that are included in it, as well as on the size and cleaning system. If you are an experienced cook, then, of course, desires and needs may not be limited to a standard set. For the average user, a stove with simple functions is suitable.
For modern kitchens, separate cooking systems are characteristic, that is, a hob and an oven separated in space. The reason for this is the fact that people who cook well prefer an electric oven and gas hob. Installation of an electric oven requires certain knowledge and skills. This article will help you figure out how to install a built-in electric oven.
Overview of ovens from renowned manufacturers
Ovens from well-known brands are by no means cheap, but they differ in excellent quality and excellent performance characteristics:
- Bosch - ovens of the highest quality, equipped with an environmental cleaning system. The temperature range is from 30 to 300 degrees. They are distinguished by a stylish design, ease of management and operation.
- Samsung - convenient ergonomic models with a convenient change of mode and economical energy consumption.
- Electrolux - ovens with built-in electronic timers and temperature sensors. Management - touch. Beautiful thoughtful design, a wide selection of colors.
- Gorenje - units are equipped with a steam cleaning system. They are distinguished by a stylish design, multifunctionality, a large number of heating modes.
Installation of the integrated oven
If you drive into a new apartment, best option there will be a purchase of a kitchen furniture set with a hob and oven already installed. Installation of the kit should be entrusted to professionals. If you decide to independently install a built-in electric oven, you must follow certain rules.
First of all, you need to know that ovens are divided into two categories:
- Independent.
- Addicted.
What to consider in the model of each of these types in order to correctly install the built-in electric oven:
- Independent ovens can be placed anywhere you choose. It is a fully autonomous construction.
- Dependent ovens are connected to the hob. Such devices are sold as a set, with the hob mounted on top and the oven below. This does not suit everyone, so autonomous ovens are becoming more popular.
Important! Before installing the electric oven, you need to prepare a niche for installation. In the process, it is necessary to control using the building level so that there are no distortions. Distortions are unacceptable, since this threatens an uneven distribution of heat and the failure of the oven.
How to install the oven yourself?
Since the oven during operation emits a large amount of heat from the surfaces, ventilation gaps must be provided between the walls of the cabinet and the niche:
- The distance between the floor of the niche and the bottom of the electric oven is 8.5-9.5 cm.
- The distance between the side walls of the niche and the oven should be at least 0.5 cm on each side.
- The minimum width of the ventilation gap between the rear walls of the niche and the oven is 4.0 cm.
Connection Order
So, the oven is installed. Now you can think about how to connect the oven. Since the oven consumes a lot of power, the most crucial moment is the laying of a three-core copper wire from the power shield to the electric oven outlet.
Important! This must be done if the house is old and the internal wiring is made of aluminum wire.
 What rules to follow here:
- With an oven power of 3-3.5 kW, the current consumption will be no less than 16 A. In the power panel, it is necessary to put a separate machine for 25 A. It works only to turn on the oven. The wire is laid in the cable channel. Type of wire - VVG-3X2.5.
- When the power of the built-in oven is greater than 3.5 kW, the current consumption will be about 32 A. An automatic machine designed for 40A will be needed using the VVG-3X4.0 wire.
Important! All electrical work is permissible only when the mains voltage is disconnected.
Additional rules and requirements:
- Install a three-pin socket on a 3-wire cable, stretched to the kitchen. The socket has 3 terminals: zero, phase and ground.
- If a two-wire circuit is used for wiring (there is no “ground”), it is necessary to invite a specialist to conduct “ground” on your shield.
- The electric oven, depending on the specific model, may have a 3-pin connector for connecting a power cable or a terminal block equipped with screws. The screws are labeled with zero, phase, and earth, but this work must be done with the utmost care.
Installation of residual current device (RCD).
Before you turn on the cable, you must make sure that it is able to withstand the current load. So, the connection power of the oven - what is it? Power parameters determine the speed and efficiency of heating, as well as the amount of energy consumed. But this factor will affect the features of the connection:
- With an oven power of 3.5 kW, a three-core copper cable with a cross section of 2.5 square millimeters is used.
- For electric ovens with a capacity of more than 3.5 kW, a conductor of 4 square millimeters is used.
Important! Electricity connection on the distribution panel is possible only after checking the correct installation and connection of the oven.
Features of connecting a gas oven
The procedure for arranging a niche is the same as in the case of electric oven:
- The size of the gaps in the standard is the same.
- The oven is connected to the gas line via a flexible hose.
- The most difficult moment is to ensure complete tightness of the joints.
- The oven must be connected to the mains via a separate faucet.
Important! If connecting electrical equipment is accessible to almost everyone, then gas masters can connect gas equipment.
As you can see, the oven is difficult to install. However, if you are not confident in your abilities, it is better not to undertake this work, but to contact a specialized company.
An oven is, one might say, the most irreplaceable thing in a house, in particular in a kitchen. With the help of this device we cook tasty, tasty, and most importantly healthy and varied food. However, in order to choose the right unit that will delight you with delicious food and be a real helper in the house, you need to know not only the features of the device, but also how to install it correctly in the kitchen.
How to install an electric built-in oven: principle and layout of the appliance
Connecting the oven should always begin with preparing a niche for the location of the device. Carefully, using the level, make sure that there are no irregularities or distortions in place. If this rule is not observed, the device will probably quickly break down due to the fact that the heat is distributed incorrectly.
The functioning of the oven is due to the release of heat. Therefore, a certain distance must be left between its walls and a niche. This method will help you to protect the product from failure.

How to properly integrate the cabinet:
- The boundary parameters from the back wall to the niche should be at least 4 cm;
- The right and left walls of the niche should be at least 5 cm behind;
- Between the bottom of the cabinet and the bottom surface, the correct distance will be from 9 cm.
After you have determined the correct location of the oven, it must also be correctly connected. If the house was built a long time ago, and you know that aluminum wiring is laid in it, then it is better to remove and replace it with a copper one, which is better, more durable, and durable. If such drastic actions aren’t on your plan now, you can at least lay a copper line from the shield to the connection point of your oven.
Connecting the oven to the mains: features and differences of the installation
By the method of installation, it is possible to distinguish the built-in and freestanding ovens. The installation of the device belonging to the first type is carried out in kitchen set, while their autonomous "brothers" are installed separately from other furniture.
Ovens are electric and gas. Depending on the type that you choose, the method of connecting the device to electricity or gas will come out.
If you can choose any combination of types of electric and gas stoves when buying a built-in hob, then the oven does not have such a rule. In addition, it is worth noting the established trend - for today, gas built-in ovens are less popular than electric ones. Many explain this by the fact that an electric oven is a more convenient option, moreover, they are more economical, and their integration is easier.
However, the following nuances should be considered:
- If the house has very unreliable wiring, then it is better to refuse such a decision;
- In the case when you are more accustomed to using gas, it will be more difficult for you to switch to the electric view of the oven;
- The cost of electric ovens exceeds the price of gas.
In order to make a choice correctly, first of all, it is necessary to understand the principle of operation of both types of cabinet.
Do-it-yourself oven installation: how to connect the appliance
For those who do not like to overpay for installation masters, and want to learn how to build in an oven on their own, you need to first understand the phased connection. In the kitchen, where the niche is intended for the oven, a small distance should be left a few millimeters from the wall. This forms the air gap, which is necessary for ventilation.
To connect an electric device, the outlet must be 10 cm from the floor. In addition, it cannot be positioned against the back side to prevent the installation of the oven in depth. Never cut the wire if it has a molten outlet. Such a trifle will serve as a refusal of warranty service.

Another particularly important point that you should consider before buying and installing an oven is the right choice from a huge assortment of devices sold in stores that will fully meet the requirements of the hostess in your kitchen.
Some tips for installing an electric oven:
- If the panel into which you plan to connect the cable is displayed outside, then it is better to disassemble it and connect a genuine cord to it;
- If the plug is collapsible, remove it altogether and use the terminal;
- The device must be fixed with screws that are screwed from the front in the amount of 4 pieces. They must be located on the end of the niche into which you will install.
After installation, you need to align all the remaining gaps, complete the mounting screws of the mounting screws, and this completes the installation. Be careful in the area of \u200b\u200bthermal film, it can never be damaged.
DIY oven: how to install
Electric ovens are a very practical thing today. Especially if they are installed correctly. Not the last place is the location in height. Do not forget about it. The housewife should be comfortable using the appliance, nothing should interfere with putting and pulling out baking sheets. In addition, the safe handling of the oven, which must be carefully fixed, also depends on the correct location.
Do not forget the future cleaning of the unit. For proper maintenance of the furnace, you must also choose the right location. But do not install the cabinet near the table. It will be hot from him.

How to mount a gas oven:
- Gas models are connected to a common gas line using a special flexible hose.
- If you connect the hob to the gas pipe at the same time, then you will need two connection branches.
- Starting installation, it is necessary to put a special dielectric gasket behind the tap.
- The connecting hose must be no longer than 2 m and without extensions.
After the panel and oven are installed, you need to adjust the operation of the device: set the minimum fire, thermocouple and other sensors.
How to install the oven yourself (video)
Perhaps one of the best ideas that once occurred to manufacturers of household appliances is the creation and production of electric ovens. They are useful, convenient, and do not spoil, but decorate the interior of the kitchen. And we can’t even talk about similar products from Bosch and Ikea. This helpers will do half the work of preparing delicious food for you.
Attention, only TODAY!